Handleiding
Je bekijkt pagina 35 van 52
35
Installing the hob
CAUTION:
Place the hob with the glass side down on a soft,
scratch-resistant surface to avoid damage to the
glass surface.
• Inspect the factory-installed gasket around the
hob frame for proper placement and integrity.
A damaged or misplaced gasket can lead to mois-
ture ingress later.
• Attach the supplied mounting clips with the appro-
priate screws to the designated holes on the sides
of the hob frame. Tighten the screws only by hand
- do not overtighten.
• Carefully feed the connection cable through the
worktop opening before placing the hob. Ensure
the cable is not pinched or excessively bent.
• Position the hob centrally and evenly in the pre-
pared opening in the worktop. It should lie flat and
not wobble.
• Check that the hob has an even gap on all four
sides relative to the cut edges of the worktop and
that the gasket is securely and evenly seated.
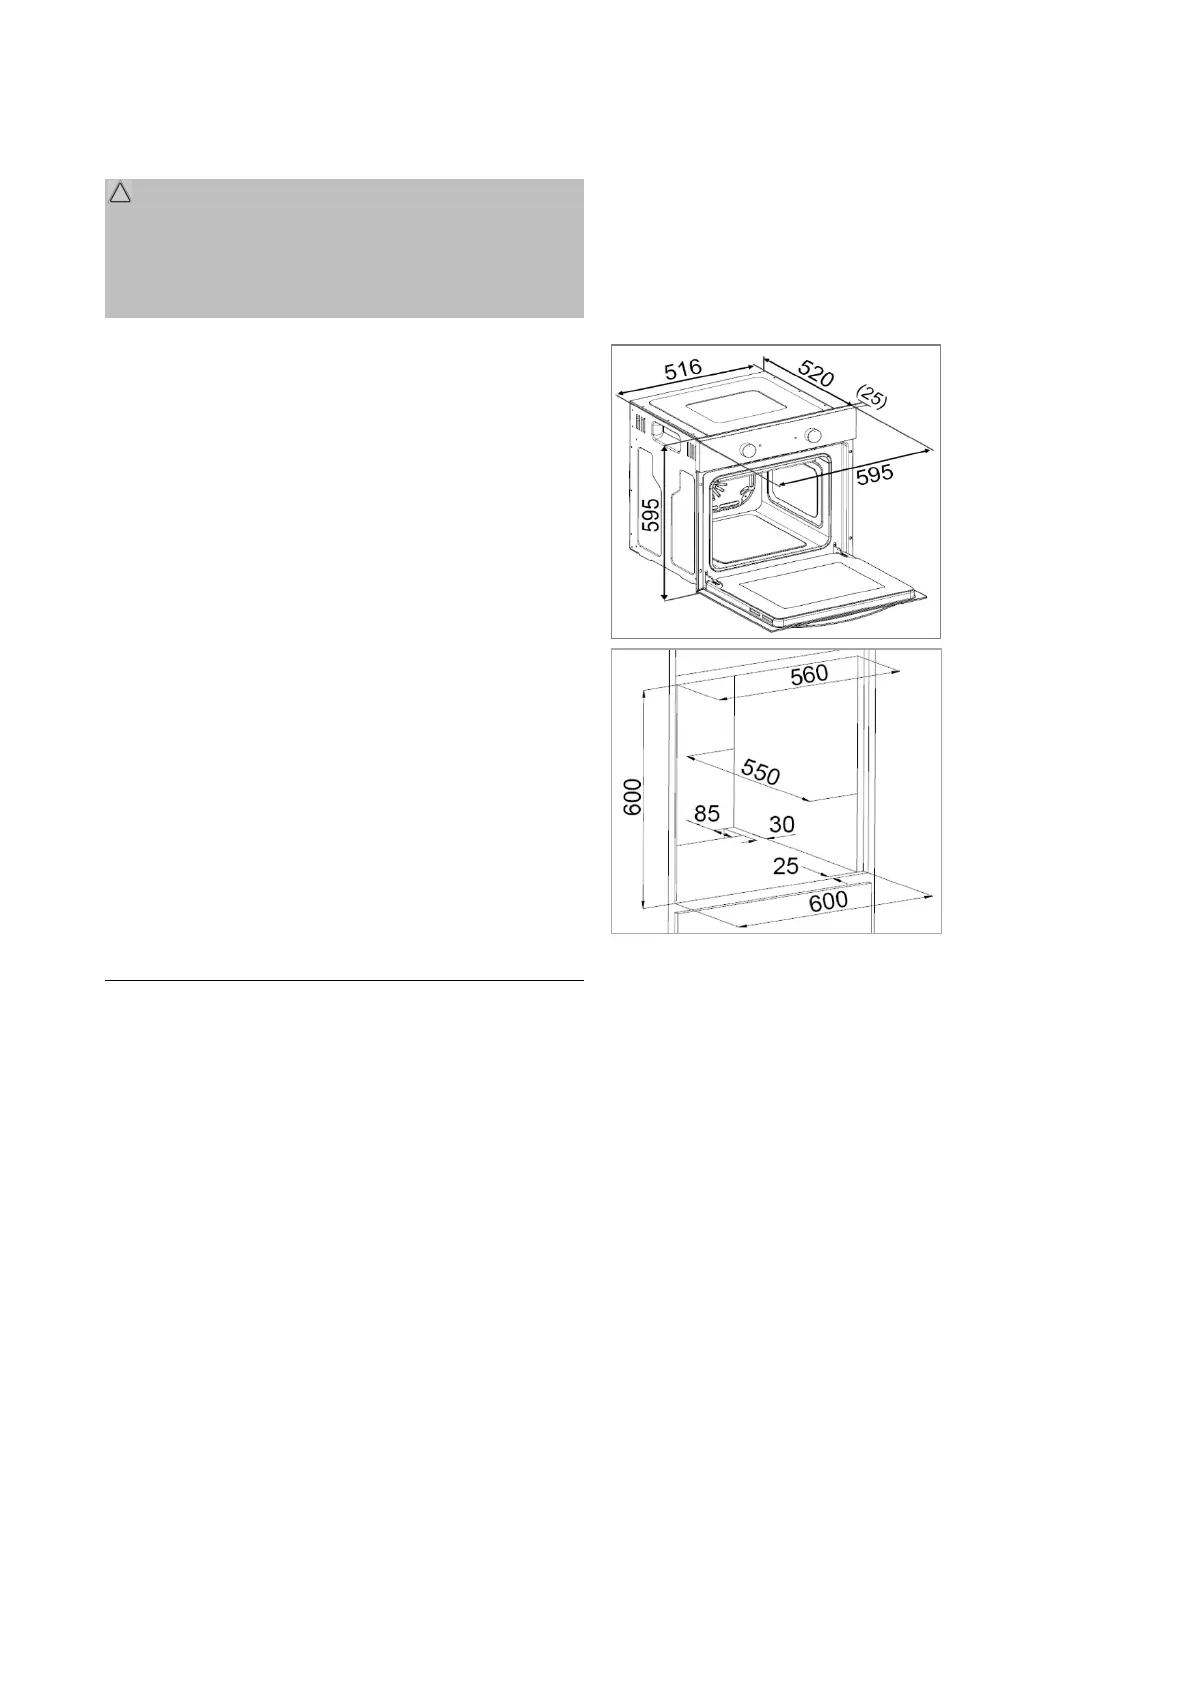
Installation of the oven
The oven measures 595 mm × 595 mm × 520 mm
(incl. 25 mm control panel). It is integrated into the
cabinet beneath the hob and securely fastened in
place.
Requirements for the cabinet
• The cabinet must comply with the dimensions pro-
vided in the drawing and include the necessary
ventilation openings. It must also be level, stable,
and horizontal to securely support the weight of
the oven.
•
The cabinet walls should have a minimum material
thickness of 16 mm to ensure adequate stability.
• A moisture seal is required on the wall side, and
the cut edges must be sealed with special paint,
silicone rubber, or casting resin to prevent dam-
age from moisture or steam.
Oven dimensions and cabinet cutout
Prepare the opening in the cabinet according to the
millimeter specifications provided in the drawing.
Installing the oven
• Carefully guide the connection cable through the
designated opening and insert the oven only par-
tially into the prepared cabinet opening.
• Connect the oven to the electrical supply accord-
ing to the instructions provided in the
"Electrical
connection"
section.
• Slide the oven fully into the cabinet opening, en-
suring that the connection cable is not pinched,
bent, or twisted.
• Secure the oven in place by fastening it with the
provided screws to the designated mounting
points in the cabinet, ensuring the oven is firmly
and securely installed.
Bekijk gratis de handleiding van Bomann EHBC 7938, stel vragen en lees de antwoorden op veelvoorkomende problemen, of gebruik onze assistent om sneller informatie in de handleiding te vinden of uitleg te krijgen over specifieke functies.
Productinformatie
| Merk | Bomann |
| Model | EHBC 7938 |
| Categorie | Fornuis |
| Taal | Nederlands |
| Grootte | 6096 MB |