Bertazzoni HER95I2EAVT handleiding
Handleiding
Je bekijkt pagina 33 van 40
33
CLEANING YOUR COOKER
A false reading of the temperature may be caused by heavy food soiling, residual oven cleaner on the
thermostat and/or the roof elements, or a dislodged thermostat phial. Cleaning should be carried out
regularly and with care. Always disconnect the electricity supply to the appliance before any cleaning takes
place. Never allow fat or oil to build up on any surface, particularly on oven bases and oven trays, as this can
lead to permanent staining or the risk of fat fires.
Cleaning your gas hob Stainless steel hob
- Do not use any abrasive cleaners on the stainless steel hotplate.
- Wipe with a soft cloth using warm water and washing-up liquid. Whilst still damp
polish dry with an microfibre cloth.
- For stubborn cooked-on stains use a non-abrasive stainless steel cleaner
.
-
Always work in the same direction as the grain of the stainless
steel,
rinse well
and polish dry.
Pan supports
Pa
n supports and burner caps are made from cast iron with a protective coating of
acid resistant enamel, and must not be put in a dishwasher.
-
Always allow pan supports and burner caps to cool completely before immersin
g
in
water.
- Wipe with a soft cloth using warm water and washing-up liquid.
- For stubborn marks use a cream cleaner applied with a nylon scourer. Rinse
well and dry, before replacing on the hotplate.
- When placing the pan supports on the hotplate, the widest edge of the cast iron
faces to the outside left or righ
t.
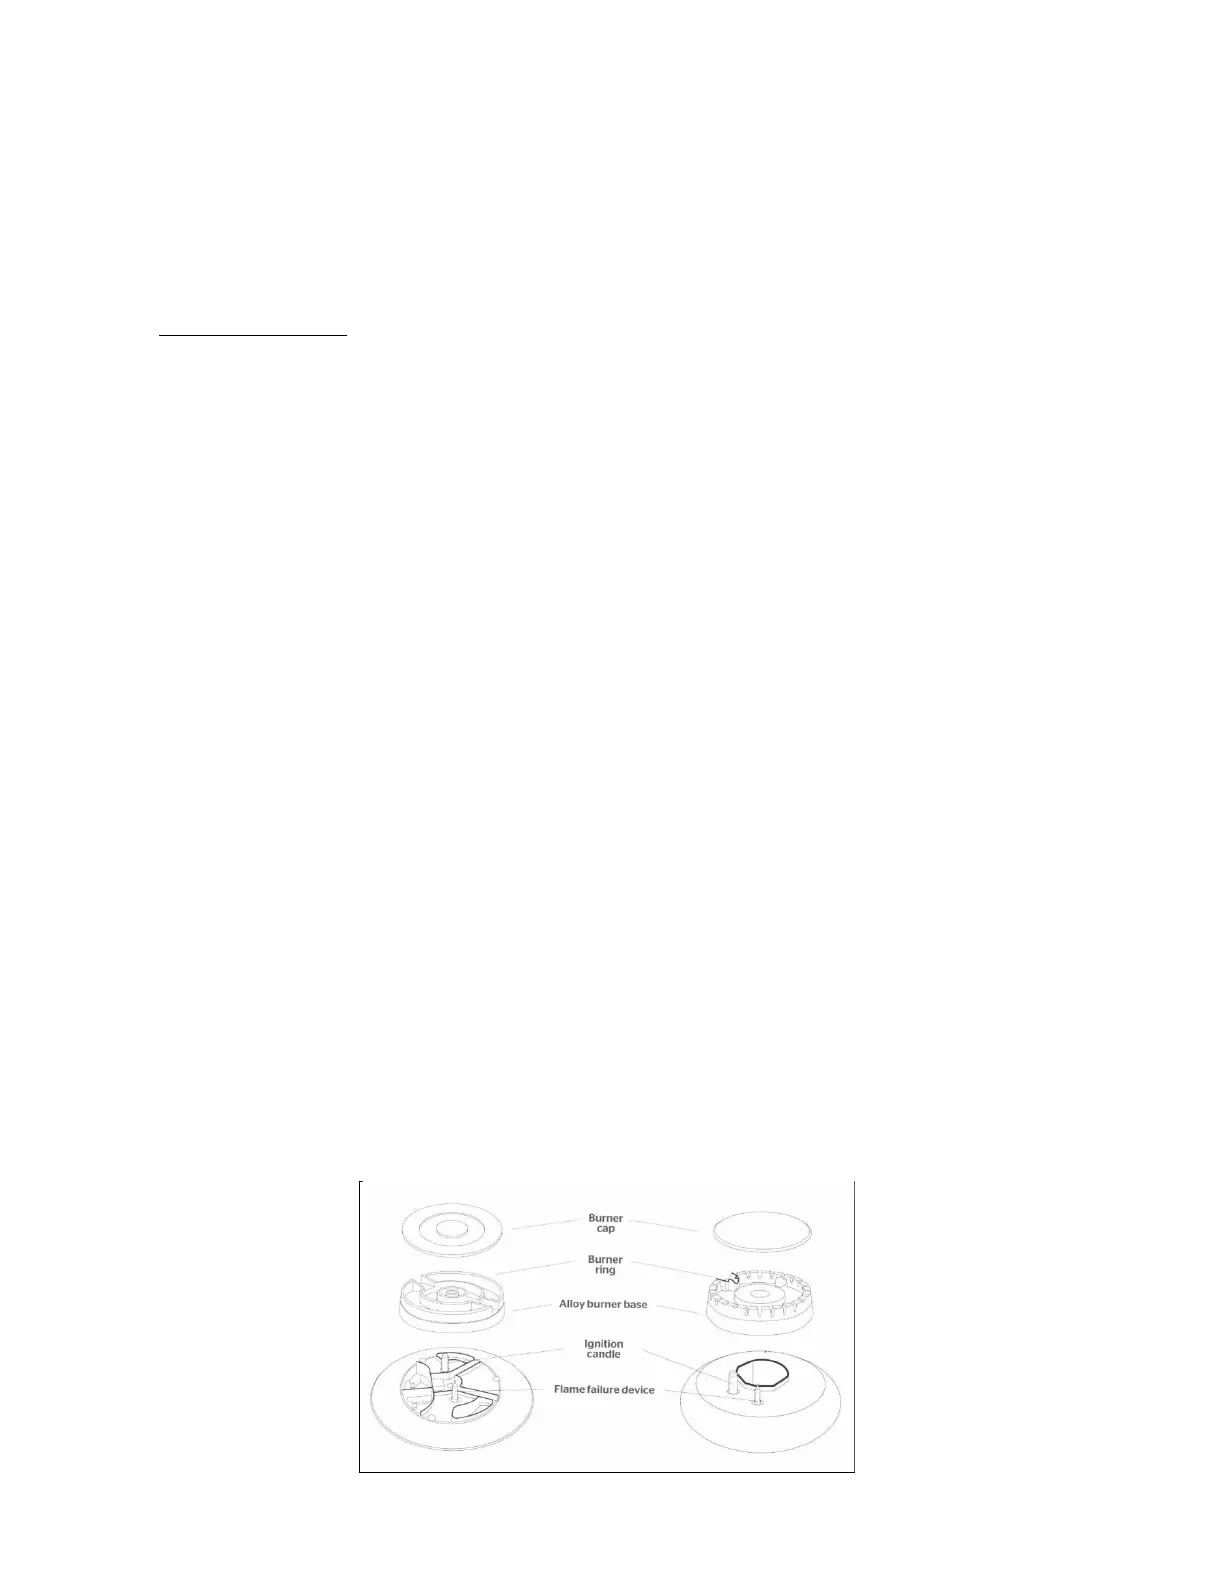
Burner rings
- Use a cream cleaner and a nylon scourer. Rinse well and dry.
- After cleaning, ensure that the burner slots are dry and not blocked.
Alloy burner
bases
-
Never put the alloy bases in a dishwasher as the salt may damage the alloy.
-
Always ensure that no other metals are in the same water as the alloy bases as
electrolysis may occur, blackening the alloy. Wipe clean with a soft cloth, wa
rm
w
ater and washing-up liqu
id.
- Fo
r stubborn marks use a cream cleaner on a soft damp cloth.
- Rin
se and dry before replacing on the hotplate.
When re-assembling the burners, always ensure that the notches on the burner ring
are seated firmly into the base for the gas to ignite and the flame to be stable. (See
burner assembly instructions
Assembly of the burners (Fig.32)
The
circular burners have two notches, which fit around the thermocouple and the
ignition candle (on the dual wok burner these notches are located on the inner ring).
Once the burner is securely in place, the black burner cap(s) should sit on top.
The burner caps must be in the correct position for operation.
Bekijk gratis de handleiding van Bertazzoni HER95I2EAVT, stel vragen en lees de antwoorden op veelvoorkomende problemen, of gebruik onze assistent om sneller informatie in de handleiding te vinden of uitleg te krijgen over specifieke functies.
Productinformatie
| Merk | Bertazzoni |
| Model | HER95I2EAVT |
| Categorie | Fornuis |
| Taal | Nederlands |
| Grootte | 4815 MB |


