Handleiding
Je bekijkt pagina 10 van 16
10
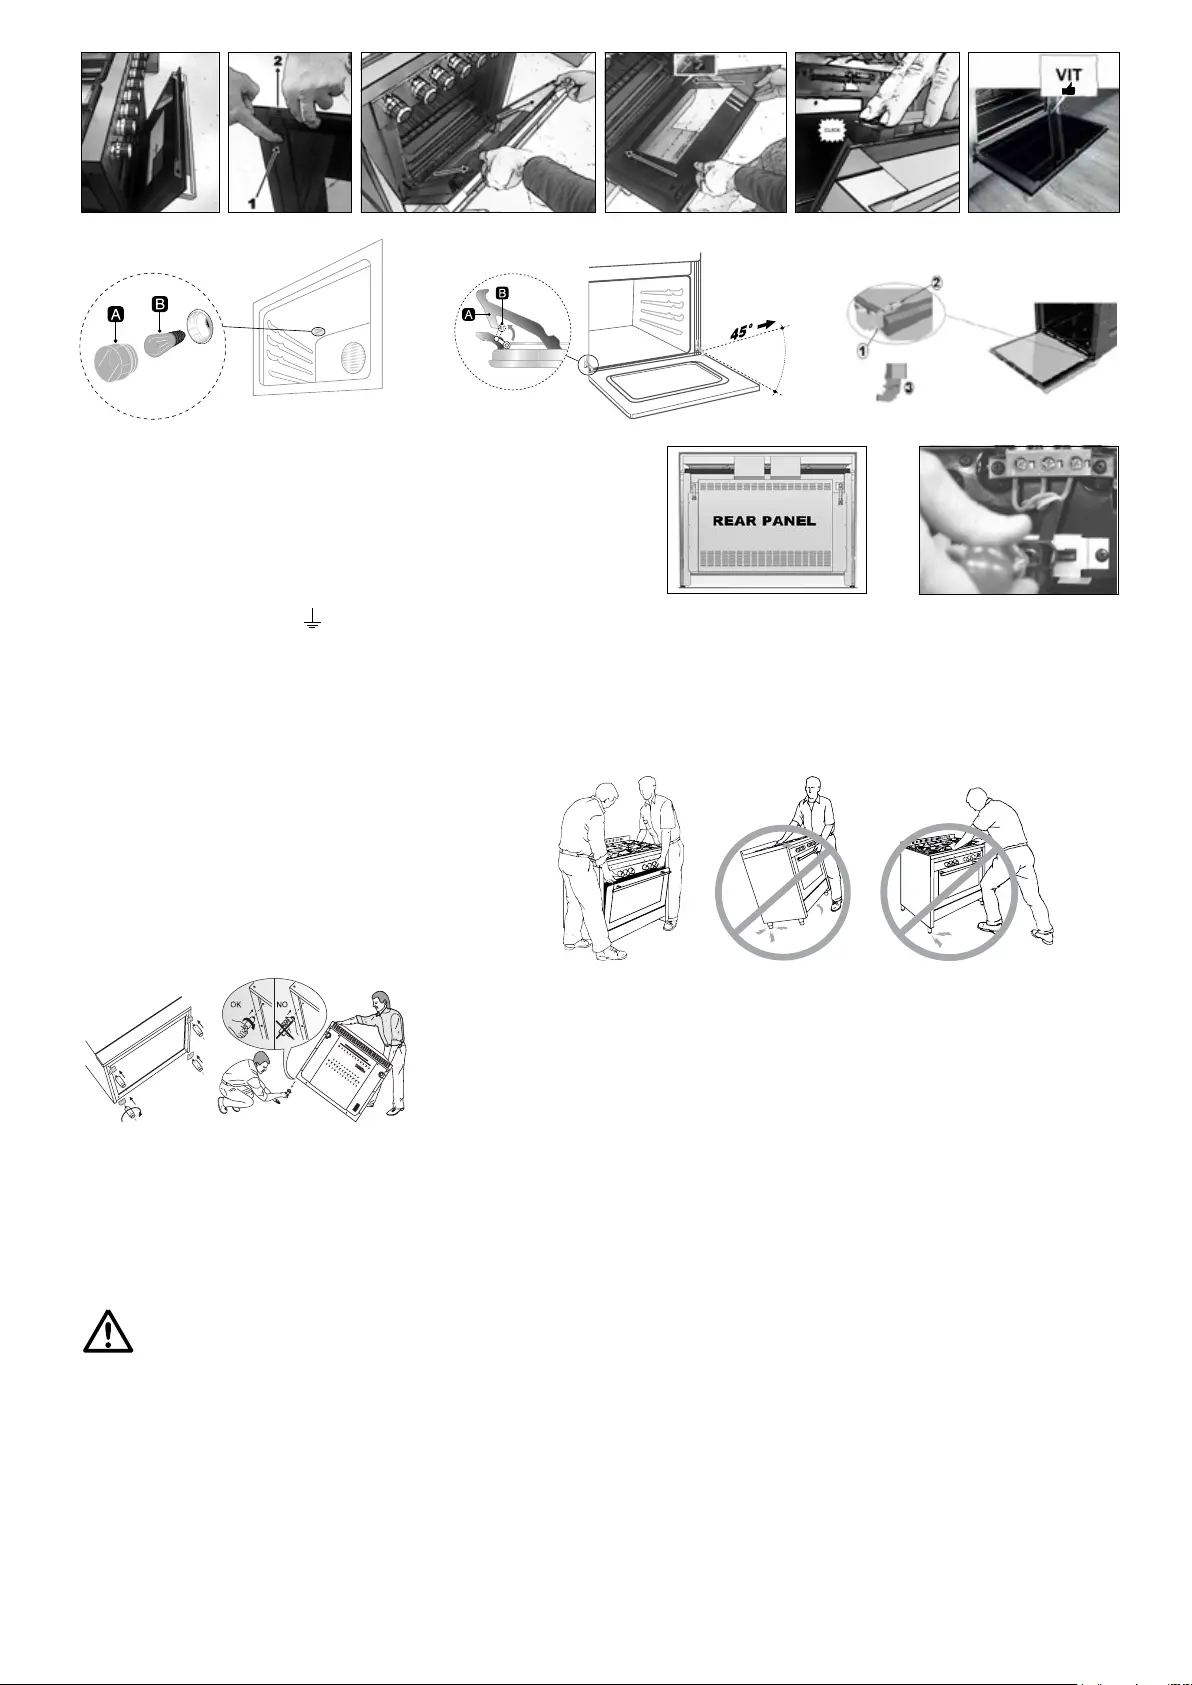
g.7 g.8 g.9
CHANGING THE POWER CABLE (this operation must be carried out
exclusively by qualied personnel)
Take the rear panel off the cooker to have access to the terminal board
(g. 10). Loosen the clamping screws of the cable retainer and the screws
on the terminal board that hold down the three cable conductors (g. 11).
the instructions listed below:
• Blue cable for Neutral on clamp N;
• Brown cable for Phase on clamp L;
• Yellow-Green cable for earth
on clamp.
Attach the cable to the corresponding cable clamp (brown terminal board)
and re-assemble the rear panel of the cooker.
INSTR
UCTIONS FOR THE INSTALLER
Product handling
The product must be handled by two people.
Do not lift the cooker by the oven door handle, rather, open
Do not drag or make the cooker slide.
INSTALLATION
VENTILATION OF THE ROOMS (g. 12 - page 11)
This appliance can only be installed and made to operate in permanently ventilated rooms, in accordance with national legislation in force.
It is essential that the amount of air required for gas combustion can ow through the room where the appliance is installed.
In particular, the air ow required for the correct combustion must not be lower than 2 m
3
/h for every kW of the appliance's rated power. (Refer to the
technical data plate attached to the appliance, applied inside the door under the oven door or on the rear of the appliance).
The air must be drawn directly from the outside through permanent openings or ventilation ducts.
g.10
g.11
This appliance is not connected to an exhaust device for the combustion products. The appliance must convey the combustion products out into the
atmosphere through a specic hood connected to a stack, ue or directly outdoors.
Intense or prolonged use of the appliance may require supplementary ventilation, for example, the opening of a window, or more effective ventilation by
increasing the level of mechanical ventilation, when applicable.
COMBUSTION GAS EXHAUST (g. 13 - page 11)
WARNING
It is essential that all operations relative to installation, regulation and technical maintenance are carried out exclusively by qualied
personnel. The appliance must be installed in compliance with regulations in the country of use.
If the power cord is damaged, contact immediately the after sales service which will replace it.
POSITIONING (g. 14 - page 11)
The appliance is class 1 and class 2.1 (see reference gure below). It can be free-standing or recessed (installed between other elements) in observance of
the following minimum distances: 750 mm between the hob and any horizontal element above it (cabinets, for example); this space can be reduced to 650
mm if the above element is an extraction hood; 50 mm between the side of the appliance and elements that are taller than the appliance. It can be installed
alongside walls that are higher then the work surface, at a minimum distance of 50 mm from the side of the appliance.
If it is installed between elements, it is necessary that the walls of these elements be resistant to temperatures of up to 90 °C.
the door and hold the cooker by the top of the internal cavity.
Bekijk gratis de handleiding van Bartscher 155660, stel vragen en lees de antwoorden op veelvoorkomende problemen, of gebruik onze assistent om sneller informatie in de handleiding te vinden of uitleg te krijgen over specifieke functies.
Productinformatie
| Merk | Bartscher |
| Model | 155660 |
| Categorie | Fornuis |
| Taal | Nederlands |
| Grootte | 2997 MB |
Caratteristiche Prodotto
| Apparaatplaatsing | Vrijstaand |
| Gewicht | 76000 g |
| Breedte | 900 mm |
| Diepte | 600 mm |
| Hoogte | 890 mm |


