Axxess AXPIO-JT1 handleiding
Handleiding
Je bekijkt pagina 9 van 16
9
REV. 7/5/22 INSTAXPIO-JT1
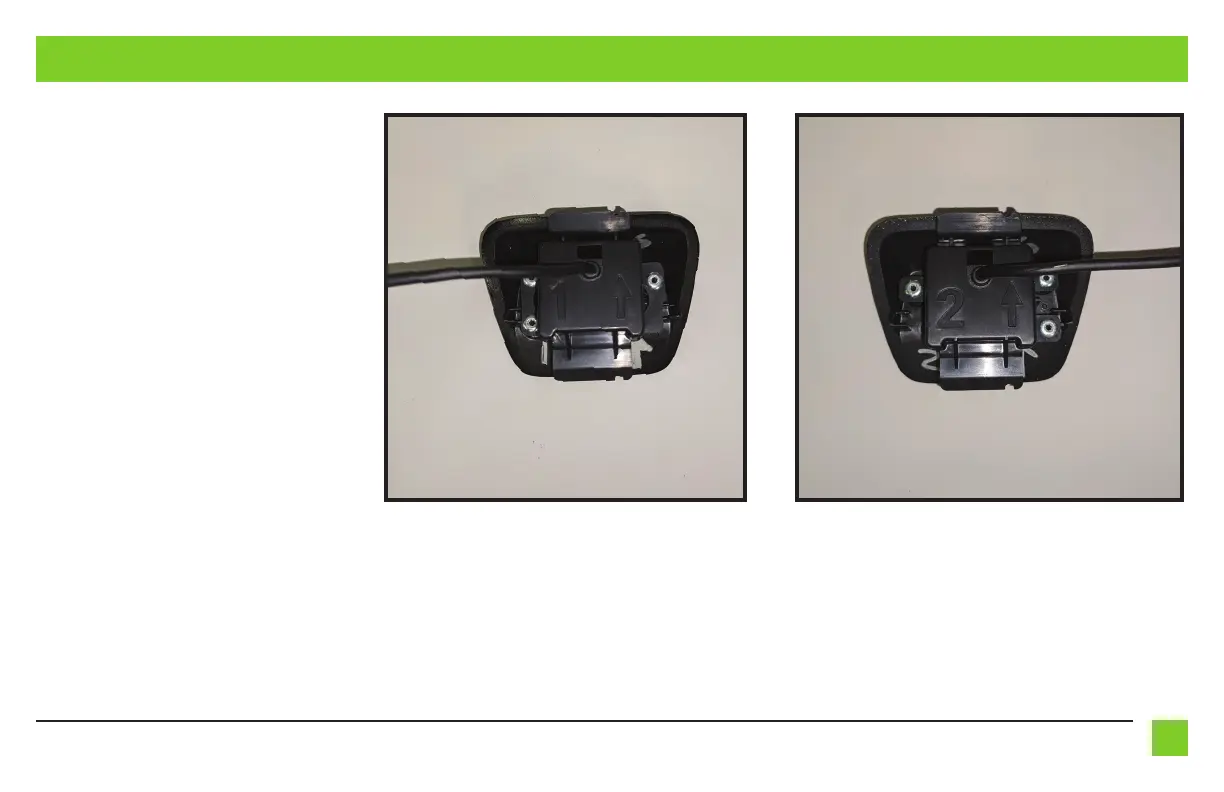
CAMERA ASSEMBLY
(Figure A) (Figure B)
1. Select the proper housing for the JP-JTKT camera.
2. Pull the extension wire from the aftermarket
camera through the hole between the number and
the arrow. (Figures A & B)
Note: Make sure the camera is properly positioned
with the top of the camera indicated by the QC
sticker and the top of the bracket indicated by
the arrow pointing towards the top of the factory
housing.
3. Place the factory housing over the camera and
secure with the factory screws removed in camera
removal.
Note: The positions of the screws differ depending
on the factory backup camera (Figure A) or
surround view or 360 camera (Figure B).
Bekijk gratis de handleiding van Axxess AXPIO-JT1, stel vragen en lees de antwoorden op veelvoorkomende problemen, of gebruik onze assistent om sneller informatie in de handleiding te vinden of uitleg te krijgen over specifieke functies.
Productinformatie
| Merk | Axxess |
| Model | AXPIO-JT1 |
| Categorie | Niet gecategoriseerd |
| Taal | Nederlands |
| Grootte | 5696 MB |


