Axxess AXDSPX-WR handleiding
Handleiding
Je bekijkt pagina 3 van 12
3
REV. 6/12/2025 INSTAXDSP-X
I N STALL ATI O N
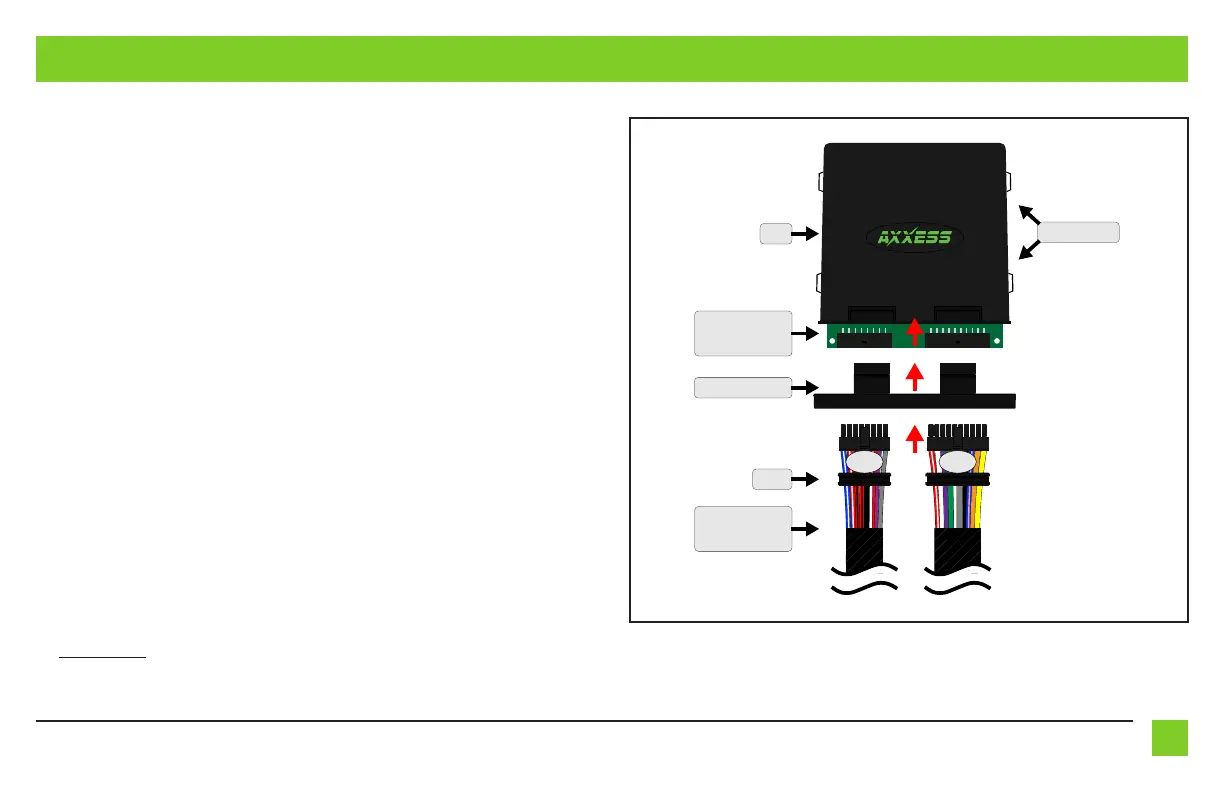
1. With the arrow stamped onto the cap facing upwards, push the 16-pin connector from the
AXDSPX-WR harness into the left side of the cap. The locking clip on the connector should
face upward. Make sure the gasket is seating properly in the cap. (Figure A)
2. With the arrow stamped onto the cap still facing upwards, push the 20-pin connector from
the AXDSPX-WR harness into the right side of the cap. The locking clip on the connector
should face upward. Make sure the gasket is seating properly in the cap. (Figure A)
3. Plug the 16-pin and 20-pin connectors from the AXDSPX-WR harness into the
AXDSP-X circuit board. (Figure A)
4. Slide the assembly into the case, then click it shut. Zip-tie the enclosure to a secure location
to secure it. Make sure the Axxess logo is facing up to further ensure that no outside
elements can enter the enclosure.
5. Complete all necessary connections to the radio and vehicle, but leave the amp turn-on wire
disconnected.
6. Download and install the AX-DSP-XL app for your smart device.
7. Open the app and follow the instructions on the Bluetooth Connection tab to pair the mobile
device to the AXDSPX-WR.
8. Scroll to the Configuration tab then select General as the vehicle type.
9. Connect the amp turn-on wire from the AXDSPX-WR.
10. Adjust the DSP settings in the app as desired. Refer to the instructions starting on (page 7)
for an explanation of each tab in the app.
(refer to page 7)
Cap (with O-ring)
Case
AXDSP-X
Circuit Board
AXDSPX-WR
Harness
16-Pin 20-Pin
Gasket
Zip-tie Mounts
(Figure A)
Bekijk gratis de handleiding van Axxess AXDSPX-WR, stel vragen en lees de antwoorden op veelvoorkomende problemen, of gebruik onze assistent om sneller informatie in de handleiding te vinden of uitleg te krijgen over specifieke functies.
Productinformatie
| Merk | Axxess |
| Model | AXDSPX-WR |
| Categorie | Niet gecategoriseerd |
| Taal | Nederlands |
| Grootte | 1369 MB |


