Axxess AXAC-CH5 handleiding
Handleiding
Je bekijkt pagina 6 van 16
6
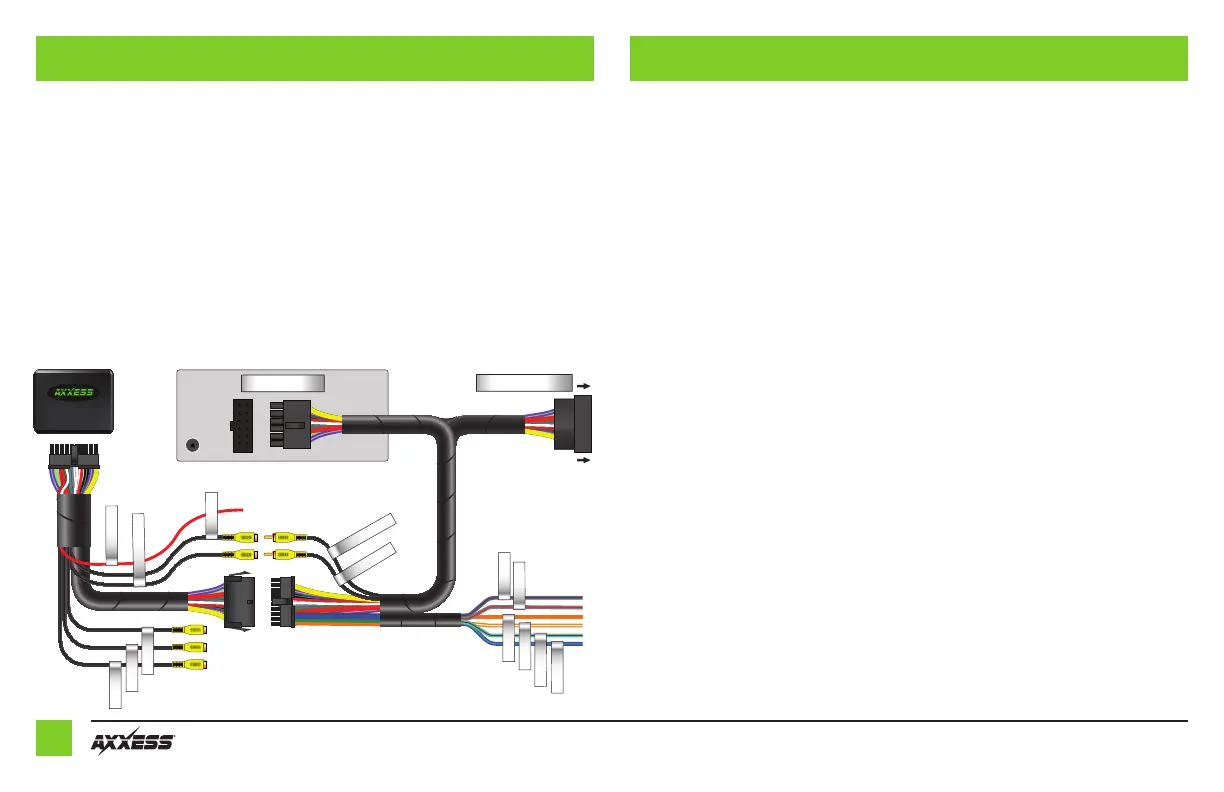
INSTALLATION PROGRAMMING
With the ignition cycled off:
1. Remove the harness from the factory radio, then install the AXAC-CH5 vehicle harness in
between.
2. Connect the AXAC-CH5 vehicle harness to the AXAC-CH5 interface harness.
3. Connect the AXAC-CH5 interface harness to the AXAC-CH5 interface.
4. Make sure the camera(s) is connected to the appropriate input.
5. Make sure the interface has been configured beforehand as shown in the Configuration
section. Failure to configure the interface will result in the interface not functioning properly.
For models with a factory backup camera:
1. Cycle the ignition on and wait until the LED in the interface comes on.
Note: If the LED doesn’t come on within a few seconds, yet blinks instead, turn the key to the off
position, disconnect the interface, check all connections, reconnect the interface, and then try again
.
2. Test all functions of the installation for proper operation.
For models without a factory backup camera:
Refer to next page (Rebooting the U-Connect Radio).
AUX-IN
Camera Input
Camera Output
Camera Output
Camera 1
FACTORY RADIO
TO VEHICLE HARNESS
Camera 4
Camera 2
Control 1
Control 2
Control 3
Control 4
Camera 3
Camera 12V
VSS output
VSS input
Bekijk gratis de handleiding van Axxess AXAC-CH5, stel vragen en lees de antwoorden op veelvoorkomende problemen, of gebruik onze assistent om sneller informatie in de handleiding te vinden of uitleg te krijgen over specifieke functies.
Productinformatie
| Merk | Axxess |
| Model | AXAC-CH5 |
| Categorie | Niet gecategoriseerd |
| Taal | Nederlands |
| Grootte | 3124 MB |


