Audiotec Fischer EXTENSION CARD 2.0 – ANALOG IN handleiding
Handleiding
Je bekijkt pagina 11 van 14
11
en
5. Insert EC 2.0 into the DSP / DSP amplier
Insert the module into the designated socket inside the device. Information about the socket position can be found
in the user manual of the respective DSP product.
Make sure that the module is installed properly and all pins are fully inserted into the socket.
6. Reassemble the DSP / DSP amplier
Reassemble the device as described in the user manual of your specic model.
7. Commissioning
Reconnect all cables and power on the device. The EC 2.0 will be automatically recognized, and the module’s Info
LED (page 9, point 2) will light up green.
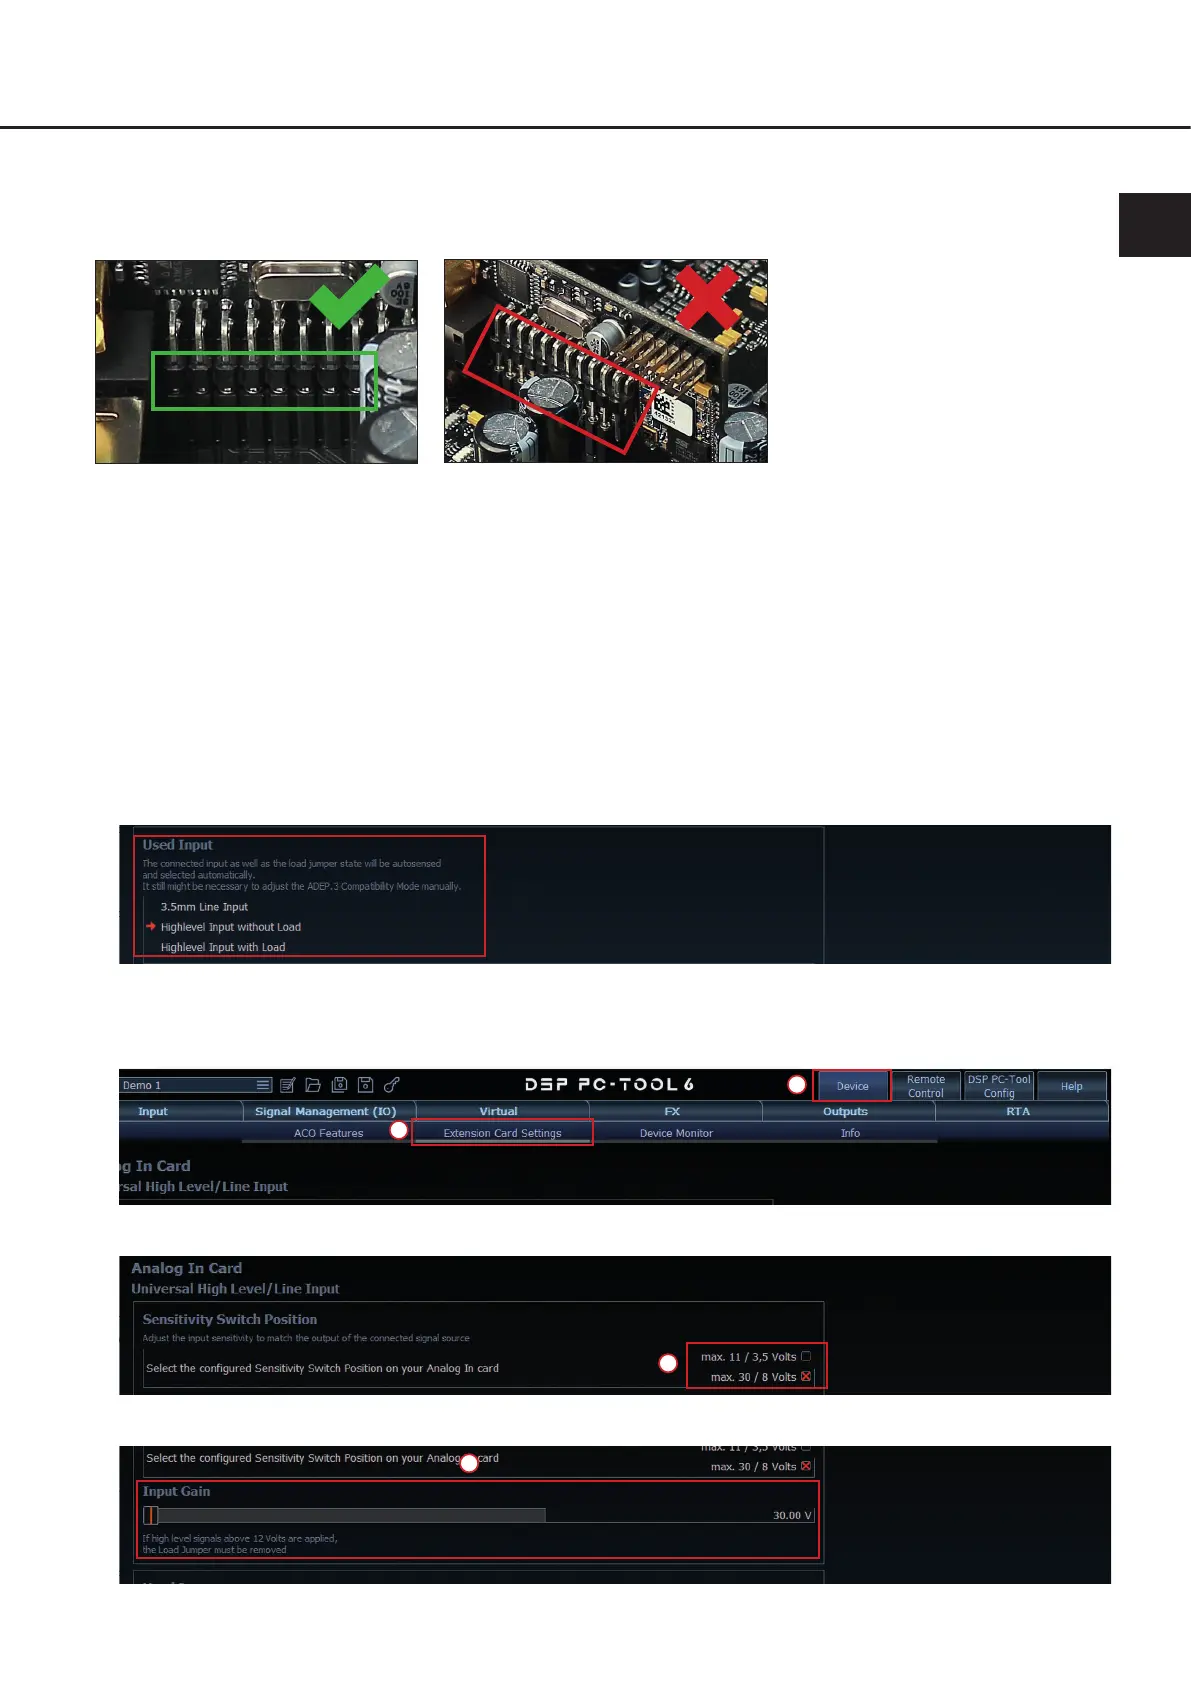
8. Conguration in the DSP PC-Tool
After setting the basic input sensitivity (page 10, point 4) and the load of the highlevel input, the input sensitivity can
be ne-tuned in the “Device” menu under the “Extension Card Settings” tab to ensure optimal signal quality.
In the “Used Input” section, you can also see which input of the module is currently used (highlevel or line) and
whether the load jumper is installed or removed – this allows for quick verication of your hardware conguration.
To ne-tune the input sensitivity, proceed as follows:
1. Connect the DSP / DSP amplier to your PC and start the DSP PC-Tool software.
2. Open the “Extension Card Settings” tab in the “Device” menu.
1
2
3. Select the congured input sensitivity switch position of your module.
3
4. Adjust the input sensitivity using the slider to match the output voltage of the connected signal source.
4
Bekijk gratis de handleiding van Audiotec Fischer EXTENSION CARD 2.0 – ANALOG IN, stel vragen en lees de antwoorden op veelvoorkomende problemen, of gebruik onze assistent om sneller informatie in de handleiding te vinden of uitleg te krijgen over specifieke functies.
Productinformatie
| Merk | Audiotec Fischer |
| Model | EXTENSION CARD 2.0 – ANALOG IN |
| Categorie | Niet gecategoriseerd |
| Taal | Nederlands |
| Grootte | 3509 MB |

