Atlona AT-OMNI-111 handleiding
Handleiding
Je bekijkt pagina 59 van 153
Using OmniStream
™
with Velocity
™
Device Manager
59
Device Operation
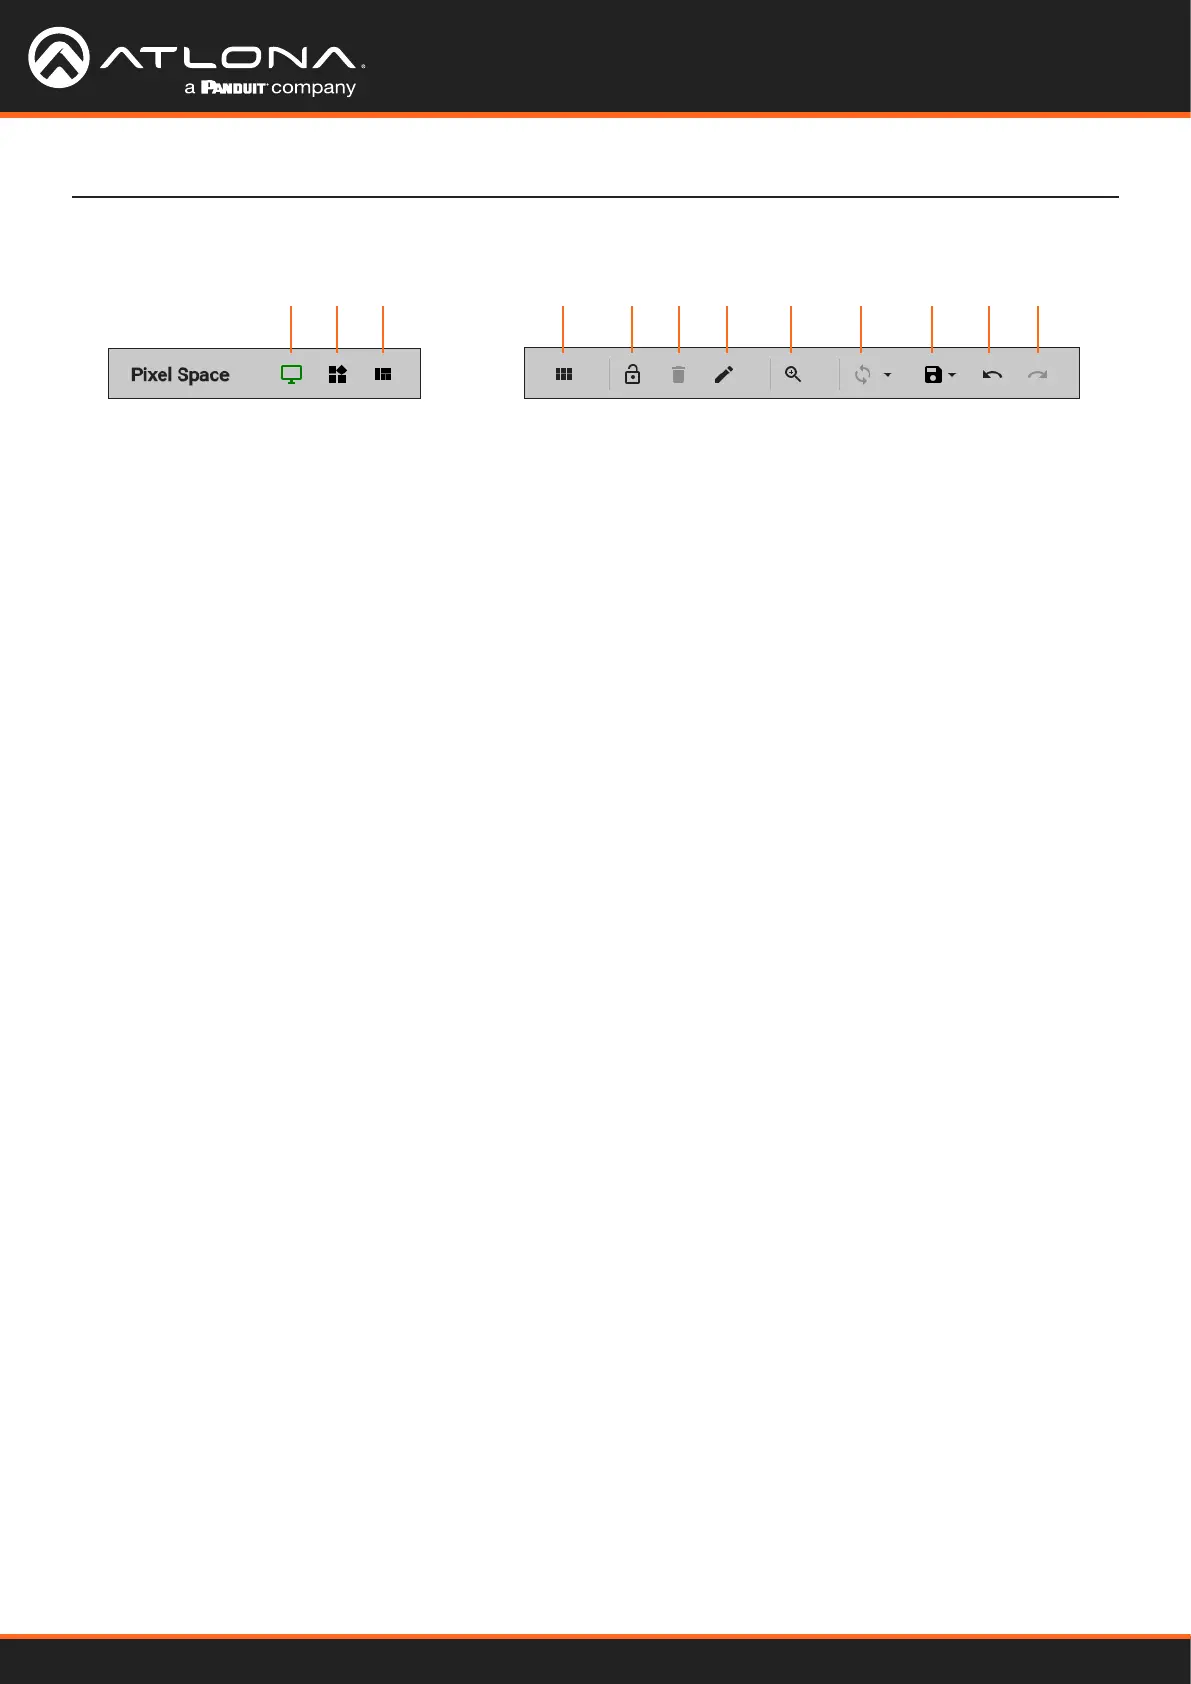
Before continuing, refer to the Pixel Space tool bar at the top of the screen. The following identies each icon:
a b c d e f g h i j k l
a. Displays
Click to icon to show the Displays window on the
left side of the screen. In this mode, displays can
be edited.
b. Presets
Click this icon to display the Presets window on
the left side of the screen. In this mode, presets
can be edited, added, or deleted.
c. Drop Zones
Click this icon to display the Drop Zones window
on the left side of the screen. Refer to Creating
and Using Drop Zones (page 65) for more
information.
d. Auto Arrange
Click this icon to auto-arrange the number of
displays in the Pixel Space window into the
selected number of rows and columns.
e. Lock
When locked, this icon will turn red, and prevent
accidental repositioning of displays or changing
presets. To unlock the displays (for adjustment
purposes), click this icon again.
f. Delete All
Click this icon to delete all displays within the
Pixel Space window. This icon will only be
available if displays are present in the Pixel
Space window. This icon is only enabled if
displays have been added to the Pixel Space
window.
g. Pixel Space
Click this icon to display the VideoWall dialog
box, allowing modication of both the Video Wall
and Pixel Space settings.
h. Zoom
Click this icon to display the zoom y-out slider
control. Click and drag the slider to adjust the
zoom factor of the Pixel Space window.
i. Apply Preset
Click this icon to apply the current preset. Click
the down arrow next to this icon to display the
Apply Preset y-out menu. This control denes
when Velocity automatically applies a preset: 1)
Auto apply preset on save; 2) Auto apply preset
on source change.
j. Save
Click this icon to save the current layout/settings.
Click the down-arrow, next to this icon, to display
the Save y-out menu option, allows enabling or
disabling of auto-saving.
k. Undo
Click this icon to undo the last operation.
l. Redo
Click this icon to redo the last operation.
Clicking this icon after an undo operation will
restore the previous setting.
8. Under the Displays window, on the left side of the screen, drag and drop the desired displays to the to Pixel
Space window.
Alternatively, to add all displays to the Pixel Space windows without manually using drag-and-drop, click ADD
REMAINING, at the bottom of the Displays window. This will automatically populate the Pixel Space window
with all available displays. Note that if all displays have been dragged to the Pixel Space window, then this
option will be grayed out.
9. Click the Auto Arrange icon in menu bar at the top of the Pixel Space window. Move the mouse within the
Auto Arrange pop-up dialog to adjust the size of the video wall. Click the lower right-most blue square of the
video wall to commit the selection.
Bekijk gratis de handleiding van Atlona AT-OMNI-111, stel vragen en lees de antwoorden op veelvoorkomende problemen, of gebruik onze assistent om sneller informatie in de handleiding te vinden of uitleg te krijgen over specifieke functies.
Productinformatie
| Merk | Atlona |
| Model | AT-OMNI-111 |
| Categorie | Niet gecategoriseerd |
| Taal | Nederlands |
| Grootte | 21597 MB |
Caratteristiche Prodotto
| Kleur van het product | Zwart |
| Breedte | 208 mm |
| Diepte | 112 mm |
| Hoogte | 34 mm |
| LED-indicatoren | Ja |


