Atlona AT-HDR-EX-100CEA-TX handleiding
Handleiding
Je bekijkt pagina 4 van 9
4
Installation Guide
AT-HDR-EX-100CEA-TX
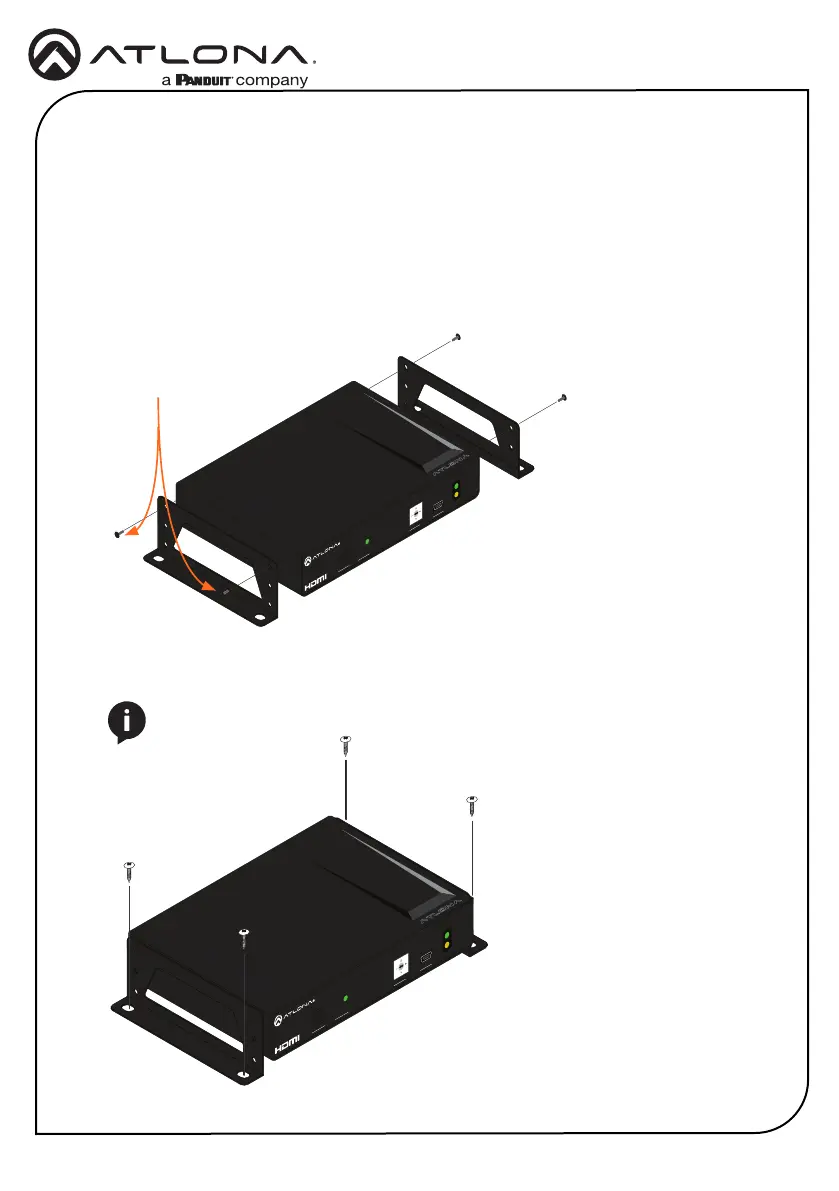
4. Mount the unit using the oval-shaped holes, on each mounting bracket. If using a drywall
surface, a #6 drywall screw is recommended.
NOTE: Mounting brackets can also be inverted to mount the unit under a table
or other at surface.
POWER
LINKTEST
AT-HDR-EX-100CEA-TX
1. LINK
2. FW
3. TEST
4. 5V LOCK
UTILITY
The AT-HDR-EX-100CEA-TX includes two mounting brackets and four mounting screws each,
which can be used to attach the units to any at surface.
1. Position one of the mounting brackets, as shown below, aligning the holes on the side of the
enclosure with one set of holes on the mounting bracket.
2. Use the enclosure screws to secure the mounting bracket to the enclosure.
3. Repeat the above steps to attach the second mounting bracket to the opposite side of the
unit.
Mounting Instructions
POWER
LINKTEST
AT-HDR-EX-100CEA-TX
1. LINK
2. FW
3. TEST
4. 5V LOCK
UTILITY
Included screws
Bekijk gratis de handleiding van Atlona AT-HDR-EX-100CEA-TX, stel vragen en lees de antwoorden op veelvoorkomende problemen, of gebruik onze assistent om sneller informatie in de handleiding te vinden of uitleg te krijgen over specifieke functies.
Productinformatie
| Merk | Atlona |
| Model | AT-HDR-EX-100CEA-TX |
| Categorie | Niet gecategoriseerd |
| Taal | Nederlands |
| Grootte | 1138 MB |

