American DJ WMS2 handleiding
Handleiding
Je bekijkt pagina 17 van 30
17
INSTALLATION
VIDEO PANEL ASSEMBLY (CONTINUED)
4. Install the video panel assembly via either wall mount or rigging bar, as detailed in the Wall Mount
and Rigging Bar sections of this manual, then connect the panel assembly to external power and
data signal. Please note that the framing strips will block the openings on the sides of video
panels along the edge of the assembly, so links to external power and data sources must
be routed through openings located along the top or bottom edge.
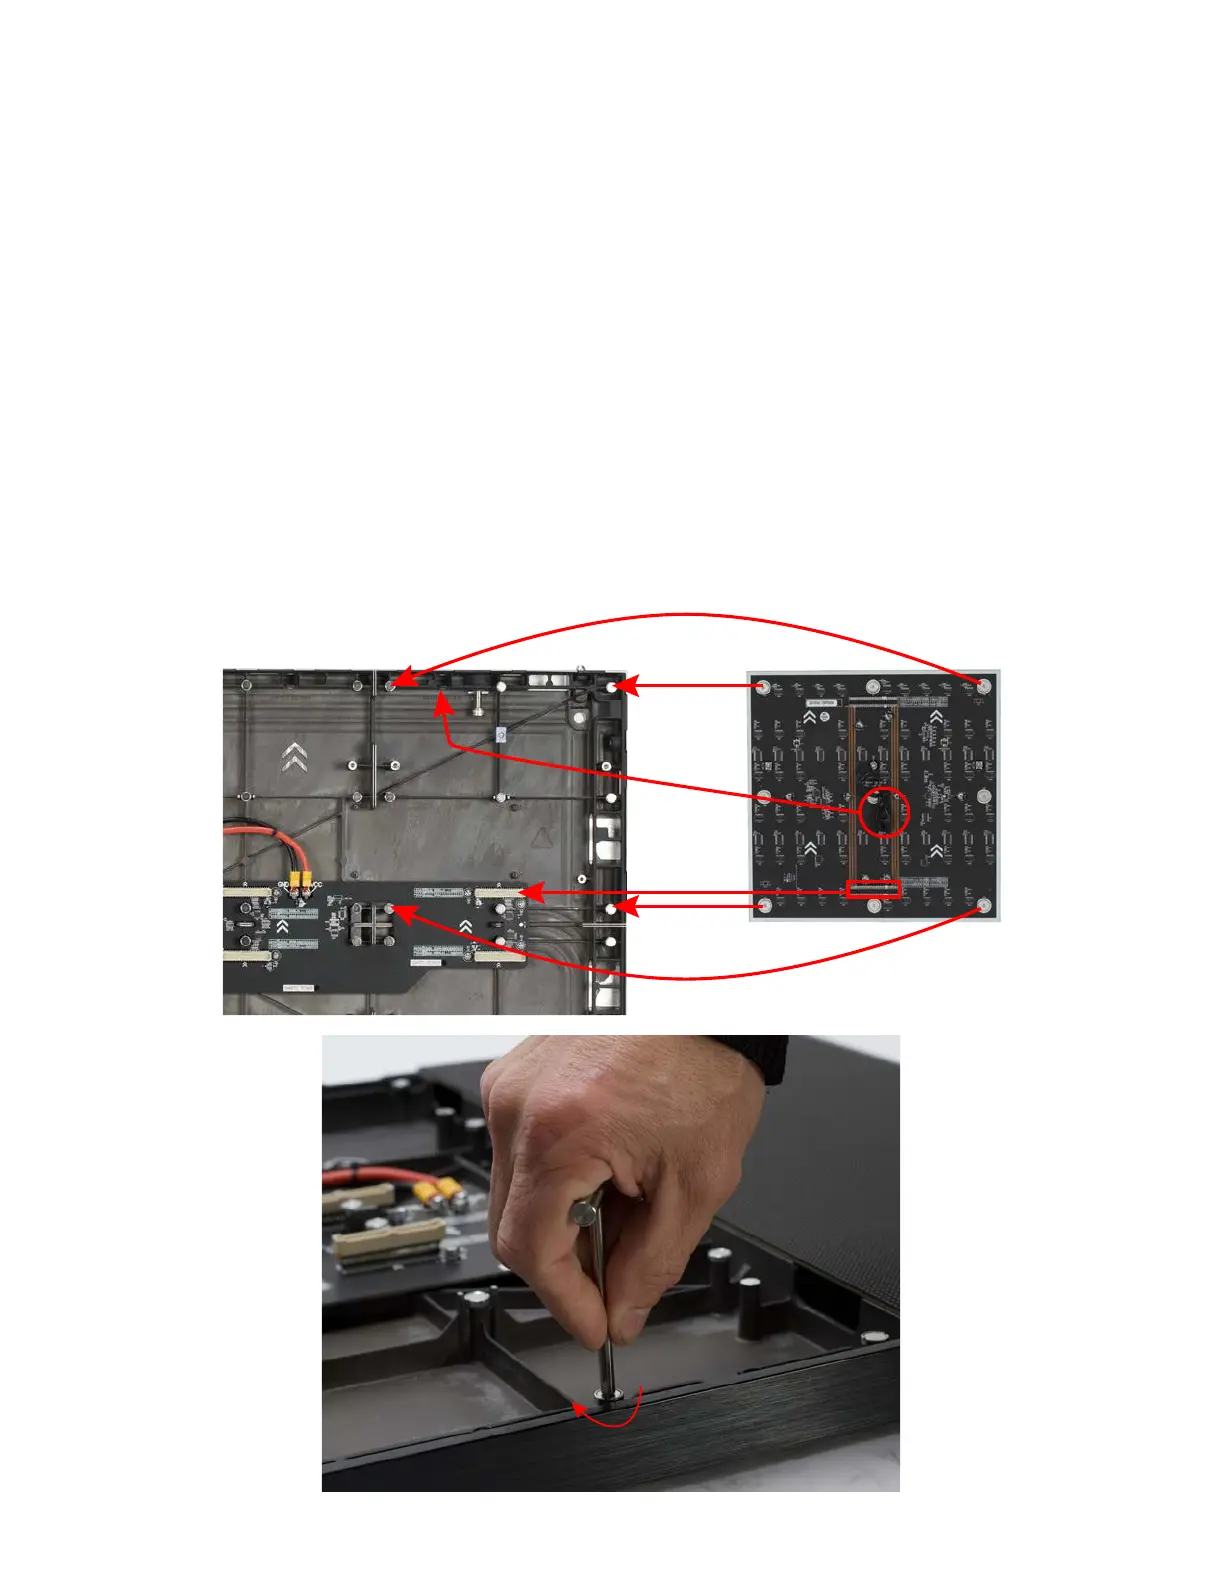
5. Lastly, install the LED modules. Orient each module with the directional arrows points upwards,
then secure the module safety cable to the nearest safety cable point on the video panel. Safety
cable points are located along the upper edge of the video panel for the top row of LED module,
as well as along the central electronics board for the bottom row of LED modules. Gently lower
the module to the video panel, and then allow the built-in magnets around the edges of the mod-
ule to snap each module into place. Make sure that one of the two power/data connectors on the
LED module mates securely to the matching connector on the video panel. Please note that mag-
net height is adjustable, as shown below, to ensure that each LED module is mounted in a level
conguration.
Magnetic
Attachment
Magnetic
Attachment
Power/Data
Connection
Safety Cable
Connection
Bekijk gratis de handleiding van American DJ WMS2, stel vragen en lees de antwoorden op veelvoorkomende problemen, of gebruik onze assistent om sneller informatie in de handleiding te vinden of uitleg te krijgen over specifieke functies.
Productinformatie
| Merk | American DJ |
| Model | WMS2 |
| Categorie | Monitor |
| Taal | Nederlands |
| Grootte | 5510 MB |