American DJ WMS2 handleiding
Handleiding
Je bekijkt pagina 18 van 30
18
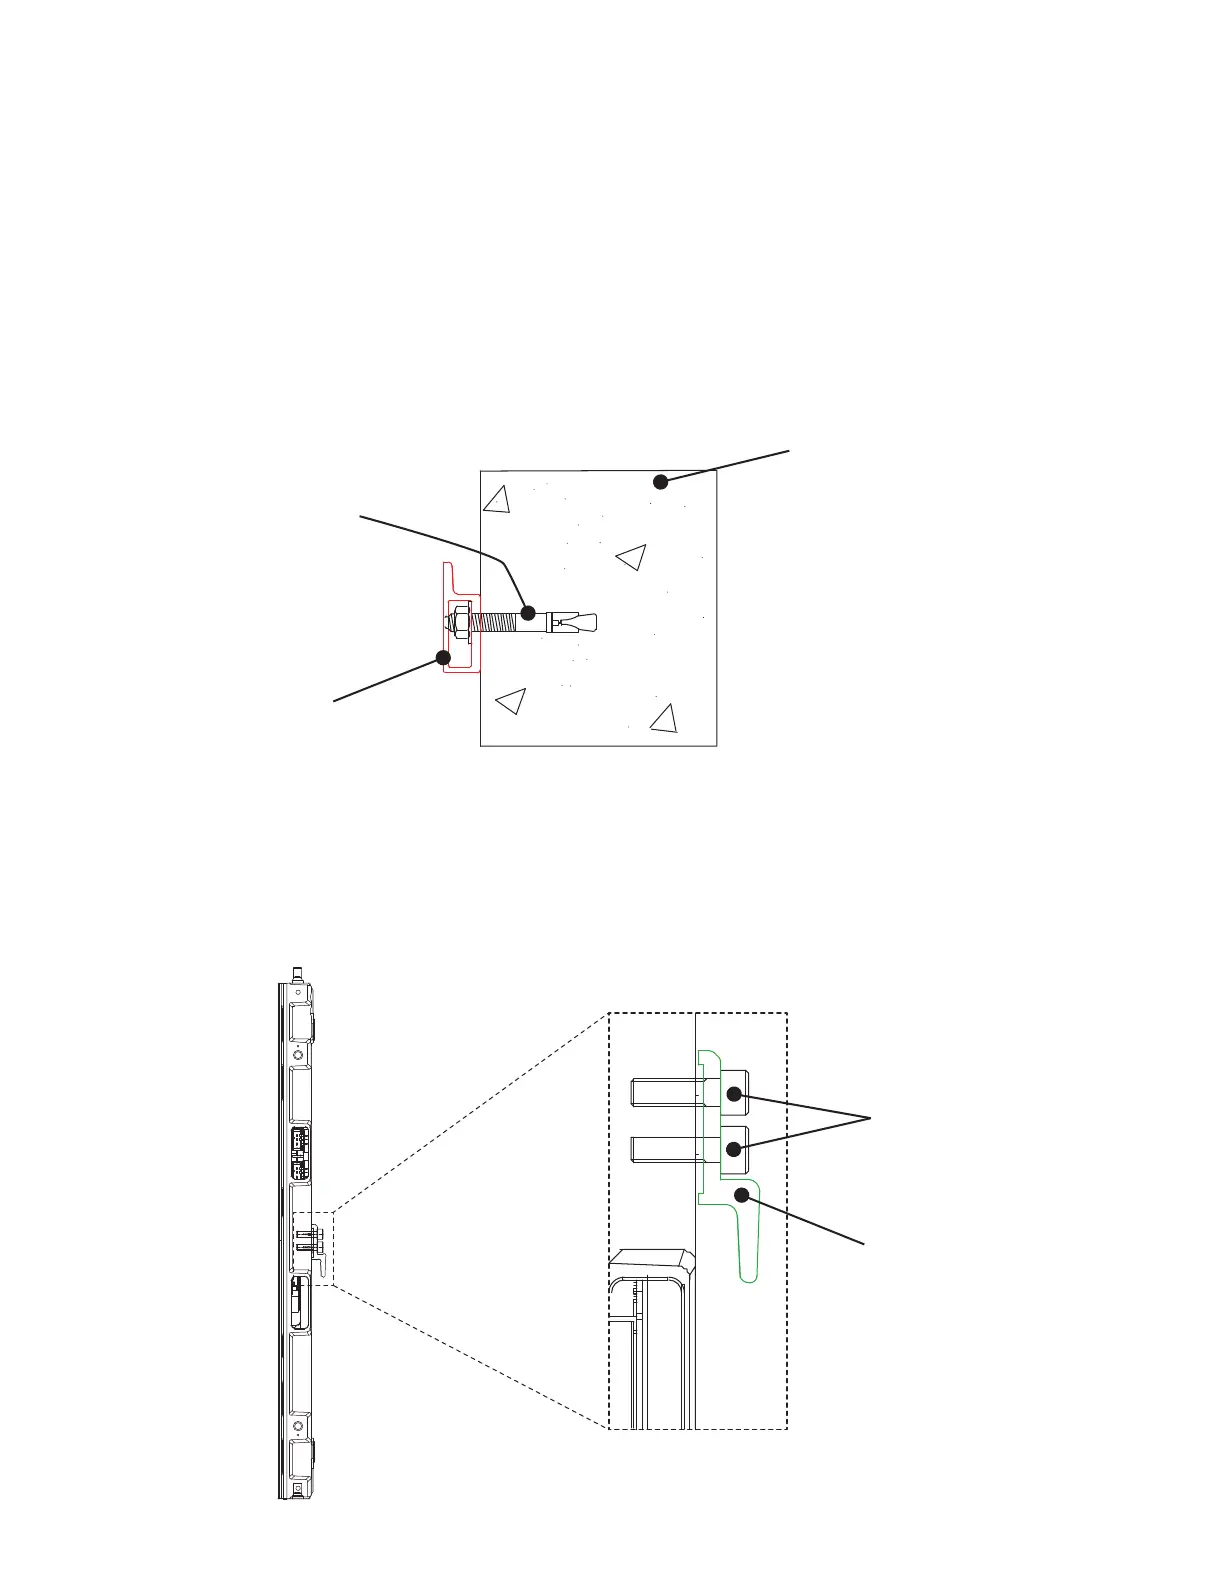
WALL MOUNTING
The video panel is compatible with ADJ’s WMSWB1 Wall Mount Bracket (sold separately). Follow
the steps below to wall mount your video panels. A qualied technician or trained professional is
required to y the WMS2 Video Panel assembly.
1. Measure the locations of the mounting holes on the wall mount bracket, then drill starting holes
in the mounting surface at the corresponding locations. Place the wall mount bracket on the wall,
so that the side of the bracket with the smaller holes is in contact with the wall, and the ange
is pointing upward. Insert the included fasteners and tighten to secure the wall mount bracket
in place. Please note that at least 3 fasteners are needed to safely and securely install the wall
mount bracket.
2. Align the video panel bracket with the holes on the back of the video panel, making sure that the
video panel bracket is oriented such that the ange is pointing downward. Secure the bracket to
the video panel with eight (8) M6 X 20L screws.
Mounting
Surface
Mounting
Fastener
Wall Mount
Bracket
(Flange
Upward)
M6X20L
Screws
Video Panel
Bracket
(Flange
Downward)
Bekijk gratis de handleiding van American DJ WMS2, stel vragen en lees de antwoorden op veelvoorkomende problemen, of gebruik onze assistent om sneller informatie in de handleiding te vinden of uitleg te krijgen over specifieke functies.
Productinformatie
| Merk | American DJ |
| Model | WMS2 |
| Categorie | Monitor |
| Taal | Nederlands |
| Grootte | 5510 MB |