Zodiac Vortex-Pro VX40 handleiding
Handleiding
Je bekijkt pagina 7 van 24
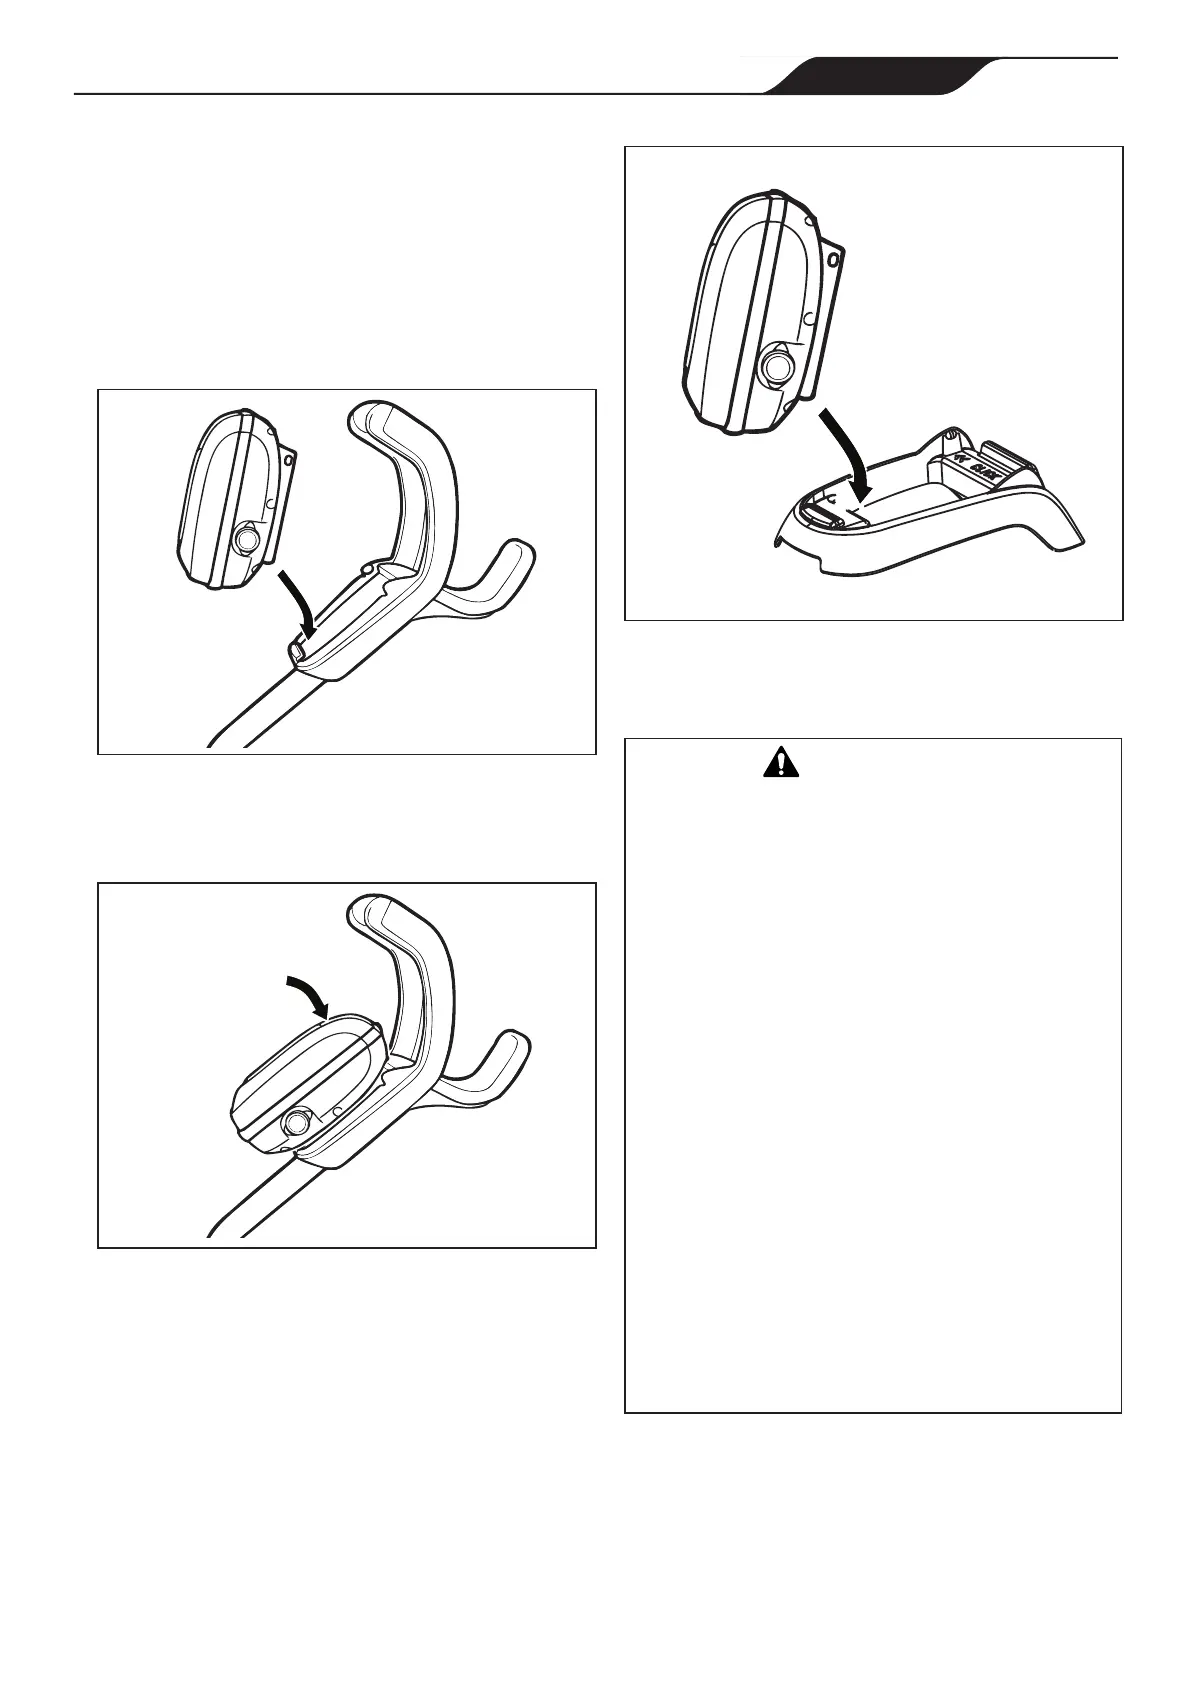
Figure 12. Attach Control box to Base
3.4 Connecting Floating Cable to Control
Box
WARNING
Failuretocomplywiththefollowingwarningscan
resultinpermanentinjury,electrocutionordrowning.
PREVENT ELECTRICAL SHOCK
• Keepthecontrolboxatleast3.5mfromtheedge
ofthepool.
• Thecleaneristobeinstalledinaccordancewith
therelevantrequirementsoftheAustralianwiring
rulesAS/NZS3000.Alsorefertotheinstallation
instructionsrelatingtotheswimmingpoolequipment
forwhichthecleanerwillbeanintegralpart.The
cleaneristobesuppliedthroughaResidualCurrent
Device(RCD)witharatedresidualoperatingcurrent
of30mA.
• Donotuseanextensioncordtoconnectthecontrol
box.
• Donotallowanyonetoswimwhilethecleanerisin
thepool.
• Thecontrolboxiswater-resistant,notwaterproof.
Inordertopreventelectrocution,neversubmerge
thecontrolboxorleaveexposedtoinclement
weather.
1. Unscrew the protective cap for the power cable
from the side of the control box by turning
counter-clockwise (Figure 12).
3.3 Connecting the Control box to Caddy
(VX50 4WD / VX55 4WD) or Base
(VX40)
VX50 4WD / VX55 4WD:
1. Align the bottom of the control box with the
notch at bottom of the control box hook on the
caddy (Figure 10).
Figure 10. Align Control box with Caddy Hook
2. Press control box onto the caddy hook until it
snaps and locks into position (Figure 11).
Figure 11. Attach the Control box onto Caddy
VX40:
1. Align the bottom of the control box with the
notch in the base (see Figure 12).
2. Presscontrolboxdownrmlytosnapinplace.
7
H0516700_REV A
Bekijk gratis de handleiding van Zodiac Vortex-Pro VX40, stel vragen en lees de antwoorden op veelvoorkomende problemen, of gebruik onze assistent om sneller informatie in de handleiding te vinden of uitleg te krijgen over specifieke functies.
Productinformatie
| Merk | Zodiac |
| Model | Vortex-Pro VX40 |
| Categorie | Niet gecategoriseerd |
| Taal | Nederlands |
| Grootte | 4454 MB |


