Zodiac K3 handleiding
Handleiding
Je bekijkt pagina 19 van 27
Charging Operation
The battery must be charged when the device indicates the
low battery status, emitting three consecutive sounds every
30 seconds. Then use the supplied charger, which is
equipped with a LED, whose colors have the following
meaning:
• Fixed red LED: charging in progress
• Fixed green LED: charging completed
• Flashing red LED: battery overheated or defective
To recharge, proceed as follows, respecting the order of the
subsequent phases:
1 Connect the USB-C type charging cable to the power
supply
2 Connect the other end of the USB-C type cable to the
desktop charger
3 Insert the device, complete with battery, into the charger
4 Connect the power supply to a power socket
5 Make sure that the device with battery is correctly
inserted in the charger: check that the LED light is red
6 Wait for charging to complete (a few hours): when fully
charged, the LED turns green
7 It is possible to recharge the battery only, if disconnected
from the device, by connecting the USB-C type cable
directly to the USB-C socket located on the lower rear
side of the battery, after gently opening the rubber
protection. In this case, the LED on the battery has the
same meaning as the indicator on the desktop charger.
Pay attention to the contacts located on the front of the
PREPARATION PREPARATION
battery, in accordance with what is specified in the
previous paragraph.
8 When charging the battery only, make sure that it is
placed on a dry and non-metallic surface, not exposed to
solar radiation and with sufficient ventilation.
9 After charging the battery only, carefully reposition the
rubber protection of the USB-C socket and place the
cable plug back into the socket of the desktop charger.
It is possible that the LED on the charger or on the battery
may remain on for a few moments after removing the
device or cable. This is normal and does not indicate
malfunction.
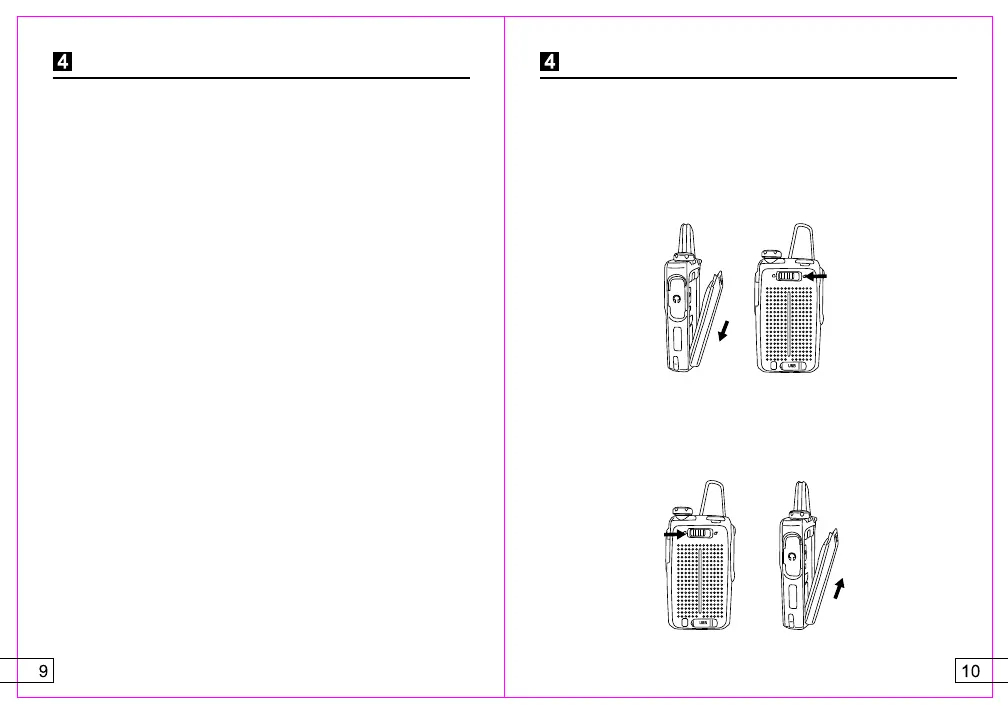
Battery Installation and Removal
The battery may not be fully charged when it is turned on.
It is advisable to proceed with a complete discharge by
using the apparatus before proceeding with the first rechar-
ge, which must be possibly complete.
1 Make sure that the fixing slide, located on the high rear
part of the battery, is in the "open padlock" position
2 Match the teeth located on the bottom side of the battery
with the corresponding notches on the back of the device
3 Press the upper part of the battery and make it adhere
completely to the device
4 Still pressing the battery, move the fixing slide to the
"padlock closed" position
5 To remove the battery, move the fixing slide to the "open
padlock" position and gently remove the battery from
the device
Bekijk gratis de handleiding van Zodiac K3, stel vragen en lees de antwoorden op veelvoorkomende problemen, of gebruik onze assistent om sneller informatie in de handleiding te vinden of uitleg te krijgen over specifieke functies.
Productinformatie
| Merk | Zodiac |
| Model | K3 |
| Categorie | Niet gecategoriseerd |
| Taal | Nederlands |
| Grootte | 2035 MB |


