Zodiac Heat Line handleiding
Handleiding
Je bekijkt pagina 8 van 17
7
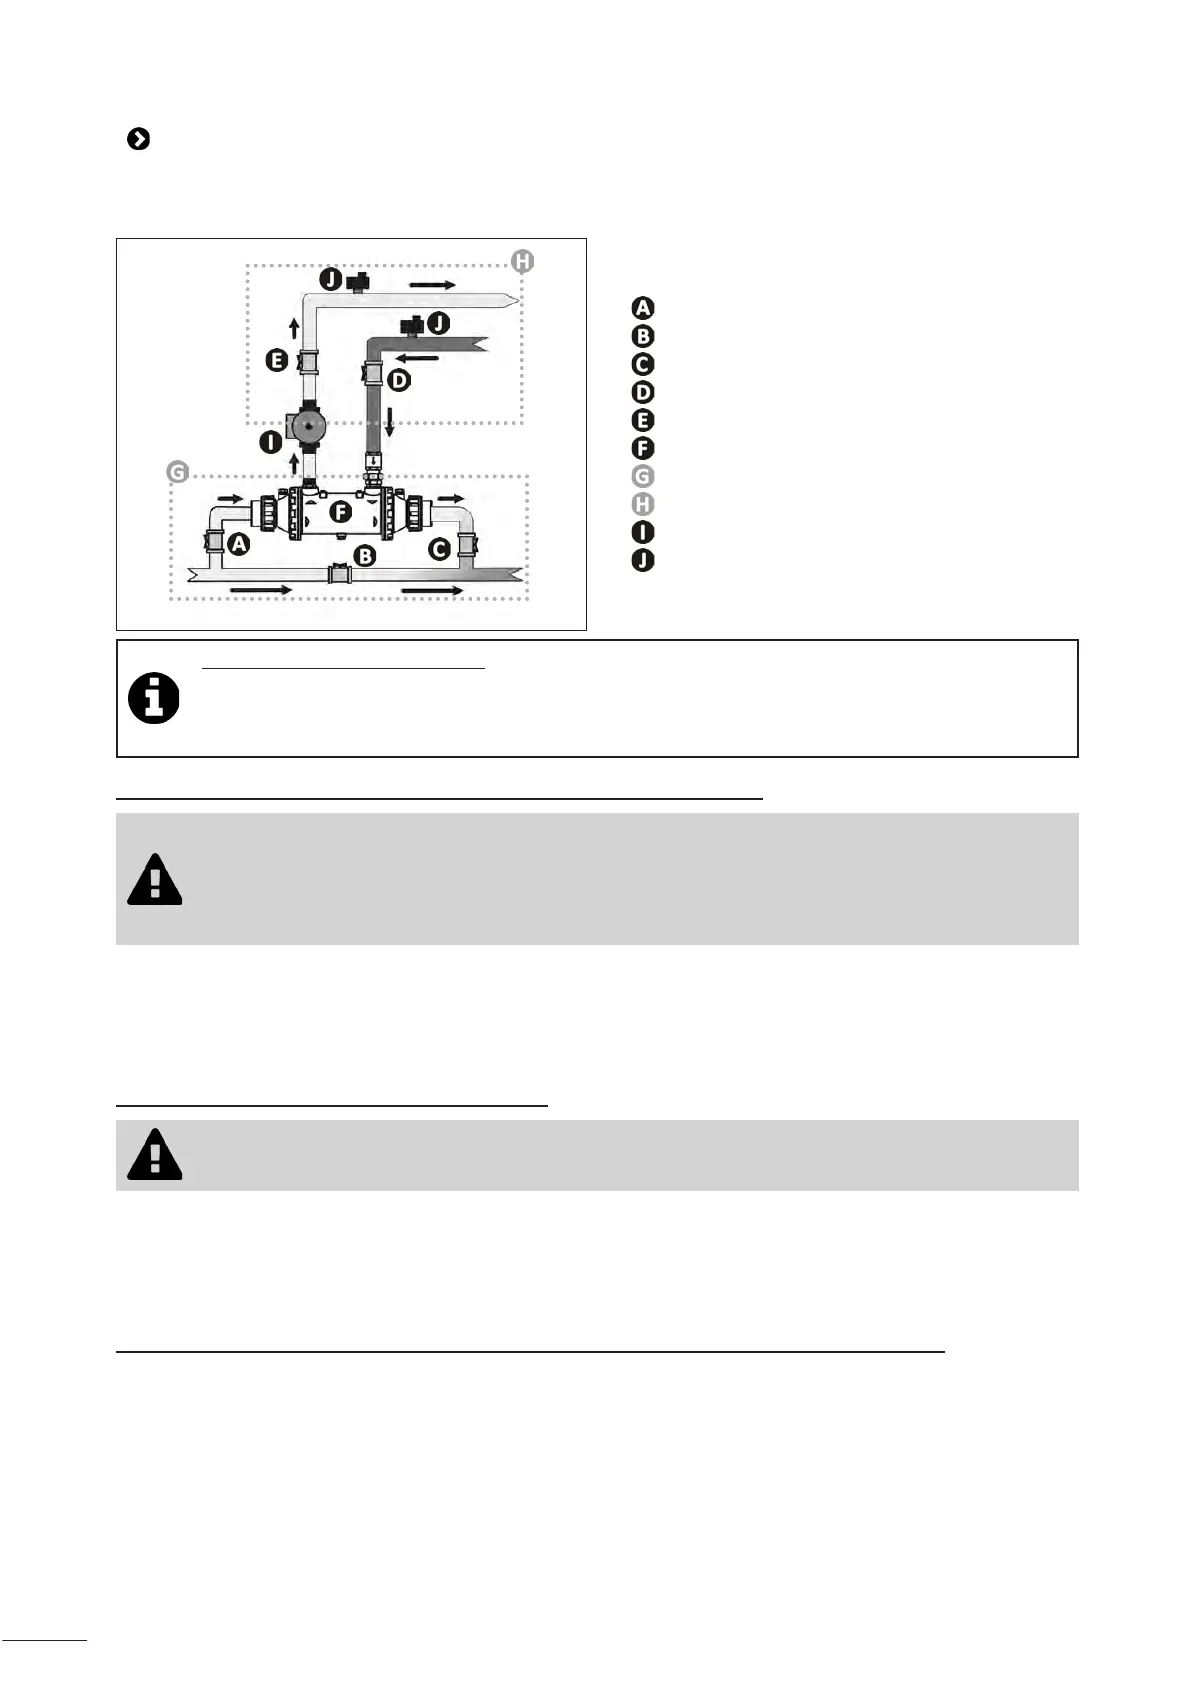
2.2 I Hydraulic connecons
• Respect the hydraulic connecon direcon (see the indicaons on the exchanger tank).
• Correctly ghten the hydraulic connecons and check for leaks.
• Check that the pipe system is cleaned before connecng anything.
: Pool water inlet valve
: Pool bypass valve
: Pool water outlet valve
: Heang water inlet valve
: Heang water outlet valve
: Exchanger body
: Pool circuit secondary)
: Heang circuit (primary)
: Circulang pump
: Automac purge
Tip: calorie exchange opmisaon
• The water from the heang source must be at constant temperature.
• Respect the water ow direcon in the exchanger. If the installaon requires it, you may reverse the
pool's water circulaon direcon in the exchanger, see § « 2.2.3 Adapng the heat exchanger to the
direcon of water ow (depending on the model) ».
2.2.1 Connecon of the heang system connecon (i.e. primary circuit)
• The primary circuit's spur must be upstream of any valves or pumps.
• Bare Heat Line: if the heang source is equipped with a circulang pump, an accumulator
or relay logic can be added to switch o the circulang pump and the heang source. If this
is not possible, provide a system to prevent any primary circuit water from returning to the
exchanger when there is no water circulang in the secondary circuit.
• The connecon must be:
- Made in insulated pipes,
- Fied with a safety valve (pressure limited to 3 bars) and a correctly-dimensioned expansion chamber,
- Use pipes ed with automac drains at their high points.
2.2.2 Pool system connecon (a.k.a. secondary)
• No 90° bend is to be directly ed to the input or the output of the exchanger.
• Leave at least 25 cm of straight pipe to prevent any chaer of the ow switch armature.
• The connecon must be made:
- Using PVC pipes Ø50 minimum,
- Via a bypass (recommended to simplify maintenance and mandatory if the water ow rate of the pool system is
greater than 22 m³/h).
2.2.3 Adapng the heat exchanger to the direcon of water ow (depending on the model)
• Remove the cover from the switch box and disconnect the regulator's two connectors to remove the cover,
• Unscrew the 4 retaining screws from the switch box's support.
• Rotate the heat exchanger and circulang pump 180 °.
• Posion and secure the switch box support using the 4 retaining screws.
• Reconnect the two connectors to the regulator.
• Reposion the switch box cover and secure it with the screw.
Bekijk gratis de handleiding van Zodiac Heat Line, stel vragen en lees de antwoorden op veelvoorkomende problemen, of gebruik onze assistent om sneller informatie in de handleiding te vinden of uitleg te krijgen over specifieke functies.
Productinformatie
| Merk | Zodiac |
| Model | Heat Line |
| Categorie | Niet gecategoriseerd |
| Taal | Nederlands |
| Grootte | 3817 MB |


