Zodiac GenSalt OT handleiding
Handleiding
Je bekijkt pagina 26 van 60
24
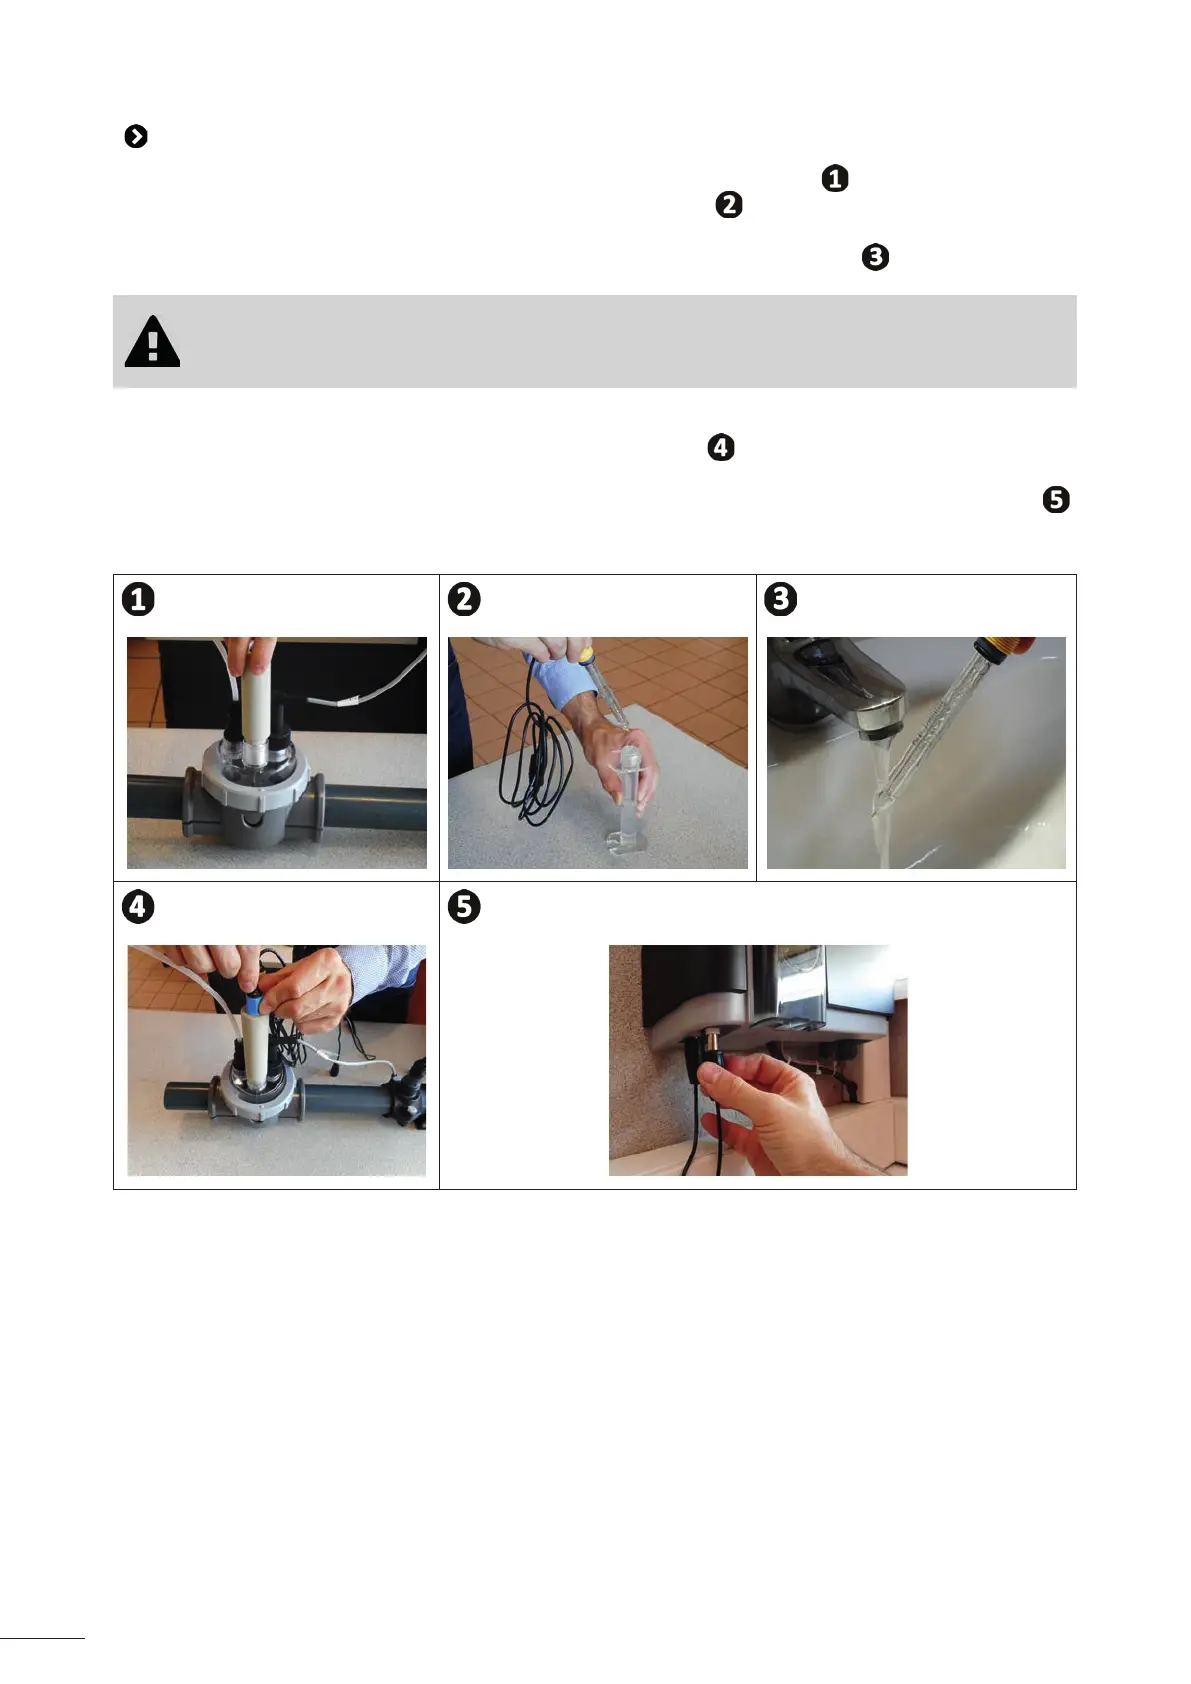
3.4 I Installing the sensors on the POD kit
• Screw the one or more threaded sensor holders onto the POD kit, see gure .
• Carefully unscrew the protec on tube from the sensor, see gure
. Keep the protec on tube for storing
the sensor over winter.
• Rinse the end of the sensor with tap water and shake o excess water, see gure .
• Never wipe the sensor using a cloth or paper ssue, as this may damage it.
• A badly-installed sensor may give false readings and cause inappropriate opera on of the
appliance. Neither the manufacturer nor the appliance shall be liable in this event.
• Screw the sensor into the sensor holder by holding the BLUE or YELLOW p in one hand and the black p
in the other hand to prevent the cable from tangling, see gure
.
• Once the sensor has been installed on the POD kit, it can be connected to the BNC socket (BLUE = pH;
YELLOW = ORP) of the pH Link or Dual Link module, see “2.5.3 Electrical connec on steps”, see gure .
• The sensor must then be calibrated, see “5.3 I Calibra ng the sensors (if an op onal “pH Link” or “Dual
Link” module has been installed)”
Bekijk gratis de handleiding van Zodiac GenSalt OT, stel vragen en lees de antwoorden op veelvoorkomende problemen, of gebruik onze assistent om sneller informatie in de handleiding te vinden of uitleg te krijgen over specifieke functies.
Productinformatie
| Merk | Zodiac |
| Model | GenSalt OT |
| Categorie | Niet gecategoriseerd |
| Taal | Nederlands |
| Grootte | 20621 MB |


