Handleiding
Je bekijkt pagina 22 van 56
22
Siena Pro Use, Care, and Installation Guide
SIENA PRO
WALL
CORE
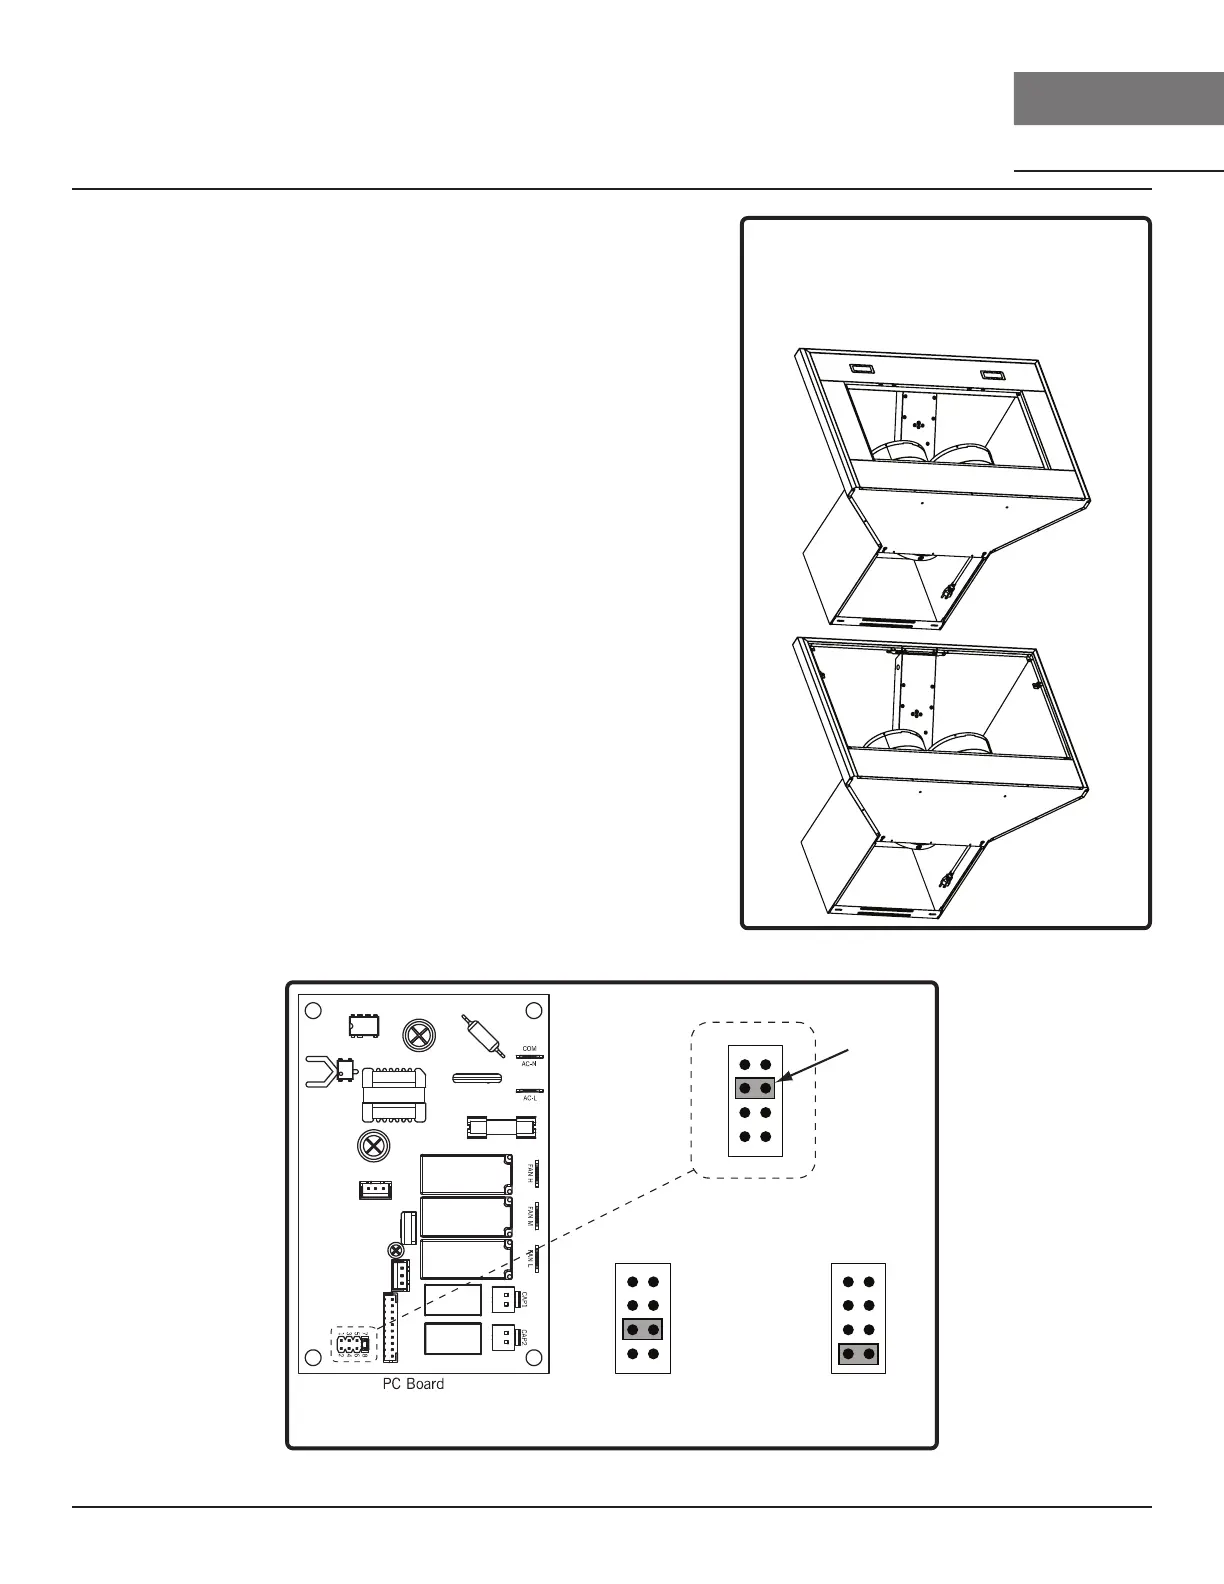
ACT™ Conversion
Enabling ACT™
To enable ACT™:
1. Before hood installation, gain access to PC board by
following the steps shown on FIG. G.
2. Change plastic jumper positioning as shown in FIG. H to
set the desired maximum blower CFM.
3. Re-install PC board and continue with hood installation.
4. Remove the appropriate foil CFM sticker included with
the hood literature and place inside the hood body
below the wiring diagram or in another clearly visible
location.
To verify if your installer enabled ACT™:
1. With hood o, hold the ON/OFF button for 3 seconds. If
ACT™ is enabled, the LCD will either display "ACT 590"
or "ACT 390". If ACT™ is disabled, the LCD will display
"ACT OFF".
2. When ACT™ is enabled, the number of blower speeds
will be reduced.
3. There should also be a foil label located inside the hood
body near the wiring diagram that indicates the blower
CFM.
FIG. G
Ju mp er 5- 6 or 7-8
DEFAULT POSITION
Default Max. Blower CFM
Ju mp er 3- 4
Max. Blower CFM
590
Ju mp er 1- 2
Jumper Pins
Plastic
Jumper
1
3
5
7
2
4
6
8
1
3
5
7
2
4
6
8
1
3
5
7
2
4
6
8
Max. Blower CFM
390
FIG. H
- PC board is located behind PC board bracket.
- Remove grease filters.
- Remove (2) screws from each side panel.
- Remove (2) screws from the light panel.
- Remove (4) screws from the PC board bracket.
- Pull down on panel to access PC board.
Bekijk gratis de handleiding van Zephyr Siena Pro ZSP-E36DS, stel vragen en lees de antwoorden op veelvoorkomende problemen, of gebruik onze assistent om sneller informatie in de handleiding te vinden of uitleg te krijgen over specifieke functies.
Productinformatie
| Merk | Zephyr |
| Model | Siena Pro ZSP-E36DS |
| Categorie | Afzuigkap |
| Taal | Nederlands |
| Grootte | 5890 MB |


