Xvive More You handleiding
Handleiding
Je bekijkt pagina 5 van 35
QUICK START GUIDE …Get Recording in 5 Minutes!
MORE YOU 12-Step Program: No one likes manuals… but at a minimum, if you read the
next 2 pages, you will be recording in 5 minutes... It’s ONLY 12 steps!
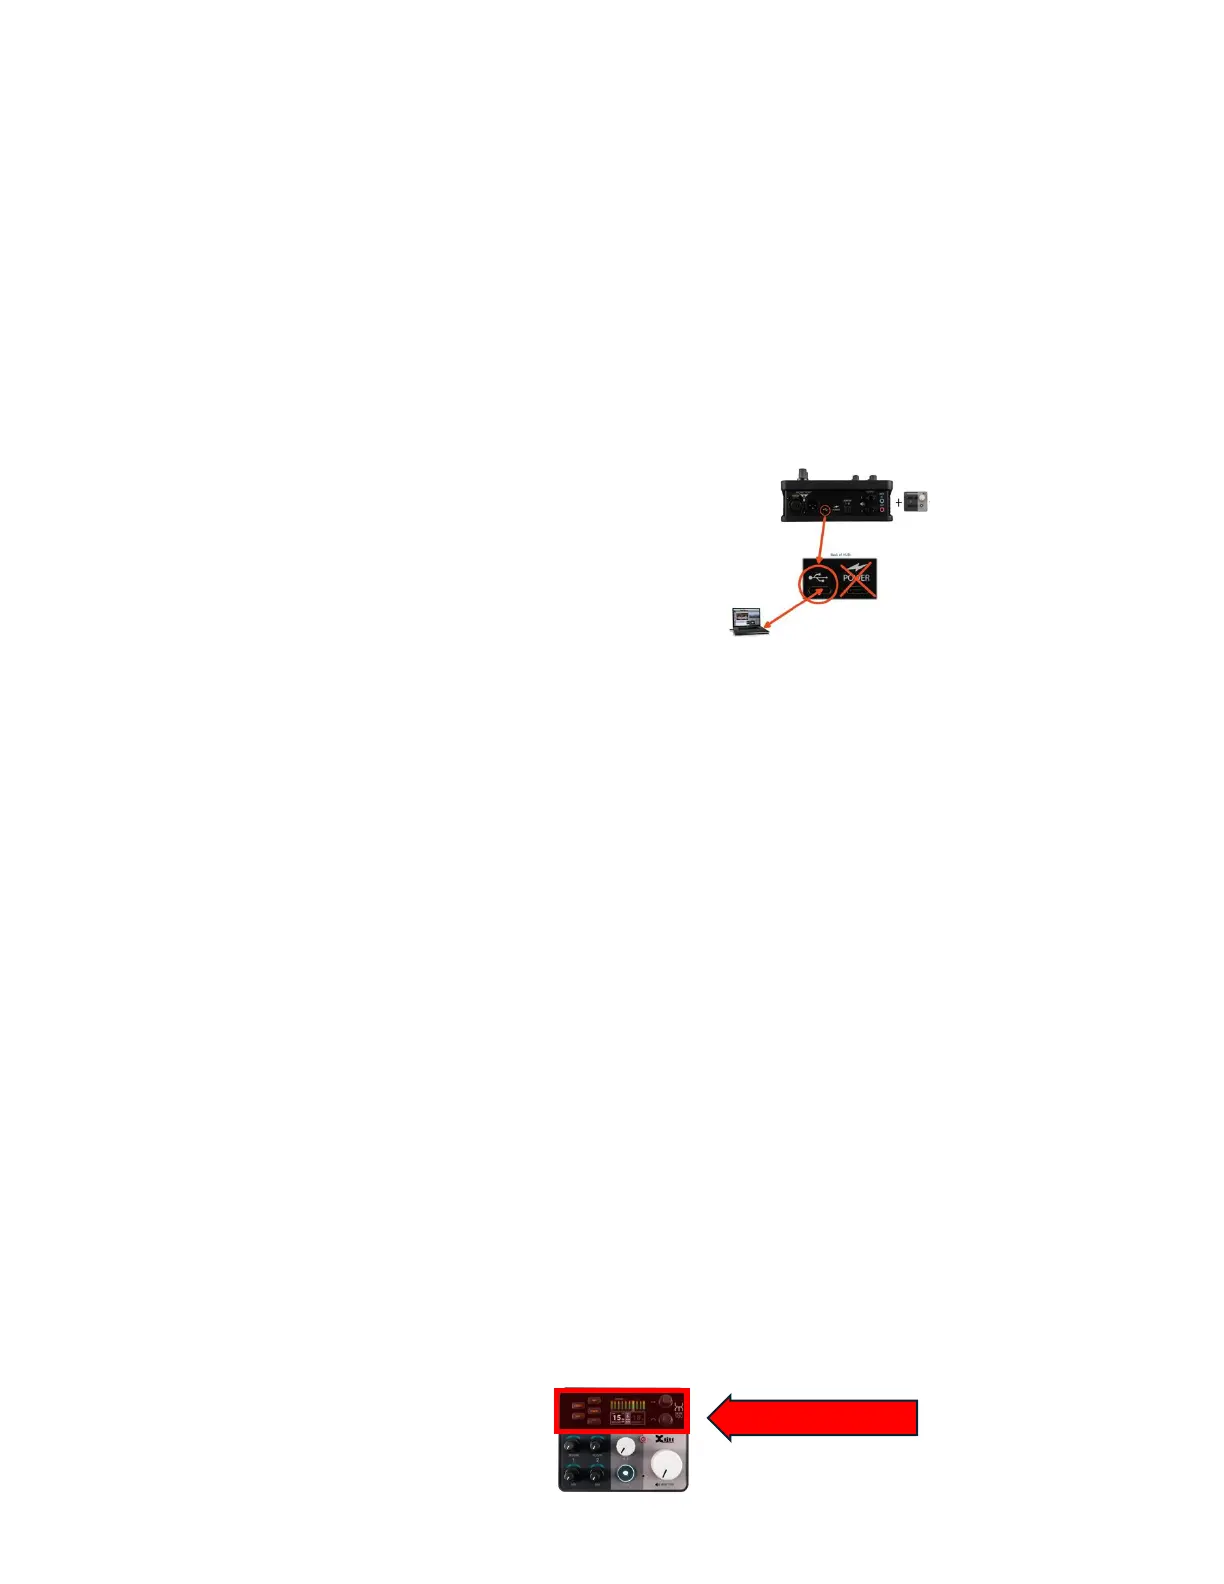
1. MORE YOU Hub – Plug in the HUB from the USB-C Port to the USB-C input of your
computer (use a USB-C to USB-A cable if your computer only has a USB-A input).
a. Power note: if you’re using ONE HUB and ONE 2X, your computer can power
both units.
b. NOTE: If you’re using a larger system such as ONE HUB and FIVE 2X units,
that’s when you’ll need a 65W USB-C power source. See pages 8 and 9 for
more details.
2. IF YOU ONLY HAVE A HUB, SKIP THIS STEP:
a. MORE PORT – THIS ONLY APPLIES if you’re using a HUB and a 2X. Plug the
male end of a standard microphone cable (up to 100’ long) into the MORE
PORT OUT on the HUB. Then, plug the female end of the cable into the MORE
PORT IN on the MORE YOU 2X/4X/8X expansion unit.
b. NOTE: Since the cable is carrying power as well as audio, the output plug
of the MORE PORT is female (not male)—the opposite of standard audio
wiring, which has the signal traveling from the female end of the cable to the
male end. See page 12 for more info.
3. Studio Speakers – If you have studio monitor speakers, connect them to the ¼” TRS
L and R outputs on the back of the HUB. You will need either TRS-to-TRS or TRS-to-
XLR cables, depending on your speaker inputs.
4. Studio Speaker Level – Use the BIG KNOB (with the word “Monitors” below) to
adjust the volume of your studio speakers. Always start with the Monitors knob all
the way counterclockwise (all the way down), then slowly bring it up.
5. Headphones – Plug your studio headphones (or in-ear monitors) into the
Headphone jack on the front of the HUB. Both ¼” and ⅛” jacks are provided.
6. Input Source – Plug in your microphone and/or instrument (guitar, bass, keyboard,
etc.). Note that the jacks are “combo style”, so they accept either a ¼” or XLR input.
7. DAW – In your DAW of choice (Pro Tools, Ableton, Logic, Cubase, Studio One, etc.),
you will need to create a track. You will also need to set the track’s INPUT to MORE
YOU INPUT 1, and you will want to set the output of that track to MORE YOU OUTPUT
1 and 2. See your DAW manual for specic details.
a. We highly recommend that you eventually name the INPUTS and
OUTPUTS in your DAW. See Page 28 and 29.
8. Top Section of HUB – this is used for Preamp functions, and headphone mix
functions.
TOP SECTION
Bekijk gratis de handleiding van Xvive More You, stel vragen en lees de antwoorden op veelvoorkomende problemen, of gebruik onze assistent om sneller informatie in de handleiding te vinden of uitleg te krijgen over specifieke functies.
Productinformatie
| Merk | Xvive |
| Model | More You |
| Categorie | Niet gecategoriseerd |
| Taal | Nederlands |
| Grootte | 11327 MB |


