Handleiding
Je bekijkt pagina 8 van 27
NOTE: Rolling capillary tube up will allow clearance
to
turn/rotate thermostat valve assembly off manifold.
8. Disconnect thermostat valve assembly
connections.
A. Gas outlet to burner (1,
Fig. 19).
B.
Thermocouple to oven burner. (2,
Fig. 19)
Fig. 19
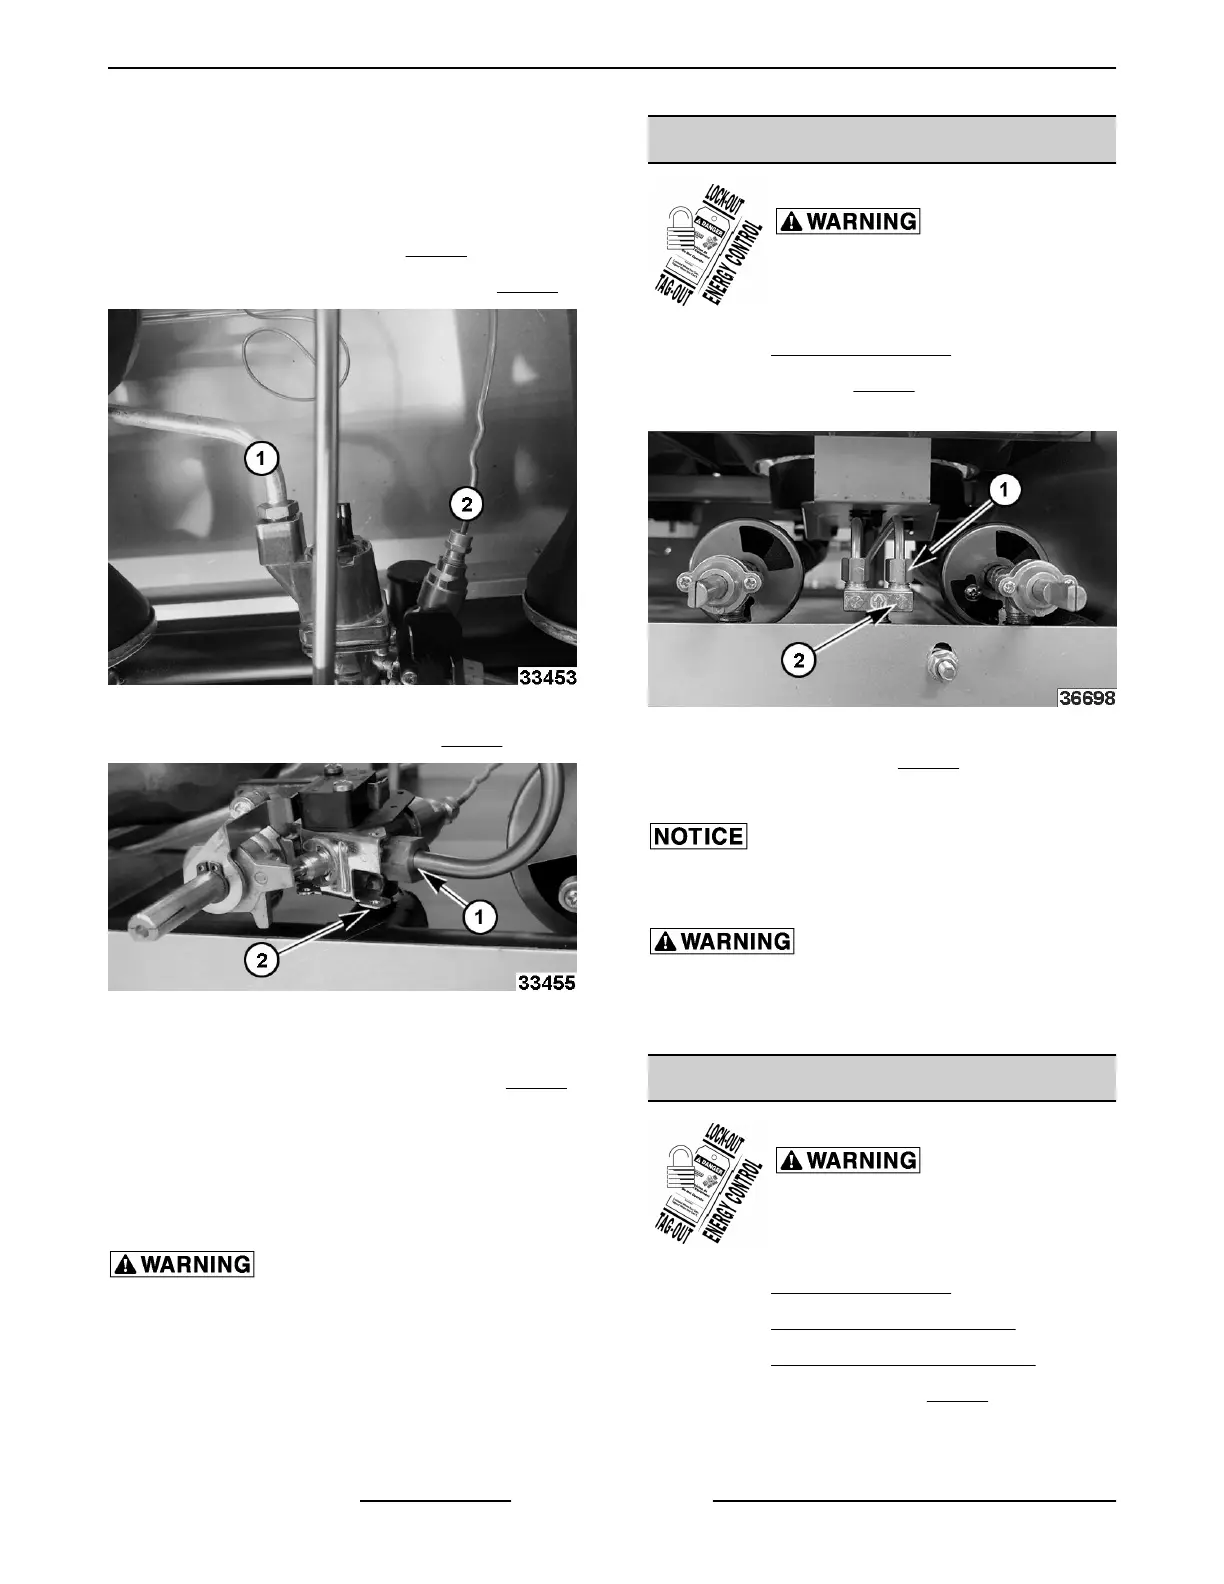
9. Disconnect gas outlet to pilot (1, Fig. 20).
Fig. 20
10.
Roll capillary tube up.
11. Unscrew thermostat valve assembly (2,
Fig. 20)
off manifold.
NOTE: Depending on range options, some will have
additional valves on either side that may need
removed for clearance to remove thermostat valve.
12.
Reverse procedure to install.
All gas joints disturbed during servicing must be
checked for leaks. Check with a soap and water
solution (bubbles). Do not use an open flame.
TOP BURNER PILOT VALVE
Shut off the gas before servicing the
unit and follow lockout / tagout
procedures.
1.
Remove
MANIFOLD COVER.
2.
Remove fitting (1,
Fig. 21) securing pilot tube to
pilot valve.
Fig. 21
3. Unscrew pilot valve (2, Fig. 21) from manifold.
4. Reverse procedure to install.
Do not over tighten pilot valve or damage to the
threads may occur.
All gas joints disturbed during servicing must be
checked for leaks. Check with a soap and water
solution (bubbles). Do not use an open flame.
TOP BURNER CONTROL VALVE
Shut off the gas before servicing the
unit and follow lockout / tagout
procedures.
1. Remove MANIFOLD COVER.
2. Remove TOP BURNER ASSEMBLY.
3. Remove TOP BURNER PILOT VALVE.
4. Disconnect pilot tubing (1, Fig. 22) from
thermostat assembly for clearance if needed.
WX RANGE - 2. REMOVAL AND REPLACEMENT PARTS
F45992 (1123) Page 8 of 27
Bekijk gratis de handleiding van Wolf WX36, stel vragen en lees de antwoorden op veelvoorkomende problemen, of gebruik onze assistent om sneller informatie in de handleiding te vinden of uitleg te krijgen over specifieke functies.
Productinformatie
| Merk | Wolf |
| Model | WX36 |
| Categorie | Fornuis |
| Taal | Nederlands |
| Grootte | 11749 MB |


