Whirlwind PL-PM1RJK1 handleiding
Handleiding
Je bekijkt pagina 3 van 4
System Reset:
The PL-PM1 is intended to be tolerant to interference
and EMI. The system has a watchdog timer such that if
measurements stop being displayed, the system will
automatically reset itself and resume measurement.
PL-PM1 Calibration:
Calibration information is held internally in a non-
volatile memory. This is set at the factory and there is no
provision for field calibration. When powering up, if for
any reason calibration information is lost, the system
will display “EEP Err” in the display. The meter will still
function except that the accuracy will be reduced to 5%.
Equipment Ratings:
Supply Voltage Range: 108-229 VAC
Power draw: 10 Watts maximum
Frequency Range: 40 to 100 Hz
Environmental Conditions:
Ÿ Indoor Use
Ÿ Altitude up to 2000 meters
Ÿ Temp range 5° C to 40° C
Ÿ Maximum relative humidity 80% for temperatures
up to 31° C decreasing linearly to 50% relative
humidity at 40° C
Ÿ Mains supply voltage fluctuations up to ±10% of the
nominal voltage
Ÿ Overvoltage Category III; Distribution level, fixed
installation
Ÿ Pollution Degree 2
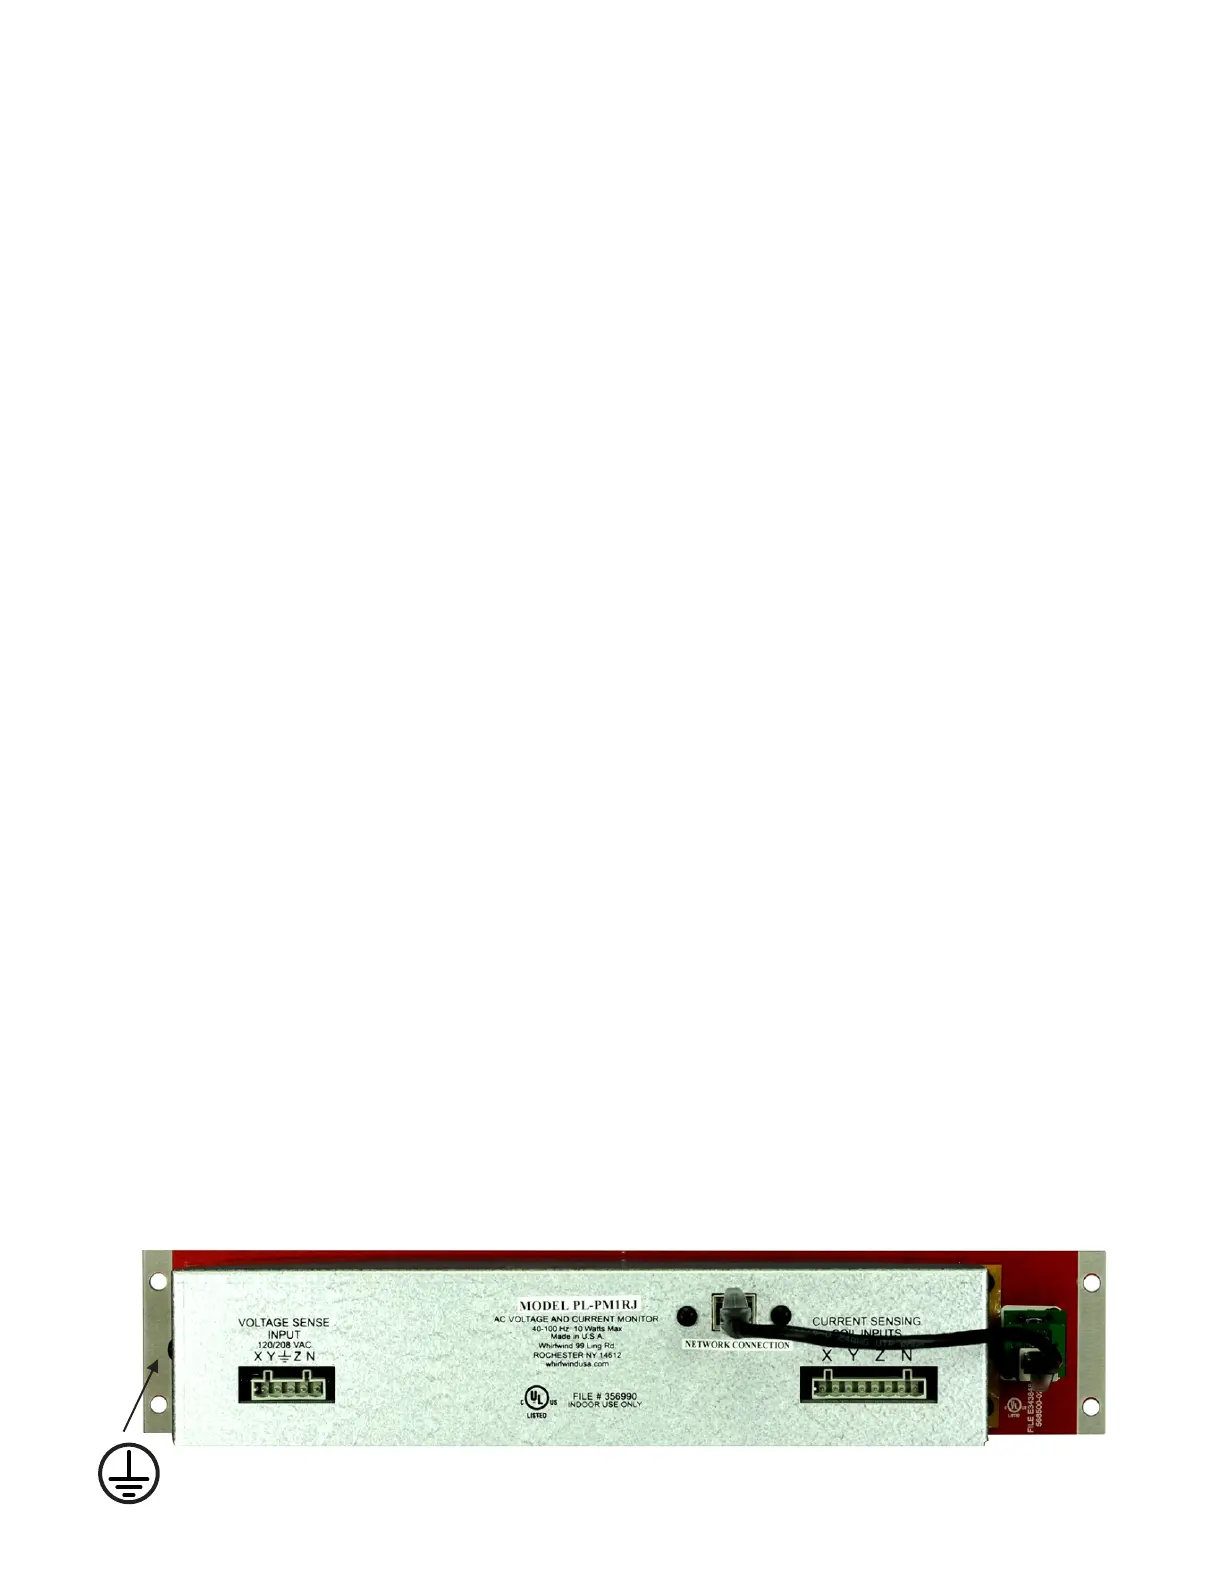
Equipment Installation:
Connections to the PL-PM1 are made through pluggable Wago Eurostyle connectors. The voltage sensing input is a 5
pin connector with the Earth contact mating first and the current sensing input is an eight pin connector. The connectors
are prewired to harnessing for connection to the system AC input terminals and the current sensing coils. Maximum
working voltage is 229 VAC and the PL-PM1 is rated at measurement category III.
Ÿ Confirm that all power is disconnected from the system.
Ÿ Disconnect device is considered a circuit breaker that is part of facility wiring per NEC.
Ÿ Install a current coil around each hot leg wire and the neutral wire.
Ÿ Connect the four pair current coil wiring harness to the coils following the labels on the wire pairs. It is
recommended to connect the red and black in a consistent fashion on all the coils.
Ÿ Connect the 5 conductor voltage wiring harness to the incoming line connectors following the color code; green
is protective earth ground, white is neutral, black, red and blue are the hot legs.
Ÿ Connect a Protective Earth (Ground) wire from the #10-32 stud on the rear of the chassis to the Green Protective
Earth (Ground) input connection.
Ÿ Connect the Wago 5 pin and 8 pin Voltage and Current connectors to the PL-PM1.
Ÿ Securely attach the PL-PM1 to the rack rails of the enclosure.
PROTECTIVE EARTH GROUND STUD
whirlwind PL-PM1RJ Power Meter
Rear view of meter showing connection points for voltage, current and earth
INSTALLATION IS INTENDED TO BE PERFORMED ONLY BY QUALIFIED PERSONNEL
Bekijk gratis de handleiding van Whirlwind PL-PM1RJK1, stel vragen en lees de antwoorden op veelvoorkomende problemen, of gebruik onze assistent om sneller informatie in de handleiding te vinden of uitleg te krijgen over specifieke functies.
Productinformatie
| Merk | Whirlwind |
| Model | PL-PM1RJK1 |
| Categorie | Niet gecategoriseerd |
| Taal | Nederlands |
| Grootte | 2012 MB |


