Handleiding
Je bekijkt pagina 6 van 72
6
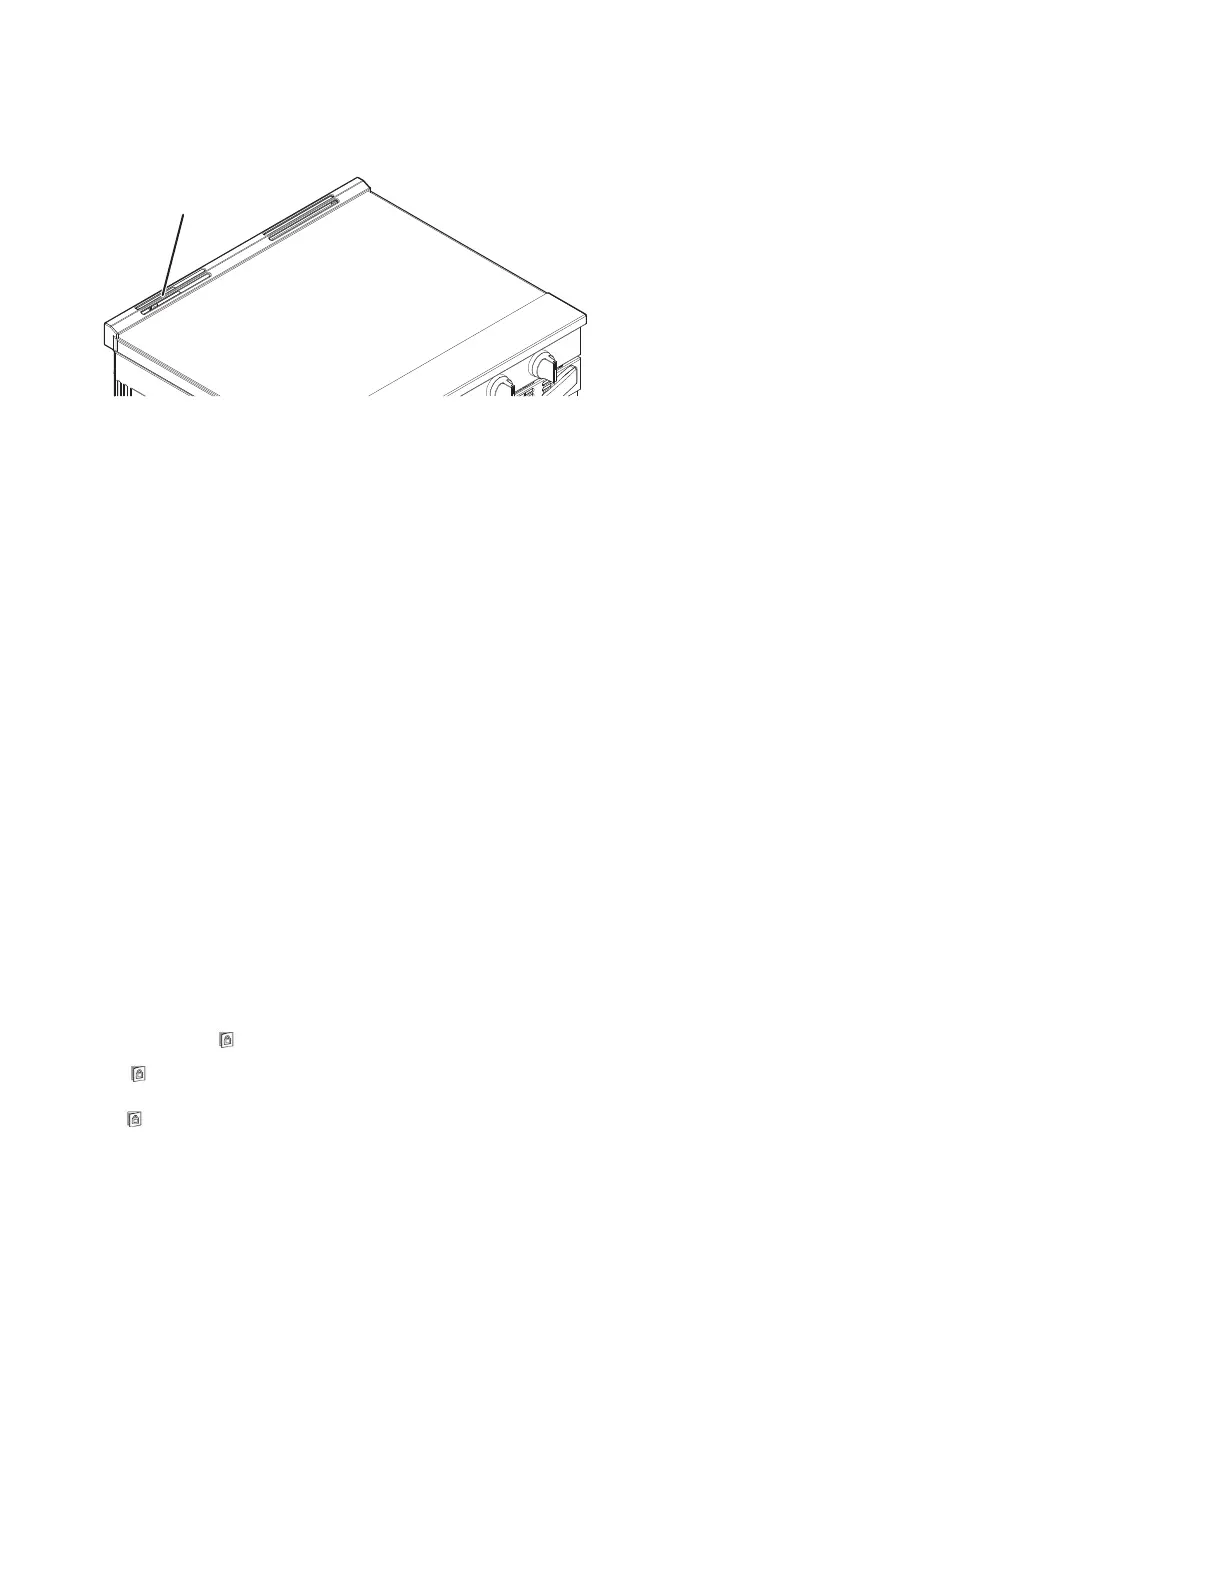
Do not block the oven vent(s) during the Self-Cleaning cycle. Air
must be able to move freely. Depending on your model, see “Oven
Vent” or “Oven Vents” section in your Quick Start Guide.
A
A. Oven vent
Do not clean, rub, damage, or move the oven door gasket.
Prepare Range:
� Remove the broiler pan, grid, cookware and bakeware, all
cooking utensils, oven racks, aluminum foil, and, on some
models, the temperature probe from the oven.
� Use a damp cloth to clean inside door edge and the 1
1
/
2
"
(3.8 cm) area around the inside oven cavity frame, being
certain not to move or bend the gasket.
� Wipe out any loose soil to reduce smoke and avoid damage.
At high temperatures, foods react with porcelain. Staining,
etching, pitting, or faint white spots can result. This will not
affect cooking performance.
� Remove plastic items from the cooktop because they may
melt.
� Remove all items from the storage drawer.
How the Cycle Works
IMPORTANT: When cooktop is in use, the Self-Cleaning cycle will
be disabled. When the Self-Cleaning cycle is in use, the cooktop
will be locked.
To Self-Clean:
Steam Clean (on some models)
IMPORTANT: Do not use oven cleaners or any other additives
with Steam Clean.
The Steam Clean feature is designed for light oven cavity bottom
cleaning. Use the Steam Clean feature as soon as possible after
spills occur. The longer a spill sits and dries in the oven, the more
difficult it may be to remove.
Allow the range to cool to room temperature before using the
Steam Clean feature.
� Remove all racks and accessories from the oven cavity.
� For best results, pour 12 oz (355 mL) of distilled or
filtered
water onto the oven bottom.
� The Steam Clean feature will take a total of 40 minutes. “End”
will appear in the display at the end of the cycle.
IMPORTANT: Since the water in the oven bottom is hot, do not
open the oven door during the Steam Clean cycle.
Press the Cancel keypad at any time to end the cycle. The display
will return to the time of day.
Helpful Hints
� Once the Steam Clean cycle is complete, remove all remaining
water and debris in the bottom of the oven with a sponge or
cloth.
� Wipe any remaining moisture from the oven door interior, oven
cavity interior sides, and cooktop.
� Use a soft brush or nylon scrubber to wipe the oven interior.
This may help with more stubborn stains.
� If any soil remains, run a second Steam Clean cycle to help
loosen debris for easier removal.
� Use the Steam Clean on small spills such as cheese or sauce
from pizza or snacks, or drips from casseroles.
� Food spills containing sugar, proteins or starches may require
vigorous scrubbing to remove most of the debris.
� It is recommended to use distilled or filtered water, as tap
water may leave mineral deposits on the oven bottom. Use a
cloth soaked with vinegar or lemon juice to remove any
mineral deposits that may be left after the Steam Clean cycle.
IMPORTANT: The heating and cooling of porcelain on steel in the
oven may result in discoloring, loss of gloss, hairline cracks, and
popping sounds.
The Self-Cleaning cycle uses very high temperatures, burning soil
to a powdery ash.
Once the oven has completely cooled, remove ash with a damp
cloth. To avoid breaking the glass, do not apply a cool damp cloth
to the inner door glass before it has completely cooled.
To stop the Self-Cleaning cycle at any time, press CANCEL or
OFF/CANCEL. If the temperature is too high, the oven door will
remain locked and a message appears on the screen regarding
oven cooling and “
” icon will be displayed.
When “ ” shows in the display, the door of the oven cannot be
opened. To avoid damage to the door, do not force the door open
when “
” is displayed.
Before self-cleaning, make sure the door is completely closed or
the door will not lock and the Self-Cleaning cycle will not begin.
Once the cleaning temperature has been reached, the electronic
control requires a 24 hour delay before another Self-Cleaning
cycle can be started.
The oven light will not function during the Self-Cleaning cycle.
Electronic Oven Control with Adjustable Clean Time (on
some models)
The Self-Cleaning cycle is time adjustable between 2 hours
and 4 hours. Suggested clean times are 2 hours for light
soil, 3 hours for medium soil, and 4 hours for heavy soil. The
door will unlock once the oven cools.
1. Press CLEAN SELF/STEAM.
2. Press the “<” or “>” to select cleaning type.
3. Press CONFIRM/MENU.
4. Press the “<” or “>” to select cleaning duration.
5. Press CONFIRM/MENU.
6. Press START.
NOTE: The oven door will automatically lock. The Door Locked
and Clean indicator lights will be displayed. The time remaining
will also be displayed.
7. When the Self-Cleaning cycle is complete and the oven cools,
the Door Locked and Clean indicator lights will turn off.
8. When the oven is completely cooled, remove ash with a damp
cloth.
NOTE: To exit the Self-Cleaning cycle before completed, press
CANCEL or OFF/CANCEL. The door will unlock once the oven
cools.
Bekijk gratis de handleiding van Whirlpool WSES7530RV, stel vragen en lees de antwoorden op veelvoorkomende problemen, of gebruik onze assistent om sneller informatie in de handleiding te vinden of uitleg te krijgen over specifieke functies.
Productinformatie
| Merk | Whirlpool |
| Model | WSES7530RV |
| Categorie | Fornuis |
| Taal | Nederlands |
| Grootte | 11324 MB |


