Handleiding
Je bekijkt pagina 12 van 40
12
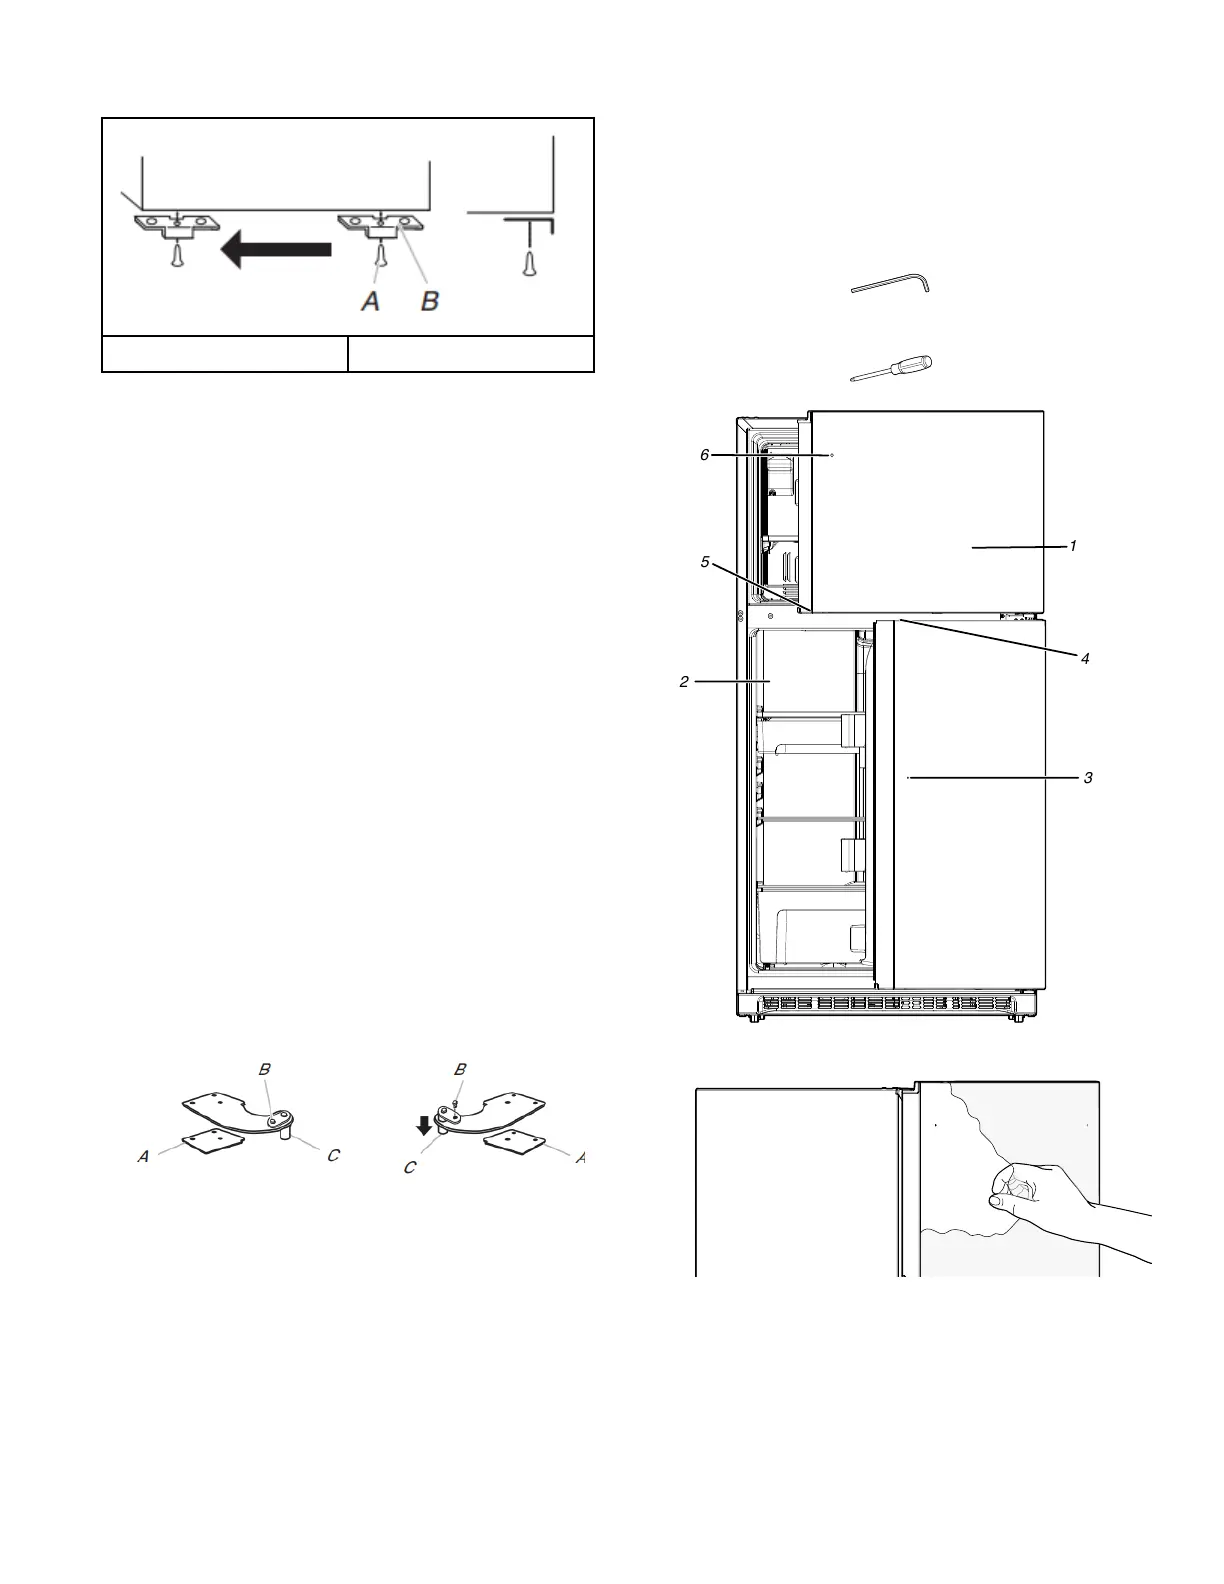
4. Remove door stop. Move to opposite side of refrigerator door
as shown below.
A. Door Stop Screw B. Door Stop
5. Refer to image in Step 1. Install refrigerator handle again on
opposite side of the refrigerator door.
6. Tighten all screws. Set aside refrigerator door until bottom
hinge is installed on refrigerator.
Replace Doors and Hinges
NOTE: Graphic may be reversed if door swing is reversed.
1. Replace the parts for the bottom hinge as shown. Tighten
screws. Replace the refrigerator door.
NOTE: Provide additional support for the doors while the
hinges are being moved. Do not depend on the door magnets
to hold the doors in place while you are working.
2. Measure the distance from the bottom of the refrigerator door
to the floor. The distance should be approximately 3
1
/
2
"
(88 mm).
NOTE: If necessary, loosen the bottom hinge, without
removing the screws, adjust the door to the correct height and
fully tighten the screws.
3. Assemble the parts for the center hinge as shown and tighten
all screws. See Center Hinge graphic. Replace the freezer
door.
4. Assemble the parts for the top hinge as shown. See Top Hinge
graphic. Do not tighten screws completely.
Contour Door Models Only:
� Remove the screw attaching the hinge pin to the hinge.
Turn the hinge over so that it is pointing in the opposite
direction.
� Place the plastic spacer beneath the hinge so that it will be
between the hinge and the cabinet, making sure the holes
are aligned.
A. Plastic spacer
B. Hinge pin
screw
C. Hinge pin
� Fasten the Top Hinge to the opposite side of the cabinet,
inserting the screws only halfway, so you will be able to
replace and align the freezer door later.
5. Line up the doors so that the bottom of the freezer door aligns
evenly with the top of the refrigerator door. Tighten all screws.
NOTE: The distance between the doors should be
approximately 5/8" (16 mm).
Install Doors Handles
Tools Required
Parts Supplied:
� Door handles (2)
� Screws (4 or 6 depending n the model)
� Set screws (2)
Tools Supplied:
� 1/8" Hex key (1) Keep for future use. (depending on the model)
Tools Needed:
� #2 Phillips Screwdriver
1
4
6
3
2
5
1. Remove the film from the door.
Bekijk gratis de handleiding van Whirlpool WRTX5328PB, stel vragen en lees de antwoorden op veelvoorkomende problemen, of gebruik onze assistent om sneller informatie in de handleiding te vinden of uitleg te krijgen over specifieke functies.
Productinformatie
| Merk | Whirlpool |
| Model | WRTX5328PB |
| Categorie | Koelkast |
| Taal | Nederlands |
| Grootte | 7620 MB |


