Handleiding
Je bekijkt pagina 17 van 72
17
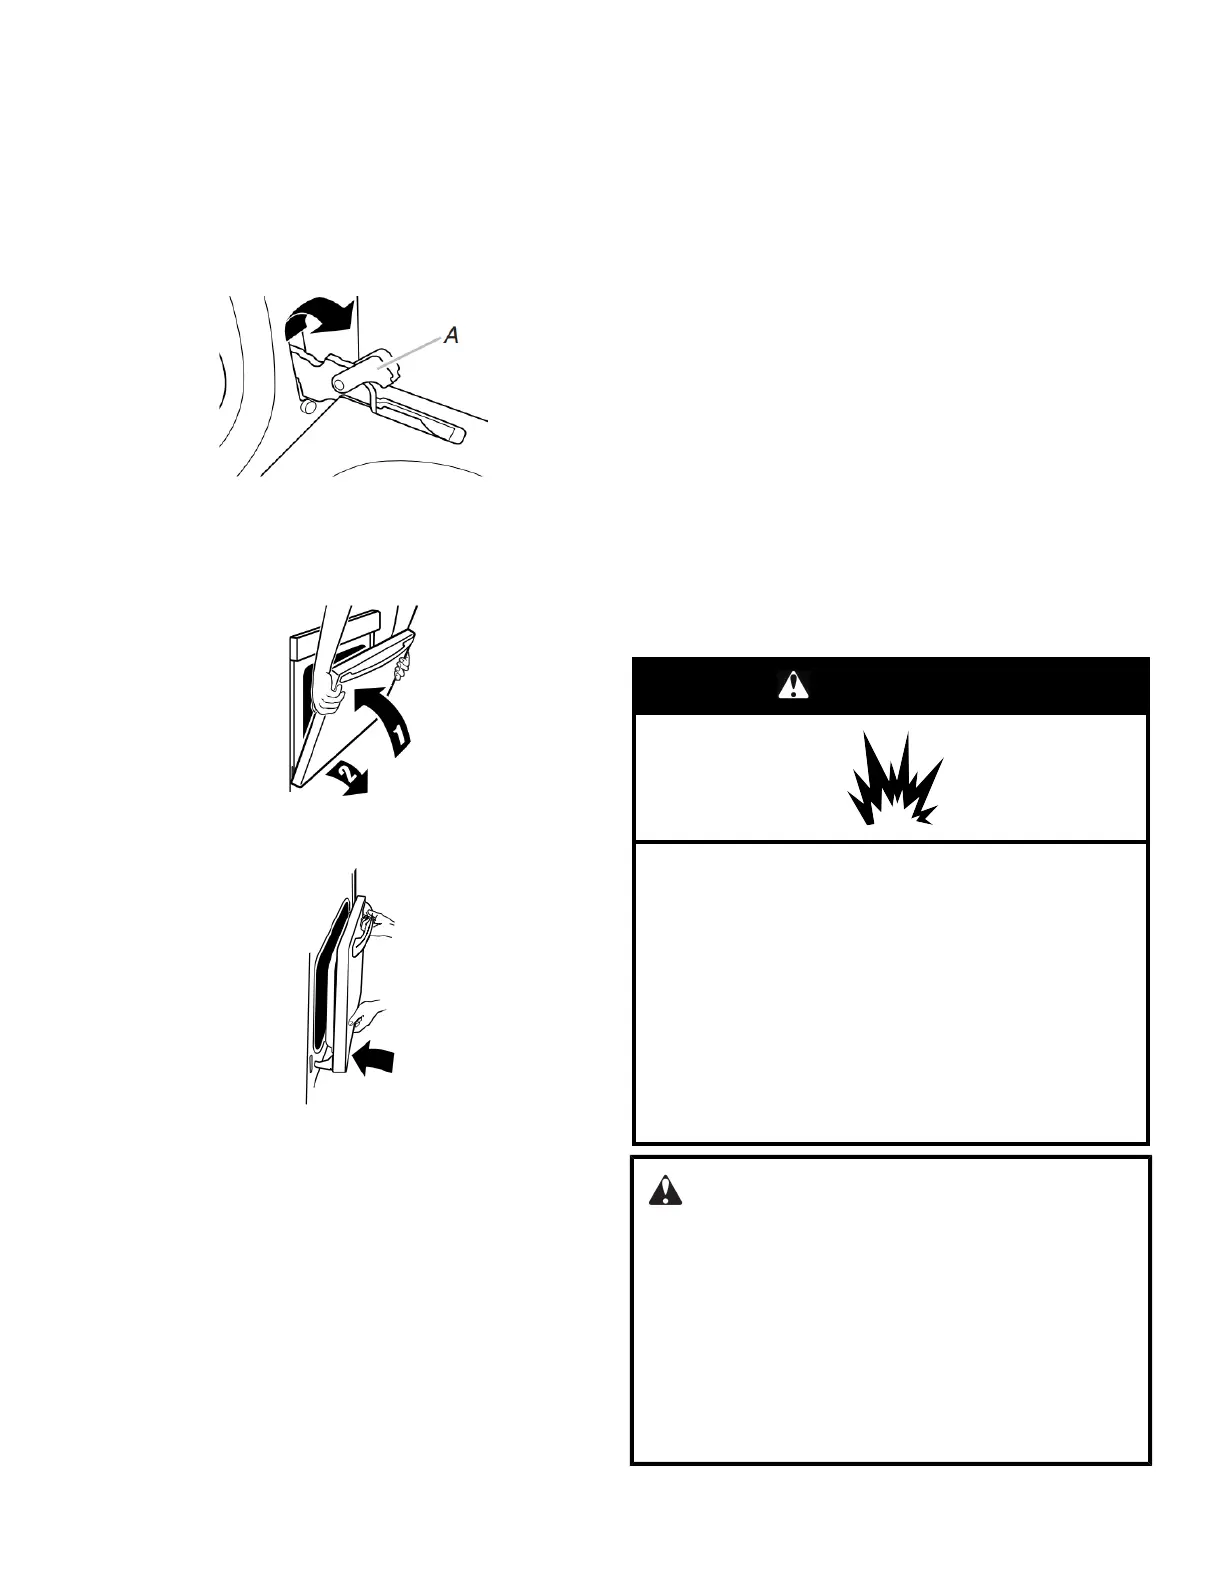
Oven Door
For normal range use, it is not suggested to remove the oven
door. However, if removal is necessary, make sure the oven is
OFF and cool. Then, follow these instructions. The oven door is
heavy.
To Remove:
1. Open oven door all the way.
2. Pinch the hinge latch between two fingers and pull forward.
Repeat on other side of oven door.
A. Hinge Latch
3. Close the oven door as far as it will shut.
4. Lift the oven door while holding both sides.
Continue to push the oven door closed and pull it away from
the oven door frame.
To Replace:
1. Insert both hanger arms into the door.
2. Open the oven door.
You should hear a click as the door is set into place.
3. Move the hinge levers back to the locked position. Check that
the door is free to open and close. If it is not, repeat the
removal and installation procedures.
Complete Installation
1. Check that all parts are now installed. If there is an extra part,
go back through the steps to see which step was skipped.
2. Check that you have all of your tools.
3. Dispose of/recycle all packaging materials.
4. Check that the range is level. See the “Level Range” section.
5. Use a mild solution of liquid household cleaner and warm
water to remove waxy residue caused by shipping material.
Dry thoroughly with a soft cloth. For more information, read
the “Range Maintenance and Care” section.
6. Read the Quick Start Guide and online Control Guide.
7. Turn on surface burners and oven. See the Quick Start Guide
and online Control Guide for specific instructions on range
operation.
If Range Does Not Operate, Check the Following:
� Household fuse is intact and tight; or circuit breaker has not
tripped.
� Range is plugged into a grounded 3-prong outlet.
� Gas pressure regulator shutoff valve is in the “on” position.
� Electrical supply is connected.
� See the online “Troubleshooting” section.
8. When the range has been on for 5 minutes, check for heat. If
the range is cold, turn off the range and check that the gas
supply line shut-off valve is open.
� If the gas supply line shut-off valve is closed, open it, and then
repeat the 5 minute test as outlined above.
� If the gas supply line shutoff valve is open, press the CANCEL
button on the oven control panel and contact a qualified
technician.
If You Need Assistance or Service:
Please reference the Quick Start Guide for contact information.
GAS CONVERSIONS
Gas conversions from Natural gas to Propane gas or from
Propane gas to Natural gas must be done by a qualified installer.
WARNING
Explosion Hazard
Use a new CSA International approved gas supply line.
Install a shut-off valve.
Securely tighten all gas connections.
If connected to propane, have a qualified person make
sure gas pressure does not exceed 14ʺ (36 cm) water
column.
Examples of a qualified person include: licensed heating
personnel, authorized gas company personnel, and
authorized service personnel.
Failure to do so can result in death, explosion, or fire.
WARNING:
This conversion kit shall be installed by a qualified
service agency in accordance with the manufacturer’s
instructions and all applicable codes and requirements
of the authority having jurisdiction. If the information in
these instructions is not followed exactly, a fire, an
explosion or production of carbon monoxide may result
causing property damage, personal injury or loss of life.
The qualified service agency is responsible for the
proper installation of this kit. The installation is not
proper and complete until the operation of the converted
appliance is checked as specified in the manufacturer’s
instructions supplied with the kit.
Bekijk gratis de handleiding van Whirlpool WFGS4530SV, stel vragen en lees de antwoorden op veelvoorkomende problemen, of gebruik onze assistent om sneller informatie in de handleiding te vinden of uitleg te krijgen over specifieke functies.
Productinformatie
| Merk | Whirlpool |
| Model | WFGS4530SV |
| Categorie | Fornuis |
| Taal | Nederlands |
| Grootte | 14390 MB |


