Handleiding
Je bekijkt pagina 1 van 2
W11679965B
QUICK START GUIDE WHIRLPOOL
®
DRYER
OPERATING INSTRUCTIONS
WARNING
Fire Hazard
No washer can completely remove oil.
Do not dry anything that has ever had any type of
oil on it (including cooking oils).
Items containing foam, rubber, or plastic must be
dried on a clothesline or by using an Air Cycle.
Failure to follow these instructions can result in
death or fire.
WARNING
Explosion Hazard
Keep flammable materials and vapors, such as
gasoline, away from dryer.
Do not dry anything that has ever had anything
flammable on it (even after washing).
Failure to follow these instructions can result in
death, explosion, or fire.
WARNING: To reduce the risk of fire, electric shock, or injury to
persons, read the IMPORTANT SAFETY INSTRUCTIONS, located
in your appliance’s Owner’s Manual, before operating this
appliance.
Step 1. Clean lint
screen
Step 2. Load clothes
Step 3. Press Power Button Step 4. Select the desired
cycle for your load*
Step 5. Adjust cycle settings and options, if desired
Step 6. Press, hold, and release Start Button
NOTE: Start button must be held for 1 second to
start cycle. Once the bottom line of lights left of
the Start button are illuminated, release the Start
button.
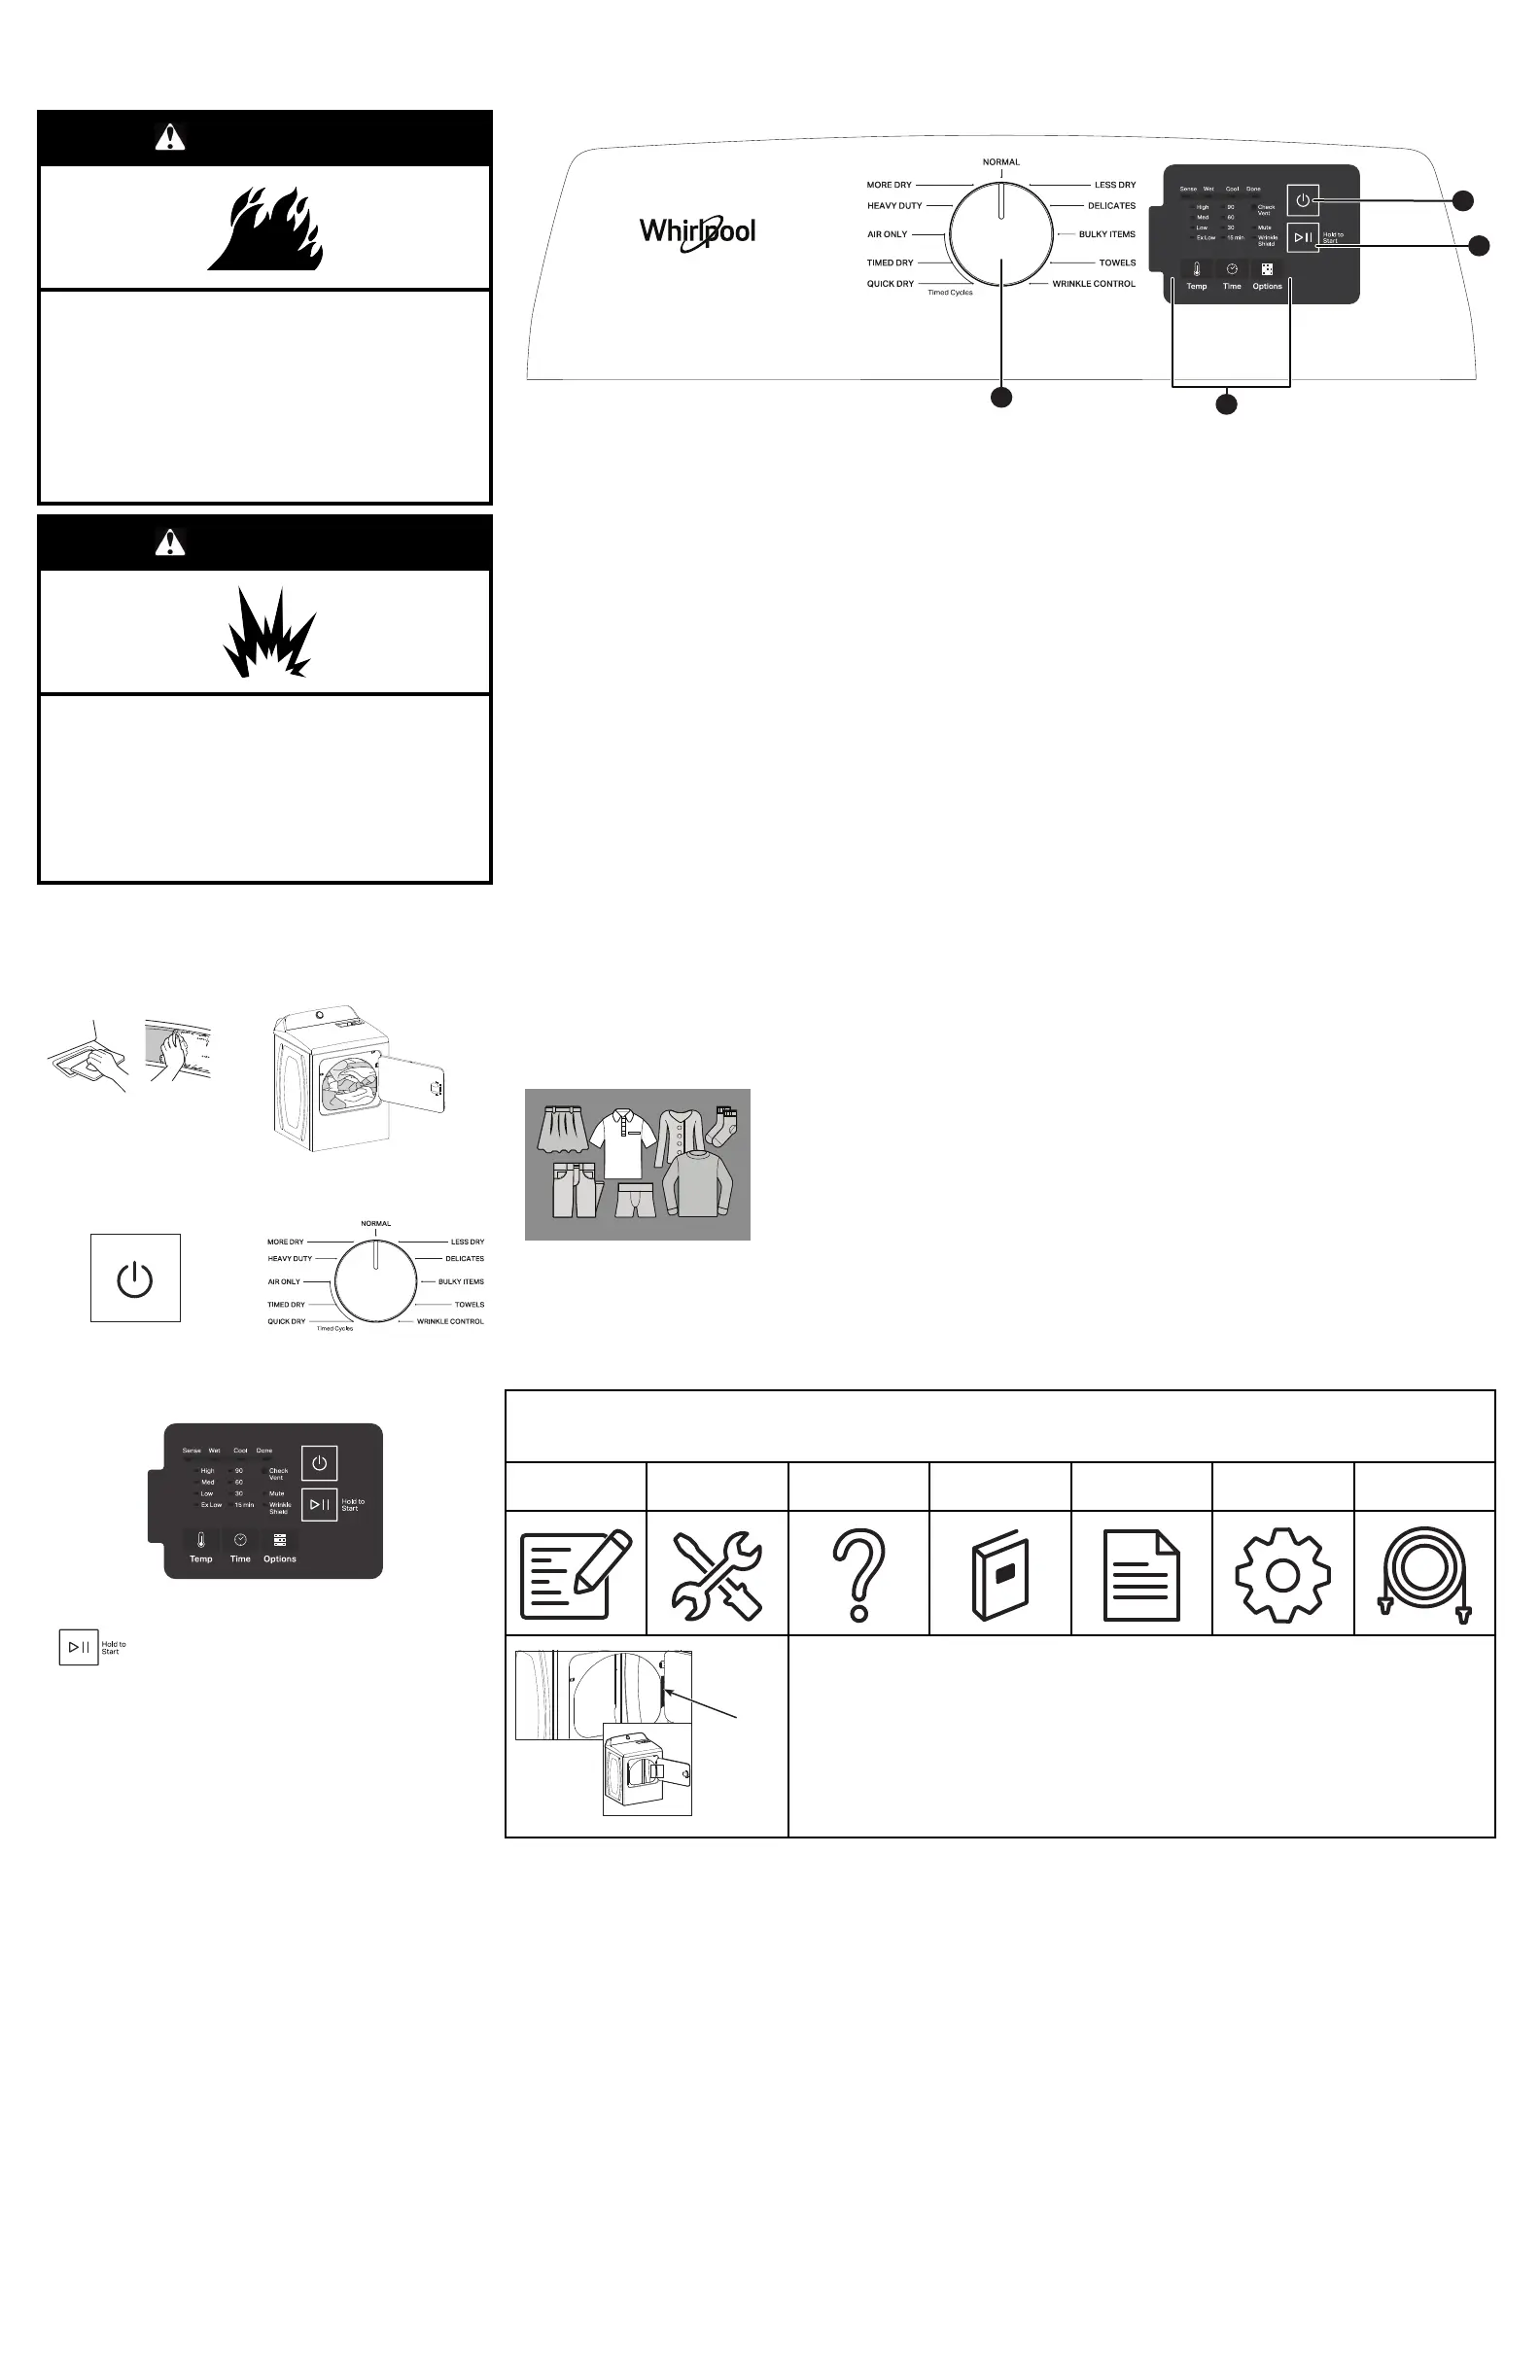
CONTROL PANEL AND FEATURES
2
3
1
4
*Not all features, cycles, and options are available on all models. Appearance may vary.
1.
POWER
Press to turn On/Off or to stop/cancel a cycle.
2.
CYCLE KNOB
Turn knob to select desired cycle.
NOTE: Your dryer comes with two types of cycles-Sensor drying
cycles and Timed drying cycles.
SENSOR DRYING CYCLES:
Use Sensor Cycles for better fabric care and energy savings. The
dryer senses air temperature and shuts off when the load reaches
the selected dryness level. Note that you cannot adjust the time
with these cycles.
TIMED DRYING CYCLES:
In these cycles, you can specify the drying time. Time options
available are 15, 30, 60 and 90 minutes. For a complete list of all
cycles, please refer to the online Product Guide document.
3.
START/PAUSE
Press and hold the Start/Pause button for 1 second until all status
lights are illuminated, then release to start cycle. Press during a
cycle to pause.
NOTE: These clothes dryer’s Government energy certifications
were based on the Timed Dry Cycle, Maximum Drying
Temperature and Maximum Dry Time Settings. The as-shipped
defaults of Normal Dryness, Medium Temp, Wrinkle Shield off,
were used.
4.
CYCLE MODIFIERS (Not all modifiers are available on all
cycles)
TEMP
Press to modify the cycle’s available temperature. (Extra Low,
Low, Medium, and High)
TIME (Air Only, Timed Dry, and Quick Dry Only)
Press to modify the time for the timed cycle between 15, 30, 60,
and 90 minutes.
OPTIONS
Press to add or remove options for each cycle. Press once to
activate Mute and twice to activate Wrinkle Shield.
CHECK VENT
The Check Vent will light up when lint has accumulated and
needs to be cleared from the dryer vent. Keeping this clean will
improve the drying performance. Steps to clean the vent can be
found in the online product guide.
MUTE
Use this option to turn the end of drying cycle signal on or off.
WRINKLE SHIELD
If you will be unable to remove a load immediately, activate this
option to add 150 minutes of periodic tumbling to help reduce
wrinkles from forming after the cycle completes.
WRINKLE ASSIST
If you will be unable to remove a load immediately, activate this
option to add 30 minutes of periodic tumbling to help reduce
wrinkles from forming after the cycle completes.
CHOOSING THE RIGHT CYCLE
A Product Guide with cycle guide
information for your dryer can be
found online at
www.whirlpool.com/owners. The
document will help identify which
cycle to choose for various load types
as well as the default cycle options.
For example we recommend using
the NORMAL cycle with Medium
temperature for cottons, linens and
mixed-garment loads.
SPECIALITY CYCLE
WRINKLE CONTROL
This cycle is designed to help remove or reduce wrinkles, this
cycle is great for permanent press clothing. The dryer cycle
uses low heat and a cool down period to keep clothes from
wrinkling or creasing.
For detailed installation instruction and maintenance information, winter storage, and transportation tips, please see the “Owner’s Manual”
included with your machine.
ASSISTANCE OR SERVICE AND ADDITIONAL INFORMATION
For information on any of the following items, a full product guide, warranty, detailed product dimensions, or for complete instructions for use
and installation, please visit www.whirlpool.com/owners or in Canada www.whirlpool.ca/owners. This may save you the cost of a service
call.
Register
Product
Schedule
Service
How To’s & FAQ
Manuals &
Downloads
Add Service
Plan
Parts Accessories
Model &
Serial
Number
Tag Location
To speak with a customer service representative or if you have additional questions, call us toll free at
1–866–698–2538 or in Canada call 1–800–807–6777.
You can write with any questions or concerns at:
Whirlpool Brand Appliances
Customer eXperience Center
553 Benson Road
Benton Harbor, MI 49022–2692
Whirlpool Brand Appliances
Customer eXperience Centre
200–6750 Century Ave.
Mississauga, Ontario L5N 0B7
Please include a daytime phone number in your correspondence.
Bekijk gratis de handleiding van Whirlpool WED4105LSW, stel vragen en lees de antwoorden op veelvoorkomende problemen, of gebruik onze assistent om sneller informatie in de handleiding te vinden of uitleg te krijgen over specifieke functies.
Productinformatie
| Merk | Whirlpool |
| Model | WED4105LSW |
| Categorie | Wasdroger |
| Taal | Nederlands |
| Grootte | 741 MB |


