Vevor 90E handleiding
Handleiding
Je bekijkt pagina 14 van 160
- 13 -
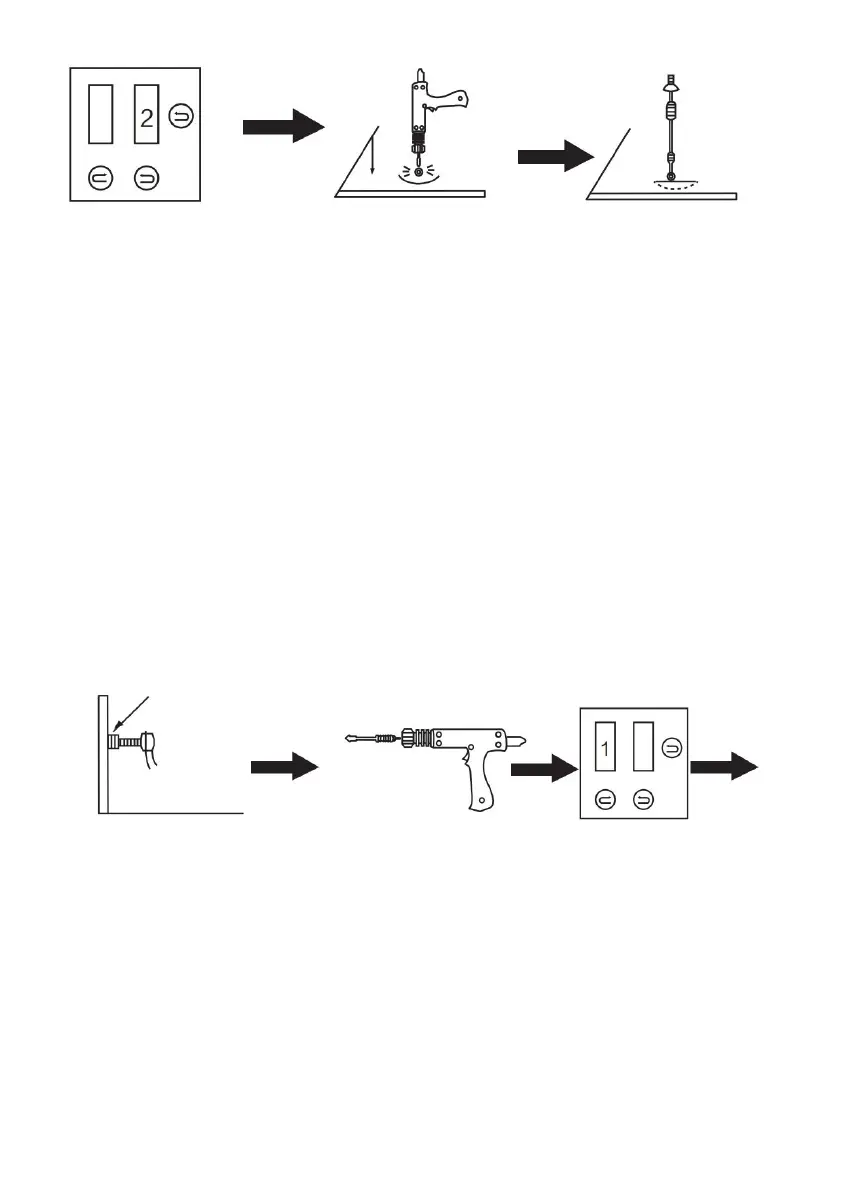
Adjust the
appropriate power.
The welding torch light
pressure to the body of the
depressed parts of the
machine automatically
welding.
Remove the welding torch, with
a strong pull hammer to the
gasket in the opposite direction
to pull the gasket, the
depression out.
OT gasket welding, same as Gasket welding, code 3, power priority 5, other steps same as
Gasket welding.
Note:
1. Before doing this, please test on other workpieces to avoid damage to the
surface of the vehicle due to excessive current or too long damage.
2. According to the body plate thickness, select the appropriate gear, the machine
will automatically match the welding time with the current.
3. After doing this, you can continue with other functional operations. If you do not
continue to work, turn off the power and cut off the main switch, finishing the
various accessories for the next use.
b. Triangular pieces of welding
The negative line fixed to the
polished clean and remove
the paint on the workpiece,
the closer the operating
surface the better .
Connect the
connected triangular
pull hammer to the
torch and lock it.
Select the appropriate
welding mode.
Bekijk gratis de handleiding van Vevor 90E, stel vragen en lees de antwoorden op veelvoorkomende problemen, of gebruik onze assistent om sneller informatie in de handleiding te vinden of uitleg te krijgen over specifieke functies.
Productinformatie
| Merk | Vevor |
| Model | 90E |
| Categorie | Niet gecategoriseerd |
| Taal | Nederlands |
| Grootte | 17767 MB |


