Vestil WL-100-5-810 handleiding
Handleiding
Je bekijkt pagina 26 van 30
Operator’s Manual Rev. 6/11/25 WL-100 MANUAL 06-25.DOCX
Table of Contents Copyright 2023, Vestil Manufacturing Corp. Page 26 of 30
Monthly inspection.
Have a qualified person inspect for:
1. Oil level. The oil should be within 3” below the top of the reservoir with the platform fully lowered. See the
Annual Inspection section for the hydraulic oil specification.
2. Worn or damaged hydraulic hoses or electrical wires.
3. Wear in the pivot points on the legs. Apply grease to all pivot points.
4. Looseness or wear in the rollers. Apply grease to all rollers.
5. Integrity of the retaining hardware on all rollers and all pivot point pins.
6. Integrity of the frame anchor bolts, and for cracks in the concrete around them.
7. Proper functioning of the control pendant.
8. Functional integrity of bridge lift chains, handles, and safety chains.
9. Unusual noises or movement during operation.
10. Condition of all information, safety, and warning labels. These should be clean and clearly legible.
11. Dirt and debris. Clean, sweep, or wipe down as needed.
Annual inspection.
Check the condition of the oil. Change the oil if it darkens, becomes gritty, or turns a milky color (indicating the
presence of water). Replace with an anti-wear hydraulic oil with a viscosity grade of 150 SUS at 100°F (ISO 32 cSt @
40°C), such as AW 32, HO 150 or Dexron non-synthetic transmission fluid. You may use a synthetic transmission fluid if
you flush the system with the synthetic fluid before filling the reservoir. 150 SUS at 100°F (ISO 32 cSt @ 40°C) or Dexron
transmission fluid.
Solenoid valve maintenance.
In the event that the platform creeps down slowly after releasing the “DOWN” control, it will be necessary to
remove the lowering cartridge valve for inspection and cleaning.
1. Remove all loads from the platform.
2. Raise the platform. Rotate or place the maintenance props into the side frame. Lower the platform until the
rollers rest against the props.
3. Remove the cover from the power unit. Locate the manifold body.
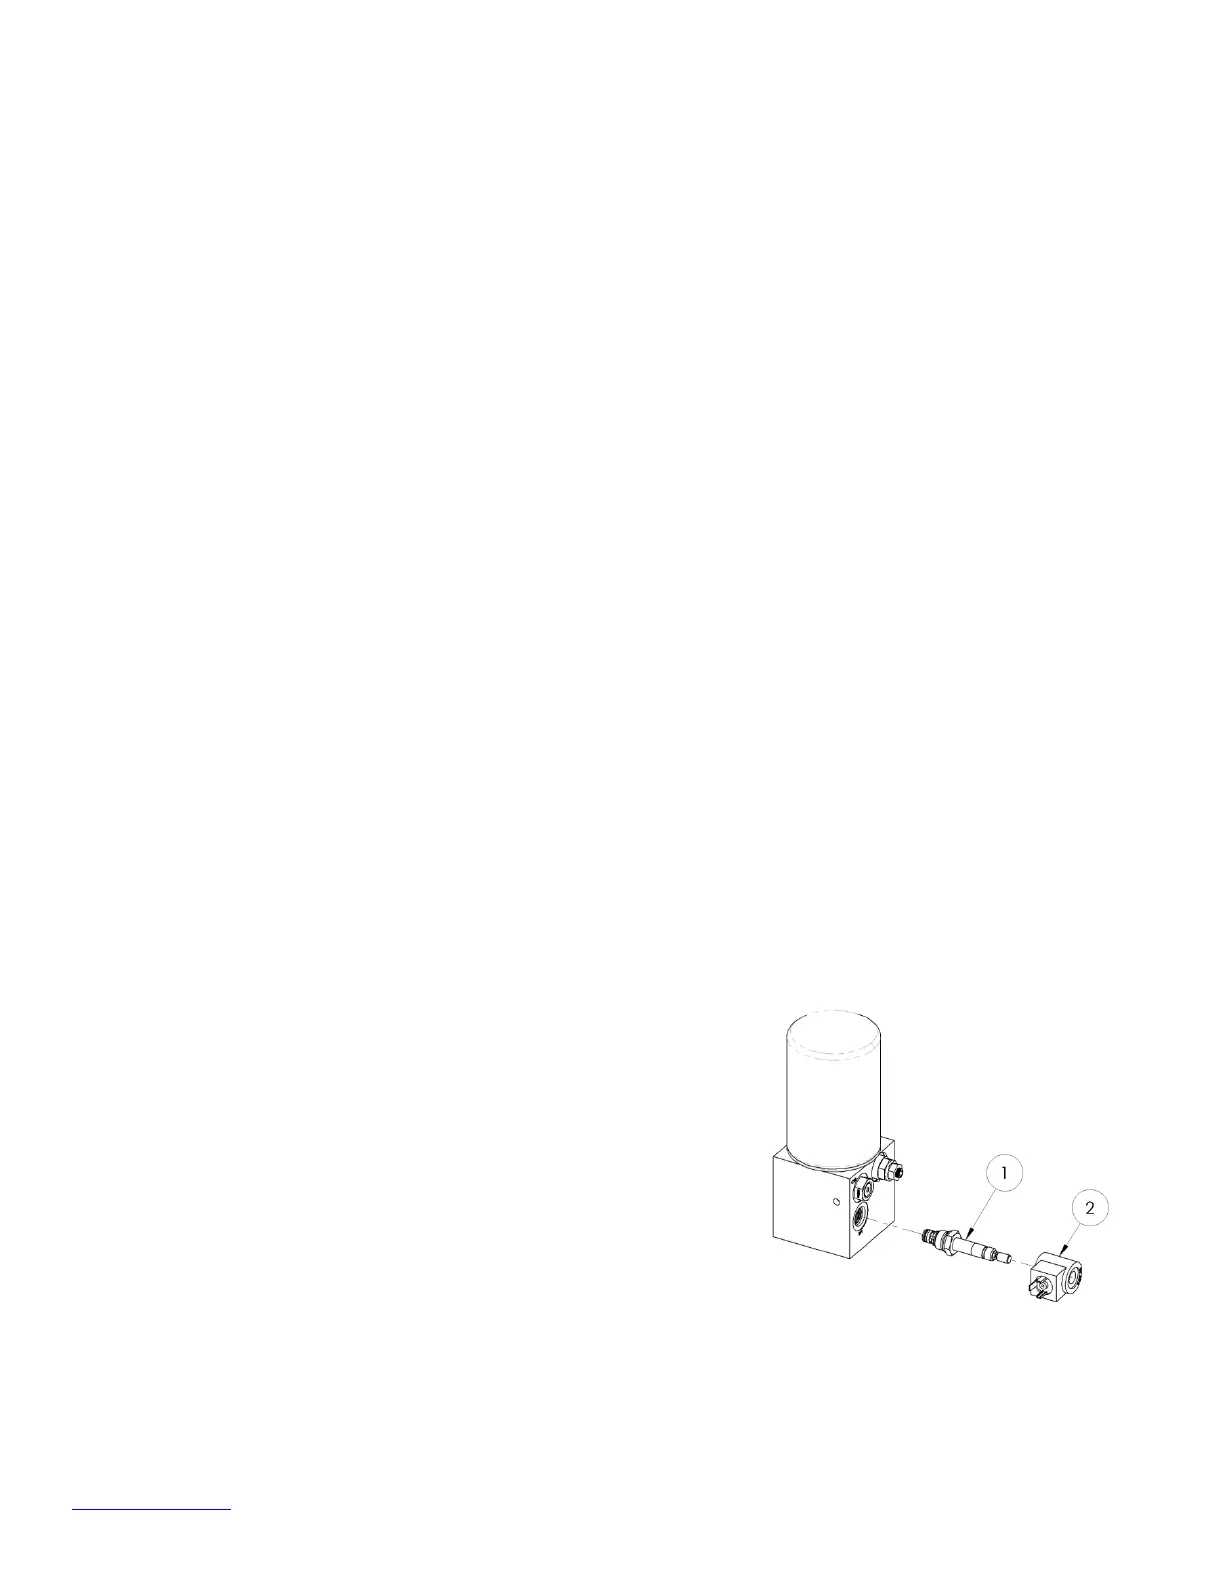
4. Remove the nut holding the solenoid coil on the solenoid valve
stem (item (1), right). Remove the coil (2), then unscrew the
valve from the manifold. Have a clean rag ready to contain any
fluid that may leak from the opening.
5. Inspect the valve for contaminants. Inspect the O-rings and
back-up washers for cuts, tears, or other damage.
6. With the valve immersed in mineral spirits or kerosene, insert
a thin tool such as a small screwdriver or a small hex wrench in
the hole at the bottom of the valve (illustration, next page).
Push the spool in and out several times. A properly functioning
spool should move freely, with about 1/16” of travel. Use
mineral spirits to flush the valve.
7. If the spool continues to stick, the stem could be bent. The valve will need to be replaced.
8. Blow the valve off with a compressed-air gun while again pushing the spool in and out.
9. Inspect the bottom of the manifold’s valve cavity for contaminants.
10. Make sure both O-rings and outer seal (flat) are seated on the valve body. Make sure the screen filter is in
place and seated at the bottom of the threads on the valve body (illustration).
Bekijk gratis de handleiding van Vestil WL-100-5-810, stel vragen en lees de antwoorden op veelvoorkomende problemen, of gebruik onze assistent om sneller informatie in de handleiding te vinden of uitleg te krijgen over specifieke functies.
Productinformatie
| Merk | Vestil |
| Model | WL-100-5-810 |
| Categorie | Niet gecategoriseerd |
| Taal | Nederlands |
| Grootte | 8817 MB |


