Vestil HSR-4860 handleiding
Handleiding
Je bekijkt pagina 5 van 6
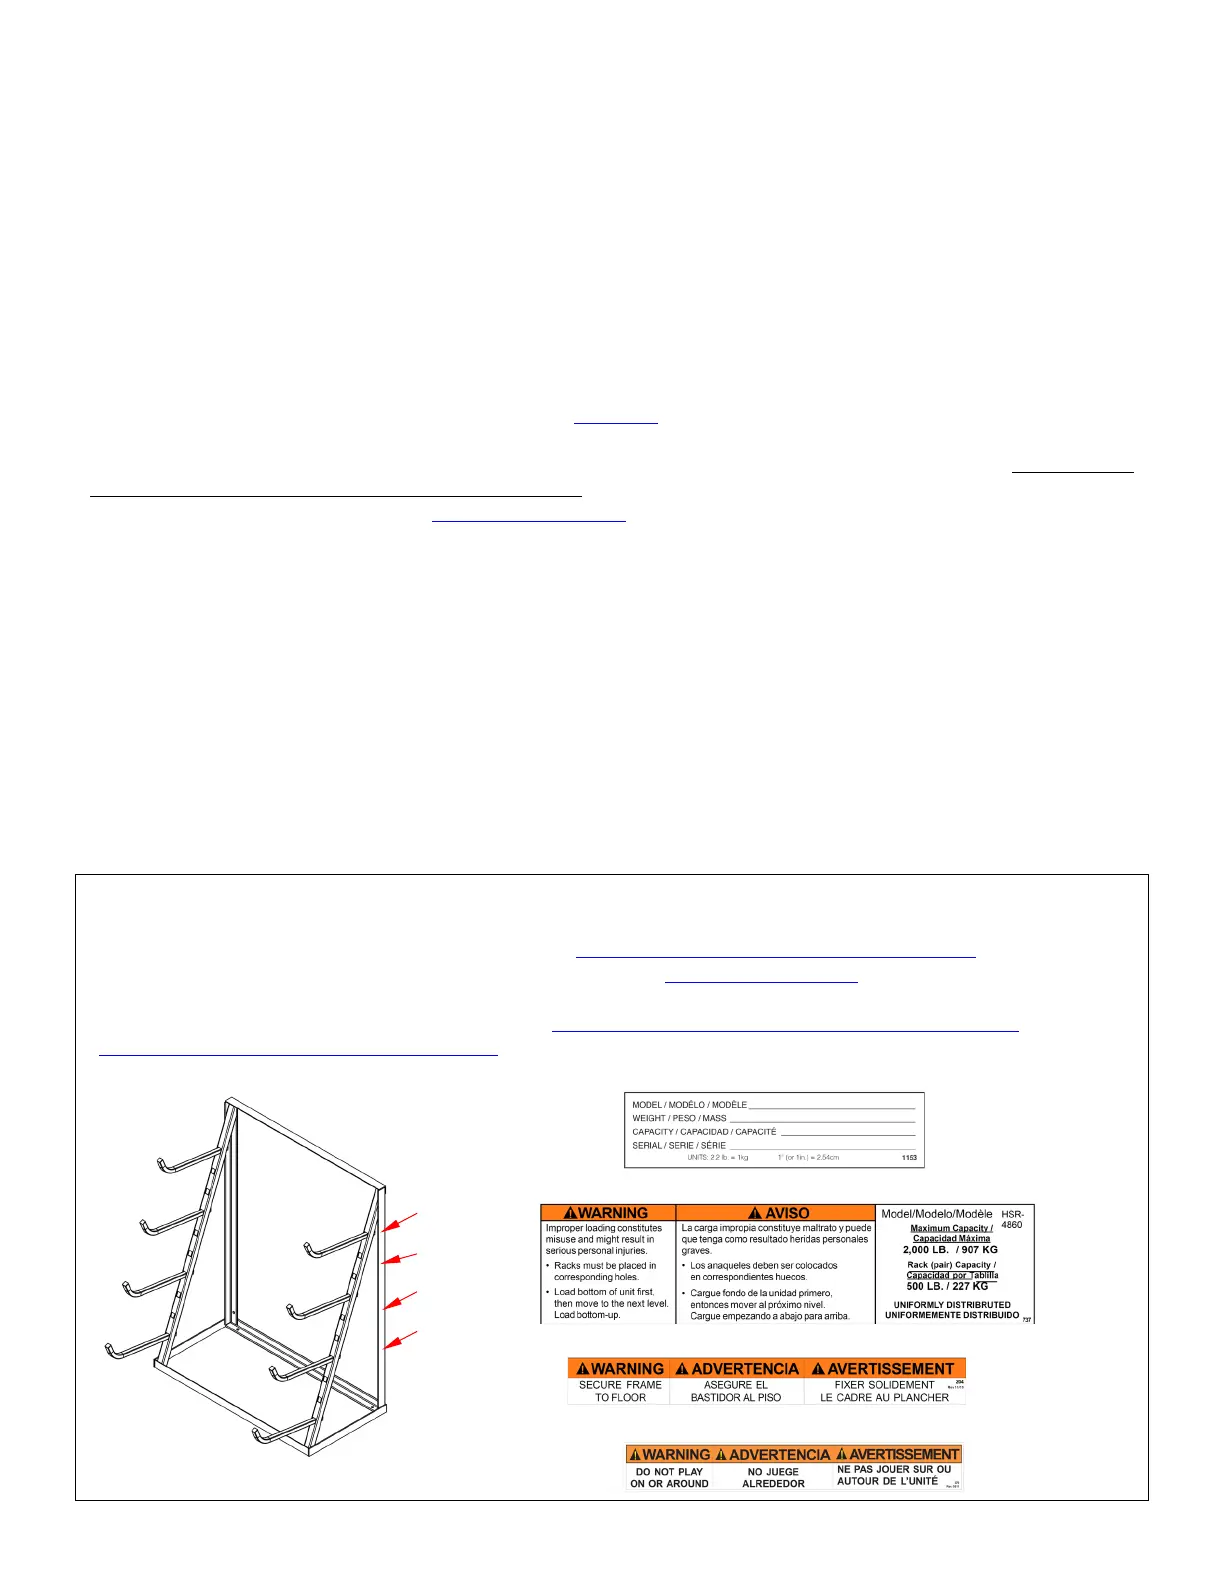
TABLE OF CONTENTS Rev. 7/7/2021 HSR-4860 MANUAL
TABLE OF CONTENTS Copyright 2021 Vestil Manufacturing Co. Page 5 of 6
LOADING THE RACK
Install a pair of rack arms in the lowest arm receivers. Install the remaining arms where appropriate for
your application. Load material onto rack arm pairs from the bottom up, i.e. load the lowest pair first. Apply
loads as close to the inclined supports as possible.
RECORD OF SATISFATORY CONDITION (THE “RECORD”)
Before putting the rack into service, record its appearance. Thoroughly photograph the unit so that all
features are clearly visible. Take close range photographs of each label and/or tag applied to the unit, the
rack arms and arm receivers, and all anchoring hardware. Collect the photographs in a file. The file is a
record of the unit in satisfactory condition. Do not use the rack unless all parts are in satisfactory condition.
INSPECTIONS & MAINTENANCE
Compare the results of each inspection to the RECORD to determine whether all parts of the rack are in
satisfactory condition. DO NOT use the rack unless all parts are in satisfactory condition. Only use
manufacturer-approved replacement parts to restore the product to satisfactory condition. Never make
temporary repairs of damaged or missing parts. DON’T GUESS! If you have any questions about the
condition of your unit, contact the TECHNICAL SERVICE department. The phone number is provided on the
cover page of this manual. Purely cosmetic changes, such as chipped paint, are not changes from
satisfactory condition. However, unprotected steel rusts so touchup paint should be applied to all areas
where the finish is damaged as soon as the damage occurs. Left unaddressed, rusting could compromise
the soundness of the metal and create a safety hazard.
Unload the rack and inspect the following at least 1 time per month:
1) Rack arms: Remove each arm and its notch and inspect for bends, cracks, warps, rust/corrosion, and
other forms of damage.
2) Frame: Closely examine all frame elements, arm receivers, and welds for rust, breaks, cracks, and other
damage.
3) Anchor Bolts: Look for significant rusting/corrosion, damaged paint, and other damage around anchor
bolts. Make sure that each bolt is solidly attached to the floor.
4) Labels: Confirm that each label is in place, undamaged, and easily readable.
Maintain the rack by replacing components that are not in satisfactory condition.
LABELING DIAGRAM
Label content and location are subject to change so your product might not be labeled exactly as
shown. Compare the diagram below to the RECORD OF SATISFACTORY CONDITION
. If differences
between applied labeling and this diagram exist, contact TECHNICAL SERVICE. Replace all labels that are
damaged, missing, or not easily readable (e.g. faded). To order replacement labels, or to inquire whether
your unit is properly labeled, contact the
TECHNICAL SERVICE AND PARTS DEPARTMENT online at
http://www.vestilmfg.com/parts_info.htm or by calling (260) 665-7586 and asking for the Parts
Department.
A: Label 1153
A
B
C
D: Label 375
C: Label 204
B: Label 1165
D
Bekijk gratis de handleiding van Vestil HSR-4860, stel vragen en lees de antwoorden op veelvoorkomende problemen, of gebruik onze assistent om sneller informatie in de handleiding te vinden of uitleg te krijgen over specifieke functies.
Productinformatie
| Merk | Vestil |
| Model | HSR-4860 |
| Categorie | Niet gecategoriseerd |
| Taal | Nederlands |
| Grootte | 1390 MB |


