Vestil GR-H2R-DI-9-YL handleiding
Handleiding
Je bekijkt pagina 5 van 10
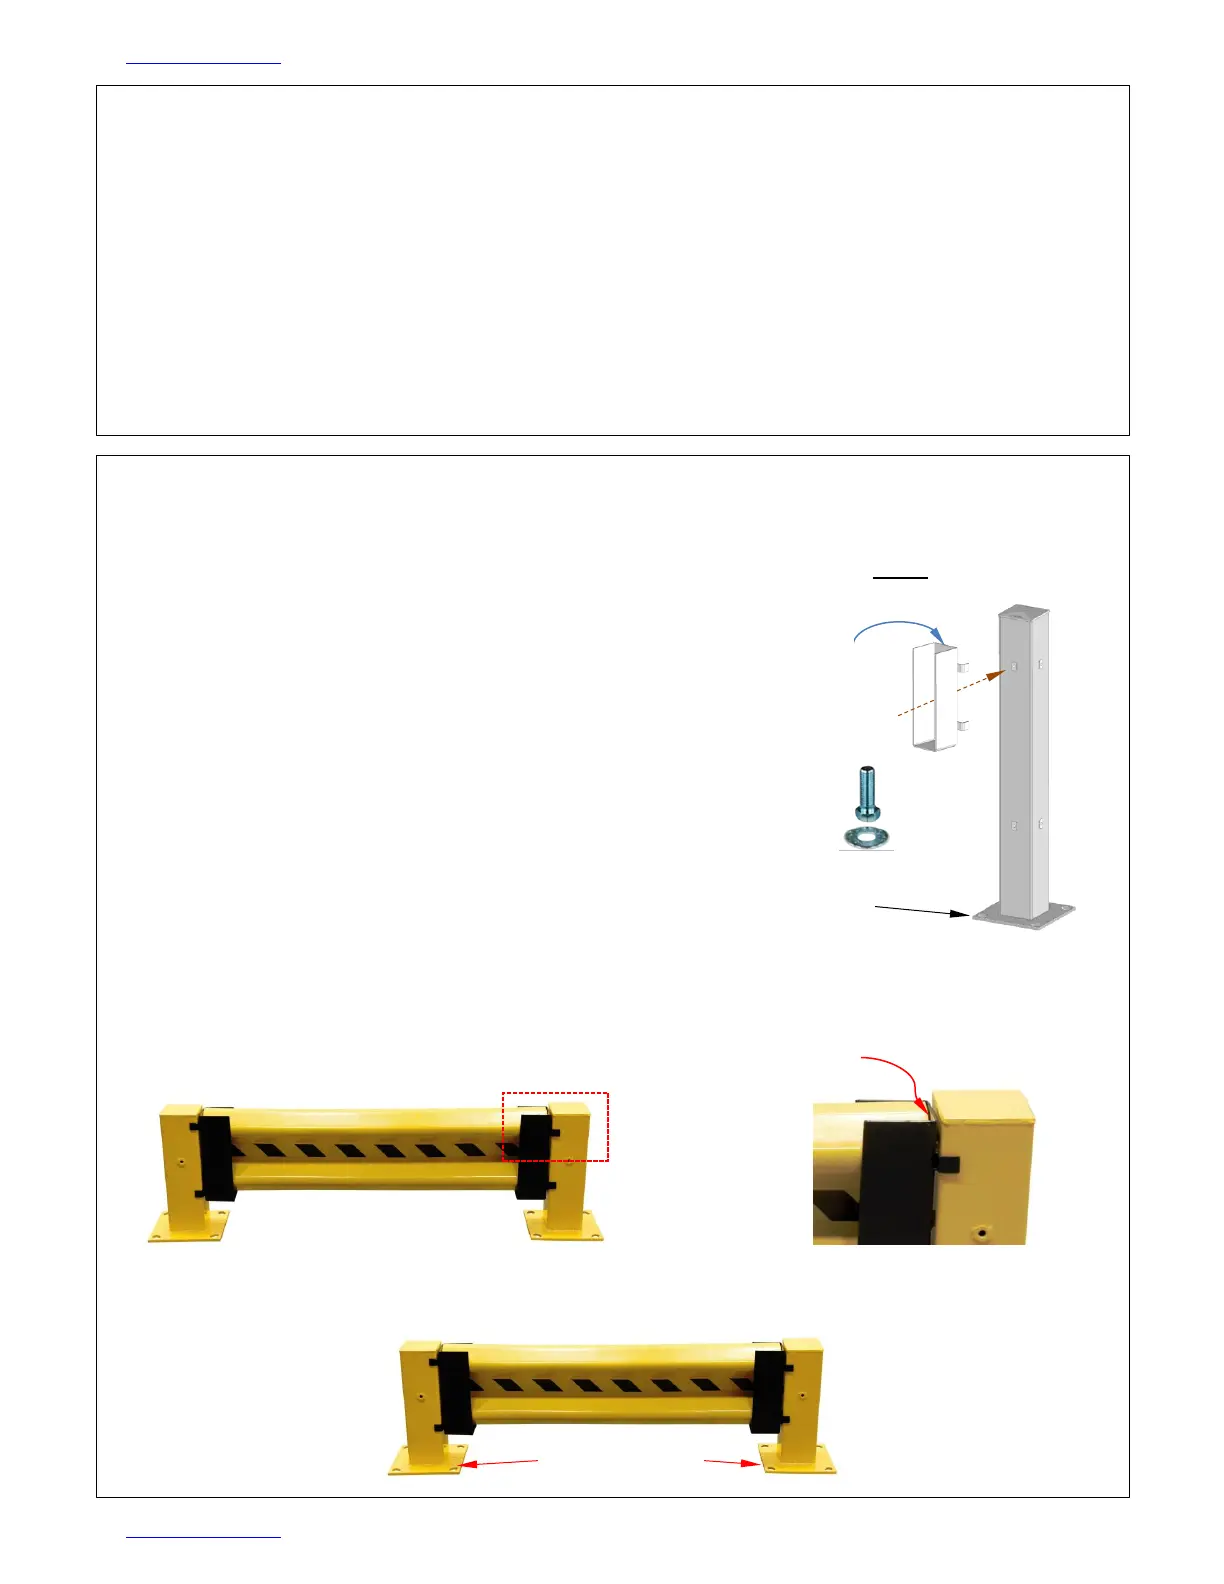
TABLE OF CONTENTS 5/14/2025 GR-H2R-DI, MANUAL
TABLE OF CONTENTS Copyright 2025 Vestil Manufacturing 5 of 10
Tools Required for Installation:
Hammer Drill: For drilling holes into concrete or asphalt surfaces.
Masonry Bit (3/4 inch): For creating holes in the supporting surface to install anchor bolts.
Wrench or Socket Set: To tighten bolts & nuts.
Level: To ensure posts are vertical and guardrails are horizontally aligned.
Measuring Tape: For accurate placement of posts and guardrails.
Marking Tool (e.g., chalk or marker): To mark the locations for drilling holes.
Note 1: Personal protective equipment (PPE) such as safety glasses, gloves, and steel-toed boots should
also be used during installation, as outlined in the Safety Instructions.
Note 2: Check the guardrail and brackets for any product identification or safety warning labels. Ensure
these labels remain legible and intact during use.
Note 3: Ensure the wall is free of electrical wiring or plumbing before drilling.
Note 4: Ensure the work area is clear of obstructions and tripping hazards.
Note 5: Use caution when handling heavy guardrail sections to avoid injury.
INSTALLING THE GUARDRAIL SYSTEM
Personal Protective Equipment (PPE): Installers must wear safety glasses, gloves, and steel-
toed boots during installation to protect against potential hazards.
Follow these steps to install the GR-H2R-DI series guardrail system:
1. Place the posts in the desired installation
locations. For guardrail lengths of 3ft to 8ft, two
posts are required (one at each end). For
lengths of 9ft to 12ft, three posts are required
(one at each end and one at the center of the
guardrail).
2. Attach the drop-in brackets to the posts:
a. Put a flat washer onto a ½in.-13 x1½in.
hex bolt.
b. Align the bolt hole in the brackets with
the appropriate bolt hole in a post.
c. Insert a bolt into the hole and tighten
the connection.
3. Lower the guardrail segment into the mounting brackets. Adjust the positions of the posts:
Guardrail should be able to slide into, and out of, the drop-in brackets relatively easily. This
requires ~1/4 in. gap between each end of the guardrail and the back plate of its drop-in
bracket.
4. The base plate of each post includes 4 bolt holes (
15
/
16
in.). Ensure all posts are properly
aligned and level to maintain structural stability. Mark the concrete with the location of
each bolt hole; then move the posts aside.
1/2” Flat washer
½in.-13 x1½in. hex bolt
FIG. 1: Fasten mounting
brackets to posts
~1/4 in. gap between end of guardrail
and back plate of drop-in bracket
Base plate of
post with anchor
bolt holes (4)
Back plate
Base plates of posts
with anchor bolt
holes (4 each)
Bekijk gratis de handleiding van Vestil GR-H2R-DI-9-YL, stel vragen en lees de antwoorden op veelvoorkomende problemen, of gebruik onze assistent om sneller informatie in de handleiding te vinden of uitleg te krijgen over specifieke functies.
Productinformatie
| Merk | Vestil |
| Model | GR-H2R-DI-9-YL |
| Categorie | Niet gecategoriseerd |
| Taal | Nederlands |
| Grootte | 2709 MB |


