Vestil FM-T-DUMP handleiding
Handleiding
Je bekijkt pagina 4 van 6
Rev. 11/6/2015 FM-T-DUMP MANUAL
Copyright 2015 Vestil Manufacturing Co. Page 4 of 6
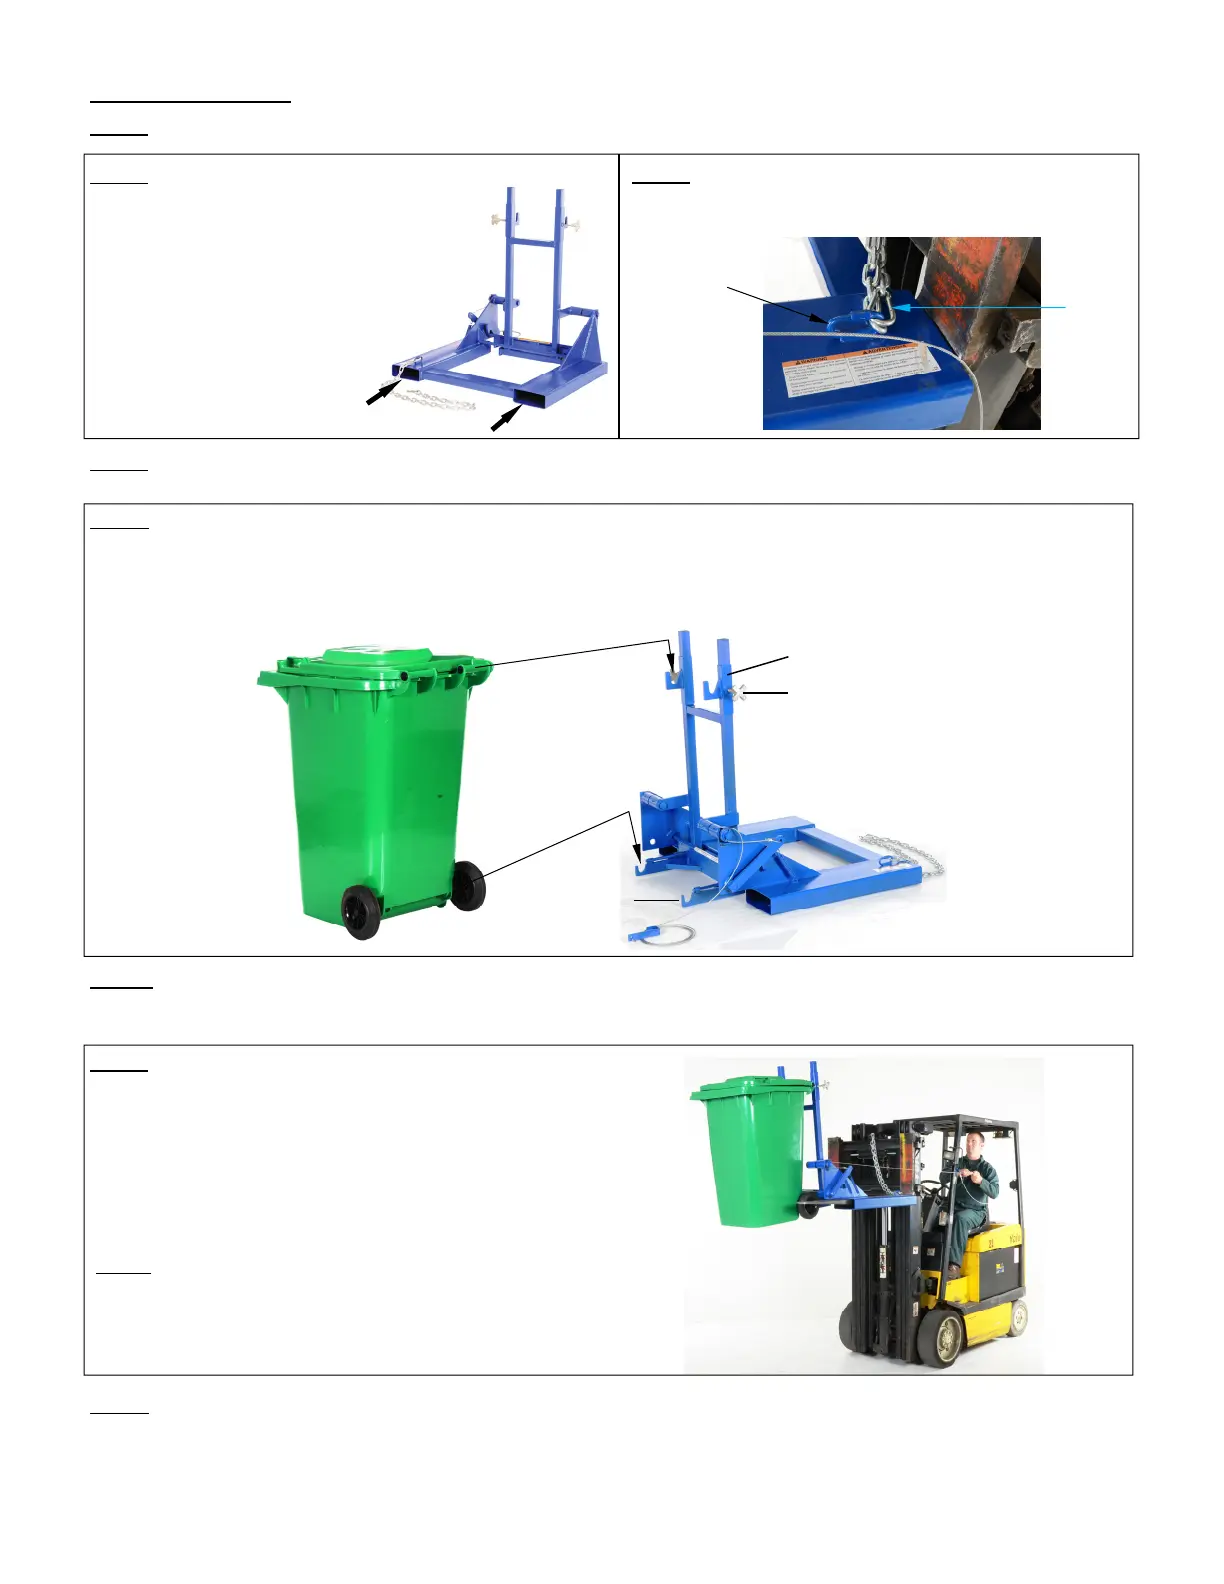
Use Instructions: [Refer to “Parts diagram” on p. 3.]
Step 1: Inspect the cart dumper as described in the “Inspections & Maintenance” section of this manual (see p. 6).
Step 4: Attach the handle at the end of the cable to the roll cage of the forklift in a location that will prevent the cable
from interfering with the operation of the forklift or getting in your way while driving.
Step 5: Engage a trash cart with the dumper. Position the cart in front of the dumper; then lift it and set the axle (of
the cart) in the axle brackets. [NOTE: The size of the wheels might prevent the axle from settling to the bottom of the
brackets. Step 8 addresses this situation.] Loosen the star knobs of the left and right handle brackets. Adjust the
position of the handle brackets so that the handle of the trash cart fits snugly inside the handle slots. Fix the handle
brackets in position by tightening the star knobs (turn them clockwise).
Step 6: Raise the forks slightly to elevate the wheels of the cart a few inches above the ground. Check the
connections between the axle brackets and the cart axle as well as the connections between the cart handle(s) and
the handle brackets. If any connection is loose or unstable, lower the forks and make all necessary adjustments.
Step 7: Elevate the forks so that the wheels are just
a few inches above the ground and drive to the
dump site. Approach the receptacle (e.g. dumpster)
and raise the forks so that the wheels of the trash
cart are above the top of the dumpster. Drive
forward until the entire dumper overhangs the
dumpster; then forcefully pull the release cable.
[NOTE: A pin slides over the top of the
cart axle on both sides when the cable is
pulled. These pins prevent the cart from
jostling and coming out of the axle
brackets during dumping.]
Step 8: Back away from the dumpster and adjust the elevation of the forks to prevent the cart from bumping against
the wall of the dumpster. Once clear of the dumpster, lower the forks until the lid of the cart is just a few inches above
the ground. Then, rotate the dumping mechanism back to the upright position. You should hear the latch lock (6) snap
over the latch crossbar when the dumping mechanism is properly reset (see Parts Diagram and Bill of Materials on p.
3).
Step 2: Drive forward and
insert the forks into the fork
pockets (see arrows in photo 1
below; move the safety chain
out of the way of the forks).
Continue driving forward until
the ends of the fork pockets
contact the heels of the forks.
The forks will stick out of the
opposite ends of the pockets.
Step 3: Attach the safety chain to the carriage. Attach
the snap hook to the chain or quick link so that there is
as little slack in the chain as possible.
Star knob
Axle
bracket
Handle bracket
Set wheel axles
in axle brackets
Set cart
handle(s) in
handle brackets
Wrap chain
around carriage;
then attach snap
hook to chain or
quick link
Quick link
Snap
hook
Bekijk gratis de handleiding van Vestil FM-T-DUMP, stel vragen en lees de antwoorden op veelvoorkomende problemen, of gebruik onze assistent om sneller informatie in de handleiding te vinden of uitleg te krijgen over specifieke functies.
Productinformatie
| Merk | Vestil |
| Model | FM-T-DUMP |
| Categorie | Niet gecategoriseerd |
| Taal | Nederlands |
| Grootte | 2508 MB |


