TP Link Omada OC400 handleiding
Handleiding
Je bekijkt pagina 30 van 475
22
Chapter 3
Manage Omada Managed Devices and Sites
3. 1 Create Sites
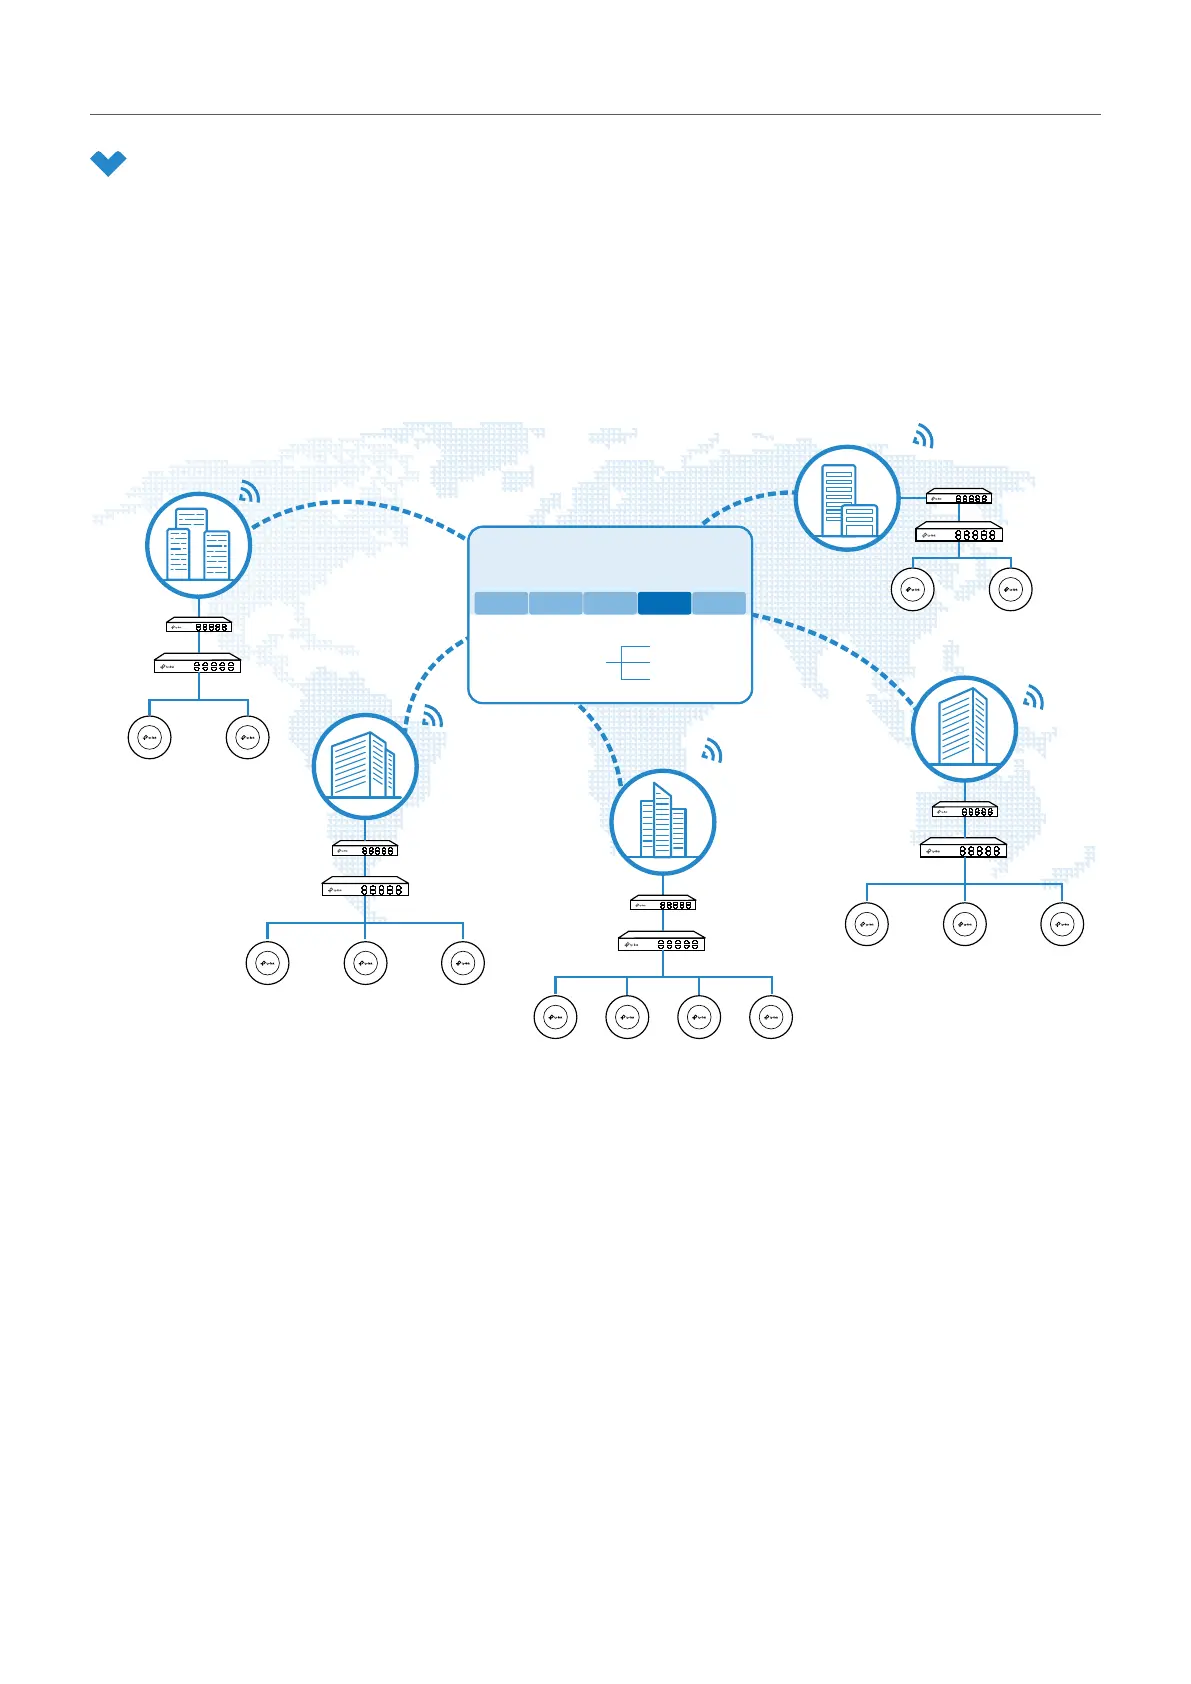
Overview
Different sites are logically separated network locations, like different subsidiary companies or
departments. It’s best practice to create one site for each LAN (Local Area Network) and add all the
devices within the network to the site, including the router, switches and APs.
Router
Site C
LAN 3
LAN 2
Site B
Site A
Site E
Site D
Switch
AP AP
AP
AP
Router
Switch
AP APAP
Router
APAP
Switch
APAP
Router
Switch
Switch
Router
AP APAP
Unied
Management from
One Interface
Gateways
Switches
Access Points
Site A Site B Site C Site D Site E
SDN Controller
LAN 1
LAN 5
LAN 4
Devices at one site need unified configurations, whereas those at different sites are not relative. To
make the best of a site, configure features simultaneously for multiple devices at the site, such as VLAN
and PoE Schedule for switches, and SSID and WLAN Schedule for APs, rather than set them up one by
one.
Configuration
To create and manage a site, follow these steps:
1 ) Create a site.
2 ) View and edit the site.
3 ) Go into the site.
Bekijk gratis de handleiding van TP Link Omada OC400, stel vragen en lees de antwoorden op veelvoorkomende problemen, of gebruik onze assistent om sneller informatie in de handleiding te vinden of uitleg te krijgen over specifieke functies.
Productinformatie
| Merk | TP Link |
| Model | Omada OC400 |
| Categorie | Niet gecategoriseerd |
| Taal | Nederlands |
| Grootte | 86105 MB |
Caratteristiche Prodotto
| Kleur van het product | Grijs |
| Breedte | 440 mm |
| Diepte | 180 mm |
| Hoogte | 44 mm |
| LED-indicatoren | Ja |


