TP Link Omada OC400 handleiding
Handleiding
Je bekijkt pagina 23 van 475
15
Chapter 2
Get Started with Omada SDN Controller
2. 2 Set Up Your Hardware Controller
Omada SDN Controller Solution is designed for scalable networks. Deployments and configurations
vary according to actual situations. Understanding your network requirements is the first step when
planning to provision any project. After you have identified these requirements, follow the steps below
to initially set up the Hardware Controller:
1 ) Determine the network topology.
2 ) Deploy the Hardware Controller.
3 ) Start and log in to the controller.
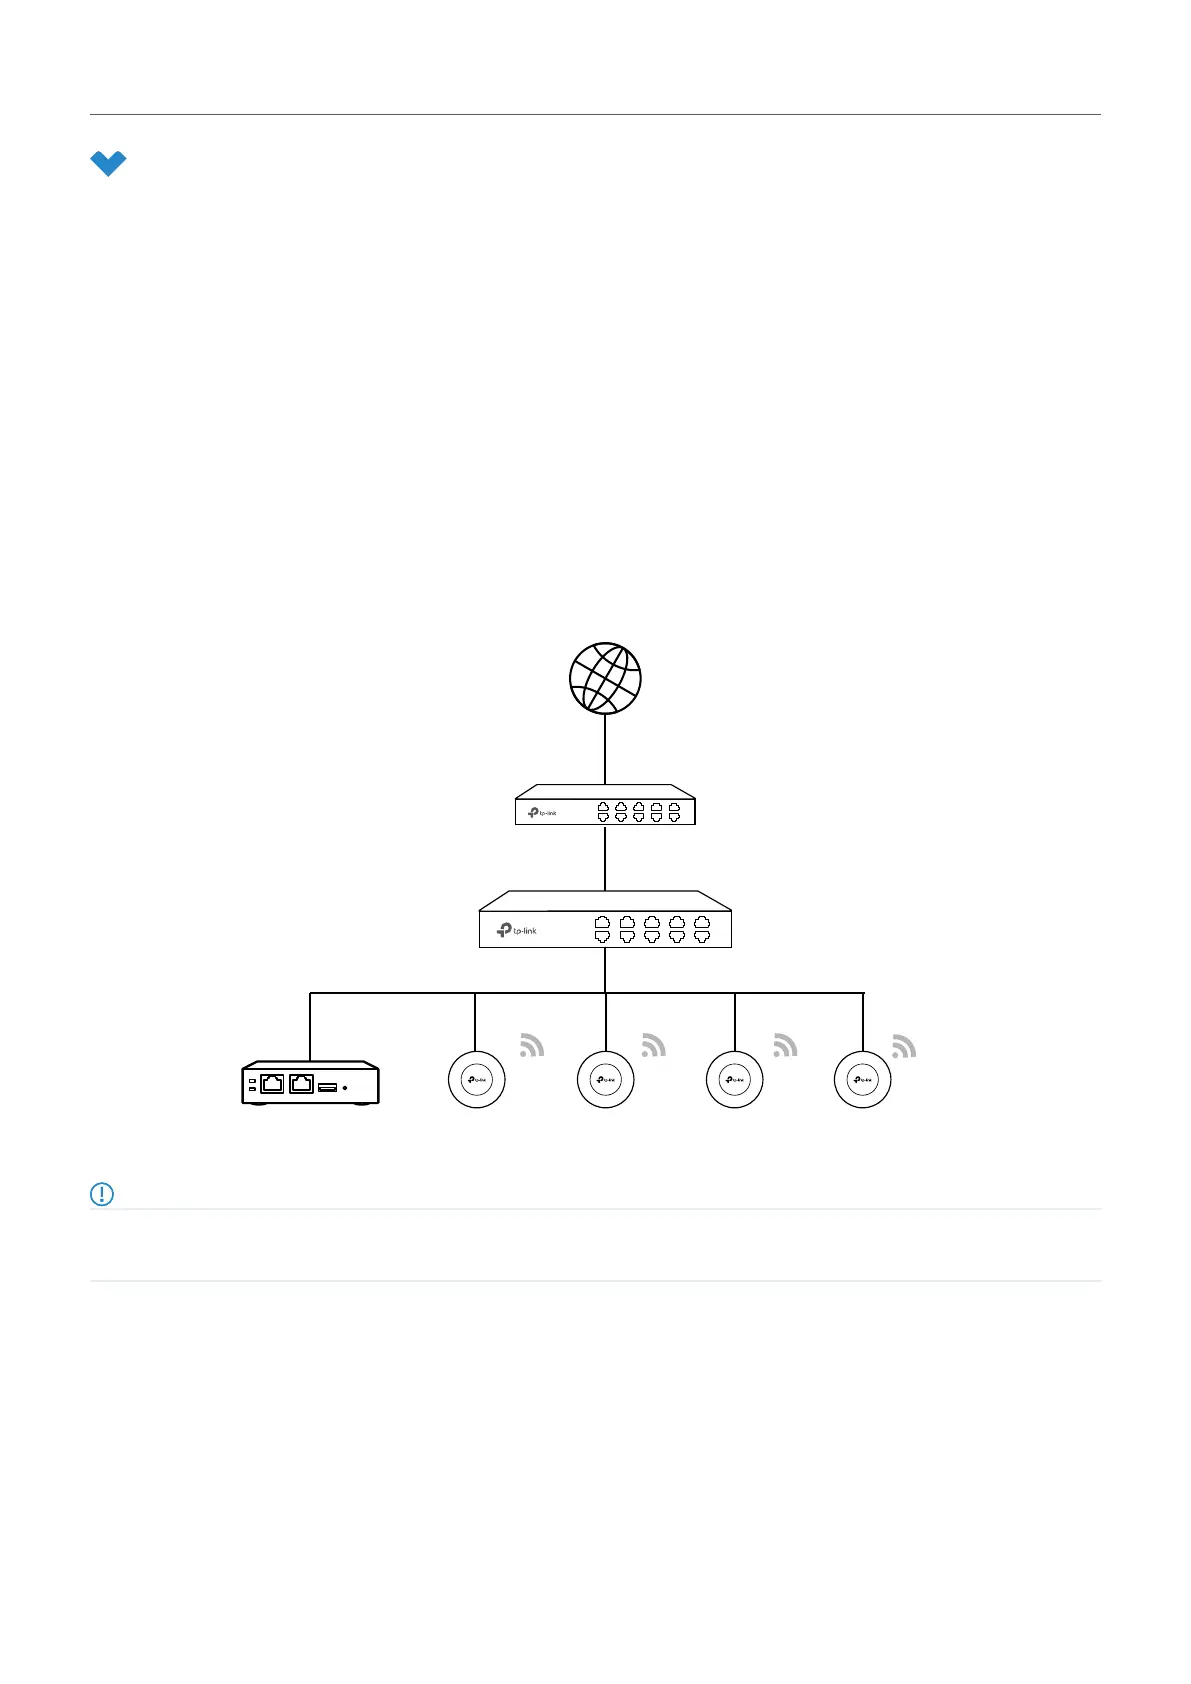
2. 2. 1 Determine the Network Topology
The network topology that you create for the SDN Controller varies depending on your business
requirements. The following figure shows a typical topology for a high-availability use case.
Internet
SafeStream Gateway
JetStream Switch
Access PointsHardware Controller
Note:
When using the Omada SDN Controller, we recommend that you deploy the full topology with Omada-supported TP-Link devices. If you
use third-party devices, Omada SDN Controller cannot discover and manage them.
2. 2. 2 Deploy the Hardware Controller
Omada Hardware Controller comes with the pre-installed controller software, so installation is not
necessary. After deploying the Hardware Controller on your network infrastructure, proceed to
configure the controller.
Bekijk gratis de handleiding van TP Link Omada OC400, stel vragen en lees de antwoorden op veelvoorkomende problemen, of gebruik onze assistent om sneller informatie in de handleiding te vinden of uitleg te krijgen over specifieke functies.
Productinformatie
| Merk | TP Link |
| Model | Omada OC400 |
| Categorie | Niet gecategoriseerd |
| Taal | Nederlands |
| Grootte | 86105 MB |
Caratteristiche Prodotto
| Kleur van het product | Grijs |
| Breedte | 440 mm |
| Diepte | 180 mm |
| Hoogte | 44 mm |
| LED-indicatoren | Ja |


