Toa TS-D1100-MU handleiding
Handleiding
Je bekijkt pagina 33 van 52
33
11. INSTALLATION
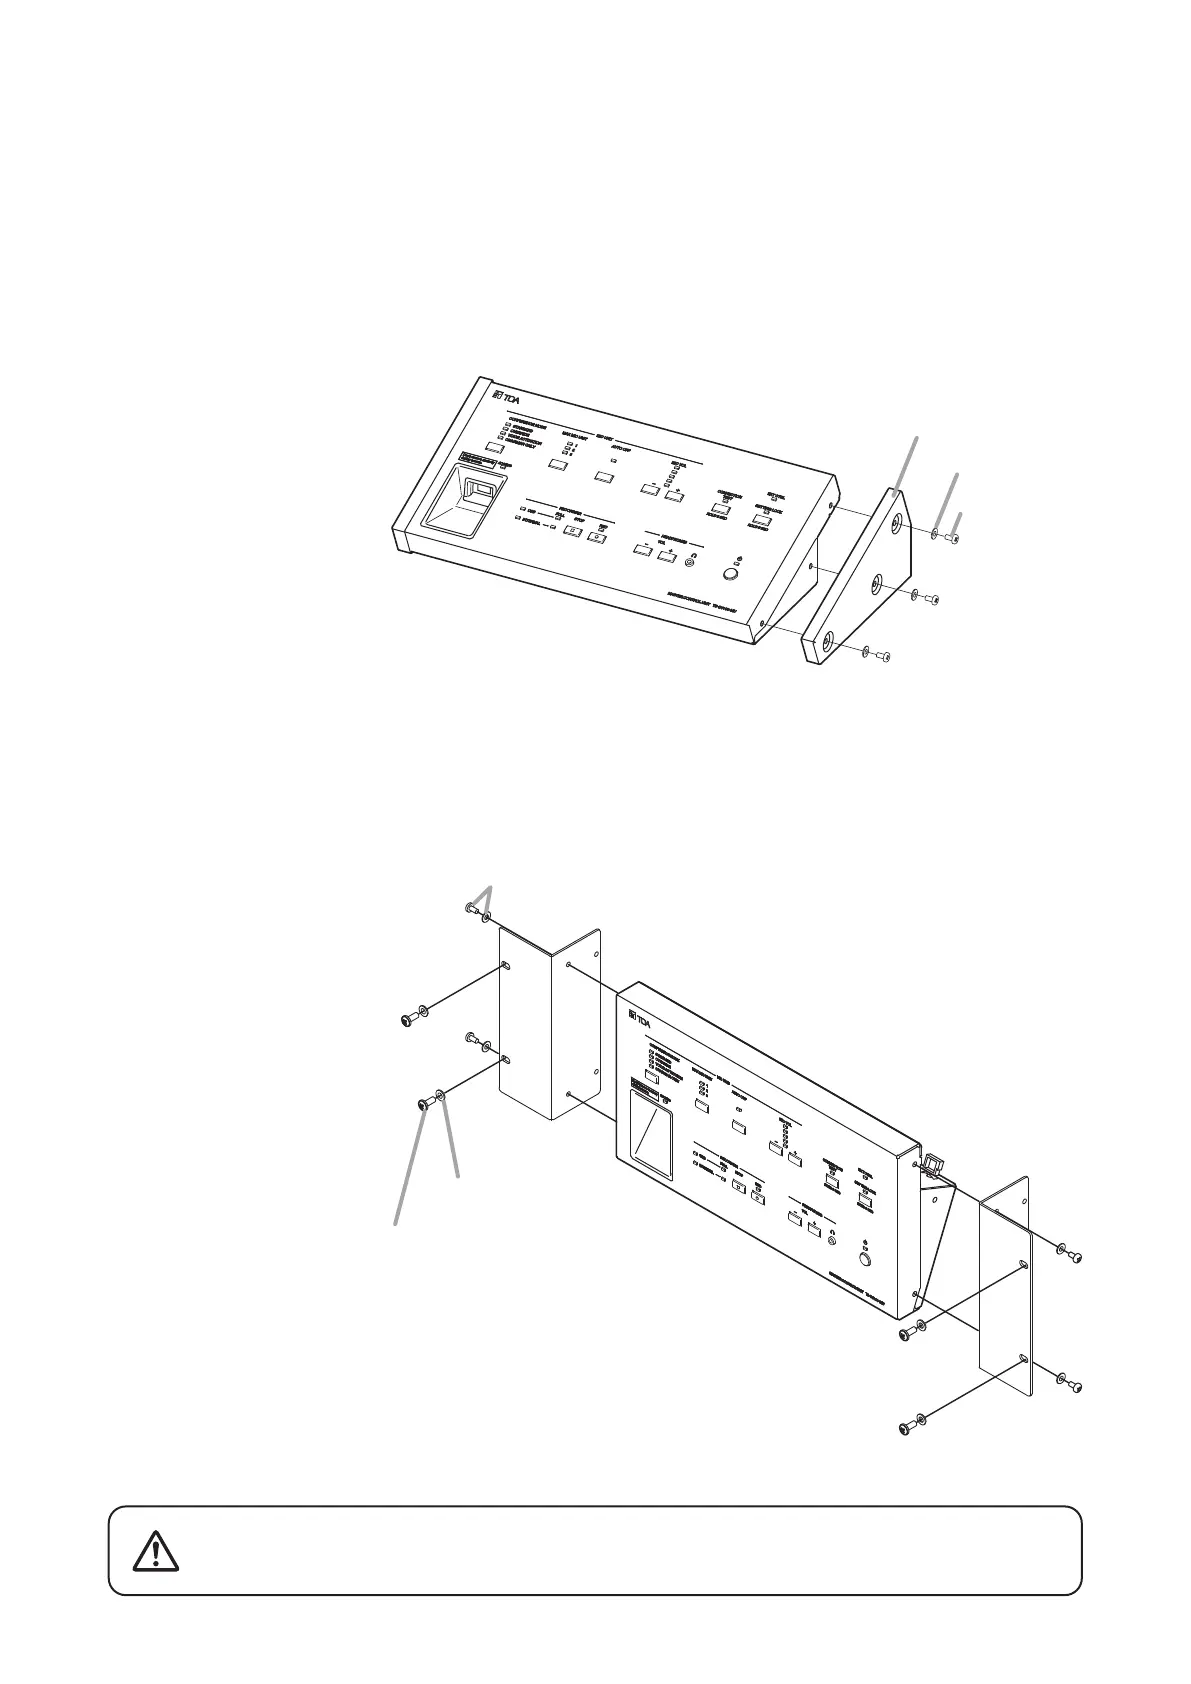
11.1. Mounting the Control Unit in an Equipment Rack
Use the following optionally available mounting bracket set when installing the TS-D1100-MU Master control
unit or TS-D1000-SU Sub control unit in an equipment rack.
11.1.1. TS-D1100-MU
Step 1. Detach both side panels of the TS-D1100-MU.
Four of the removed screws and washers are used in Step 2.
Step 2. Attach the MB-TS920 Rack mounting bracket to both sides of the TS-D1100-MU.
Use the screws and washers removed in Step 1.
Step 3. Mount the TS-D1100-MU equipped with the mounting brackets in the rack.
Use the rack mounting screws and ber washers supplied with the rack mounting bracket.
Side panel
Washer (6 pcs)
Screw (6 pcs)
3
Four of the removed screws and washers in Step 1
2
Rack mounting screw 5 x 12
(supplied with the MB-TS920)
Fiber washer (for M5)
(supplied with the MB-TS920)
The rack mounting screws 5 x 12 supplied with the MB-TS920 can
be used for the TOA equipment rack only. Do not use them for other
racks.
CAUTION
Bekijk gratis de handleiding van Toa TS-D1100-MU, stel vragen en lees de antwoorden op veelvoorkomende problemen, of gebruik onze assistent om sneller informatie in de handleiding te vinden of uitleg te krijgen over specifieke functies.
Productinformatie
| Merk | Toa |
| Model | TS-D1100-MU |
| Categorie | Niet gecategoriseerd |
| Taal | Nederlands |
| Grootte | 5846 MB |


