Handleiding
Je bekijkt pagina 3 van 12
3
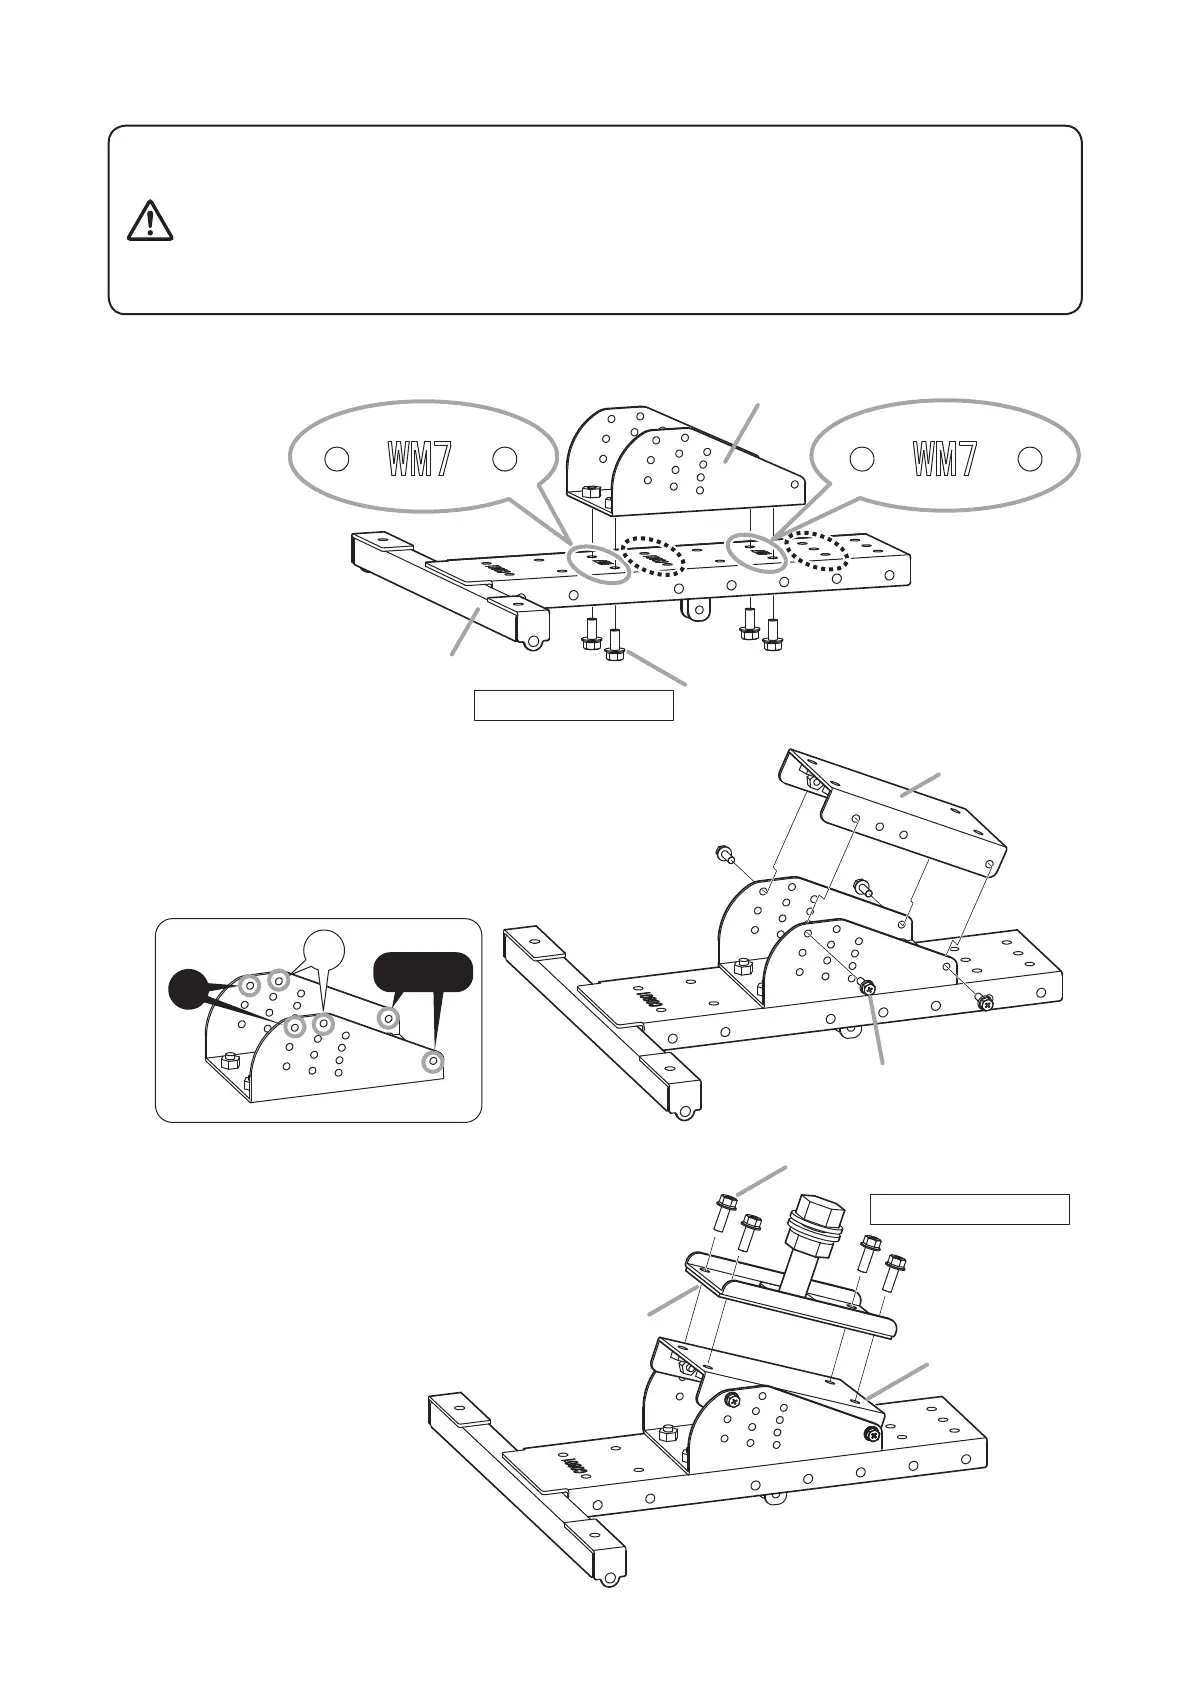
3.2. Installation
Tightentheboltssecurely,asinstructedbelow.
Failuretofollowinstructions preciselycould result in a falling speaker
andpotentialpersonalinjury.
• Ensurethatallboltsaresecurelyinsertedasfarastheirthreadsgo,
then securely fasten each bolt with a nut.
• Tightenalltheboltswiththedesignatedtighteningtorque.
Fortightening,useaPhillipsscrewdriver,oropen-orbox-endwrench.
WArNINg
Step 1. Attach the angle bracket to the T-bracket.
Usefourofthesuppliedboltstosecure.
Step 2. Attach the mounting base to the angle bracket.
Temporarily secure it in the angle bracket’s 20°
position*usingfourofthesuppliedbolts.
* 25º position only when the angle bracket’s angle
is set to 25º.
Step 3. AttachBracketBoftheHY-WM7BorHY-WM7W
to the mounting base.
UsefouroftheboltssuppliedwiththeHY-WM7B
orHY-WM7Wtosecure.
Angle bracket
T-bracket
Hex head bolt M8 x 20 with spring
and plain washers (accessory)
Tightening torque: 8 N·m
Angle bracket
20°
20°, 25°
25°
Mounting base
Hex head bolt M6 x 20 with spring
and plain washers (accessory)
HY-WM7B or HY-WM7W
(Bracket B)
Mounting base
Hex head bolt M8 x 25 with spring
and plain washers (HY-WM7B's or
HY-WM7W's accessory)
Tightening torque: 8 N·m
Note
Only when the angle bracket’s
angle is set to 25º in Step 10
(p. 5), use the mounting holes
enclosedwithdashedlines.
Bekijk gratis de handleiding van Toa HY-VM7W, stel vragen en lees de antwoorden op veelvoorkomende problemen, of gebruik onze assistent om sneller informatie in de handleiding te vinden of uitleg te krijgen over specifieke functies.
Productinformatie
| Merk | Toa |
| Model | HY-VM7W |
| Categorie | Speaker |
| Taal | Nederlands |
| Grootte | 2044 MB |
Caratteristiche Prodotto
| Kleur van het product | Wit |
| Gewicht | 4800 g |
| Plaatsing | Ceiling, Wall |
| Materiaal | Staal |
| Inclusief bouten | Ja |


