Handleiding
Je bekijkt pagina 3 van 8
3
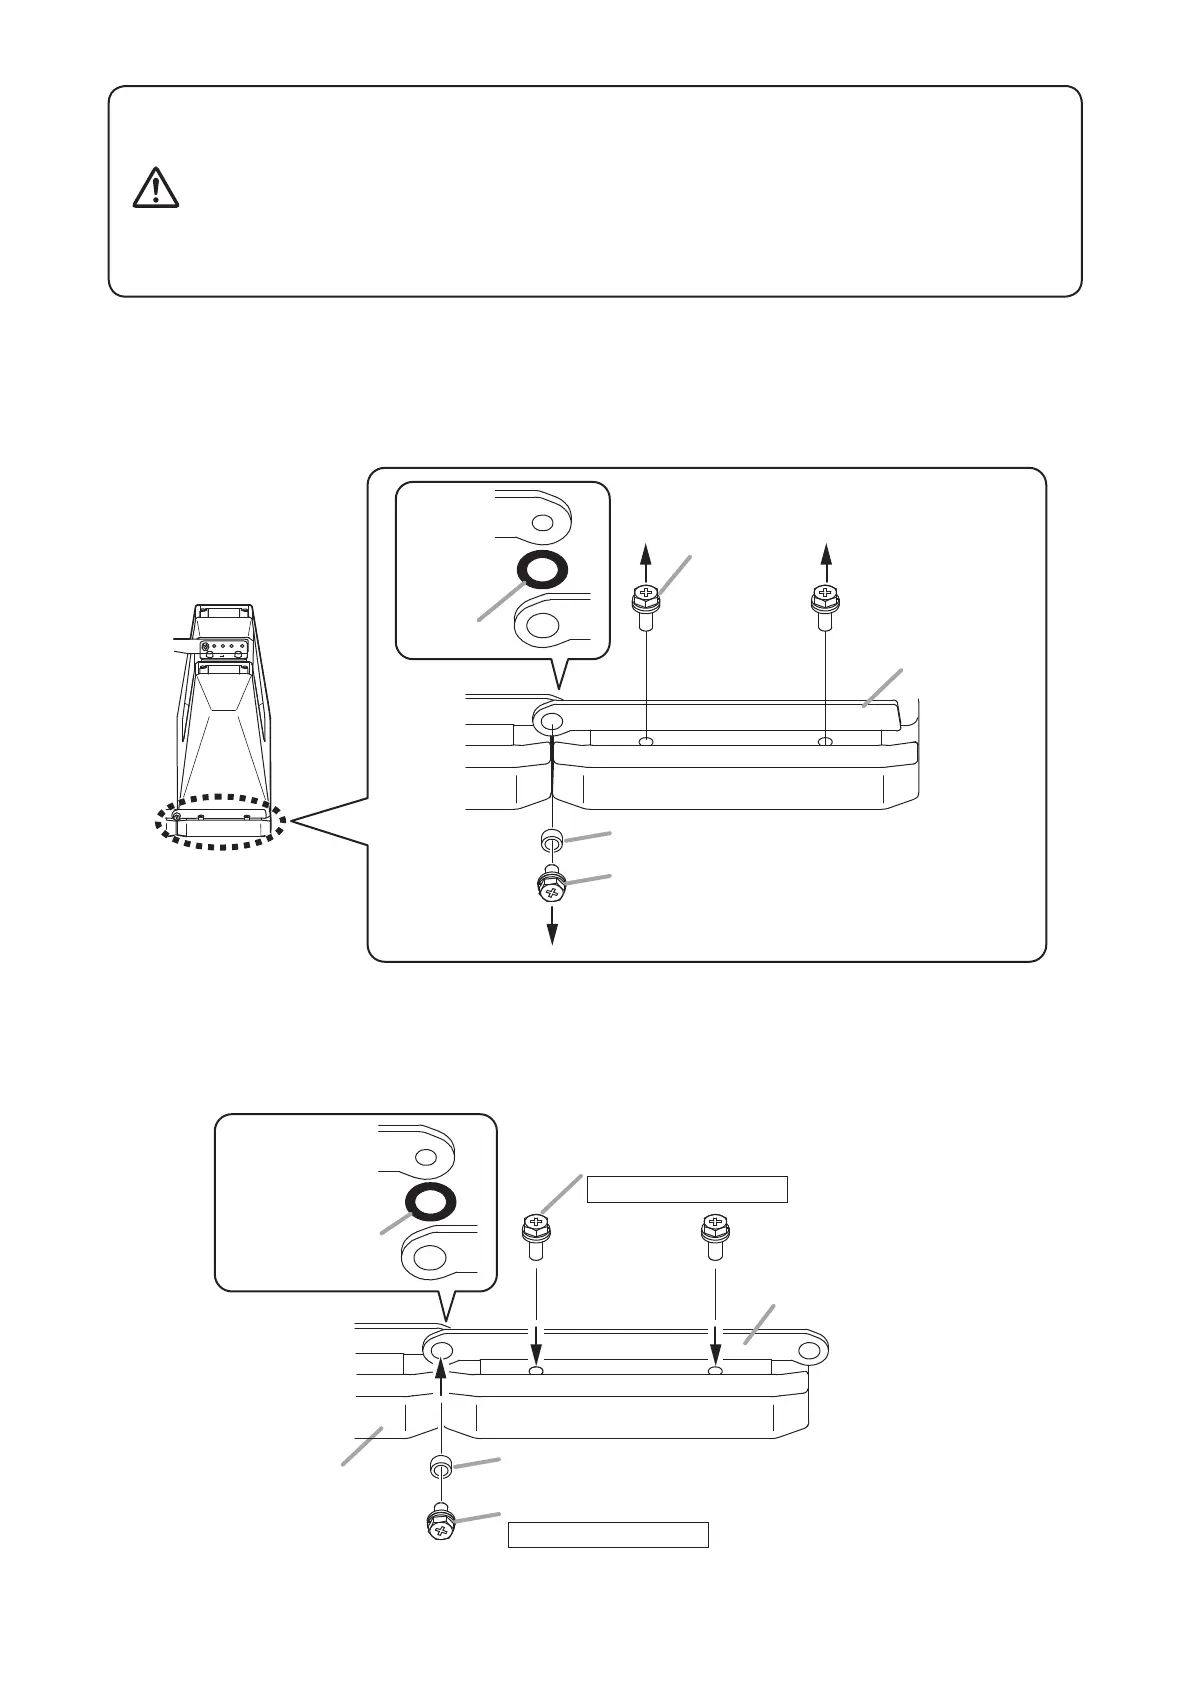
Speaker molule A
Hex head bolt removed in Step1-1
Rubber ring removed
in Step1-1
Side angle plate of this bracket
Speacer (golden) removed in Step1-1
Hex head bolt removed in Step1-1
Tightening torque:
3 N·m
Tightening torque:
3 N·m
Speaker molule A
Rubber ring
Speacer (golden)
Hex head bolt
Side angle plate
Hex head bolt
Tighten the bolts securely, as instructed below. Failure to follow
instructions precisely could result in a falling speaker and potential
personal injury.
• Ensurethatallboltsaresecurelyinsertedasfarastheirthreadsgo,
then securely fasten each bolt with a nut.
• Tighten all the bolts with the designated tightening torque. For
tightening,useaPhillipsscrewdriver,oropen-orbox-endwrench.
WARNING
Step 1. DetachthesideangleplateslocatedoneithersideofspeakermoduleA,andreplacethemwiththe
HY-CN7bracket'ssideangleplates.
1-1. Removethe2mountingboltstodetacheachsideangleplate.
Note:Takecarenottolosetheremovedbolts,spacersandrubberrings,astheseareusedinthenext
stepoftheprocedure.
Similarly,replacethesideangleplateontheoppositesideofthespeakermodule.
1-2. AttachtheHY-CN7bracket'ssideangleplatesinthesamepositionwherethespeaker'ssideangle
platesweremounted.
AttachtheHY-CN7bracket'ssideplatesinthereverseordershowninStep 1-1.
Similarly,attachthesideangleplateontheoppositesideofthespeakermodule.
Bekijk gratis de handleiding van Toa HY-CN7W-WP, stel vragen en lees de antwoorden op veelvoorkomende problemen, of gebruik onze assistent om sneller informatie in de handleiding te vinden of uitleg te krijgen over specifieke functies.
Productinformatie
| Merk | Toa |
| Model | HY-CN7W-WP |
| Categorie | Speaker |
| Taal | Nederlands |
| Grootte | 1280 MB |


