Thames & Kosmos Monster Sewing Workshop handleiding
Handleiding
Je bekijkt pagina 11 van 20
9
Now that you have learned the most important
stitches, it’s time to start sewing the monster.
But be careful! Decorations such as eyes and
mouth have to be sewn onto the fabric from the
back side
.
So first think about which decorations you want
to apply, and look at Part 3 of this manual to see
how to do it. Only after you do that will you be
able to sew the monster together.
You will need:
Stuck-together fabric shapes, needle, thread,
cotton batting, wooden stick, scissors, ruler
Here’s how:
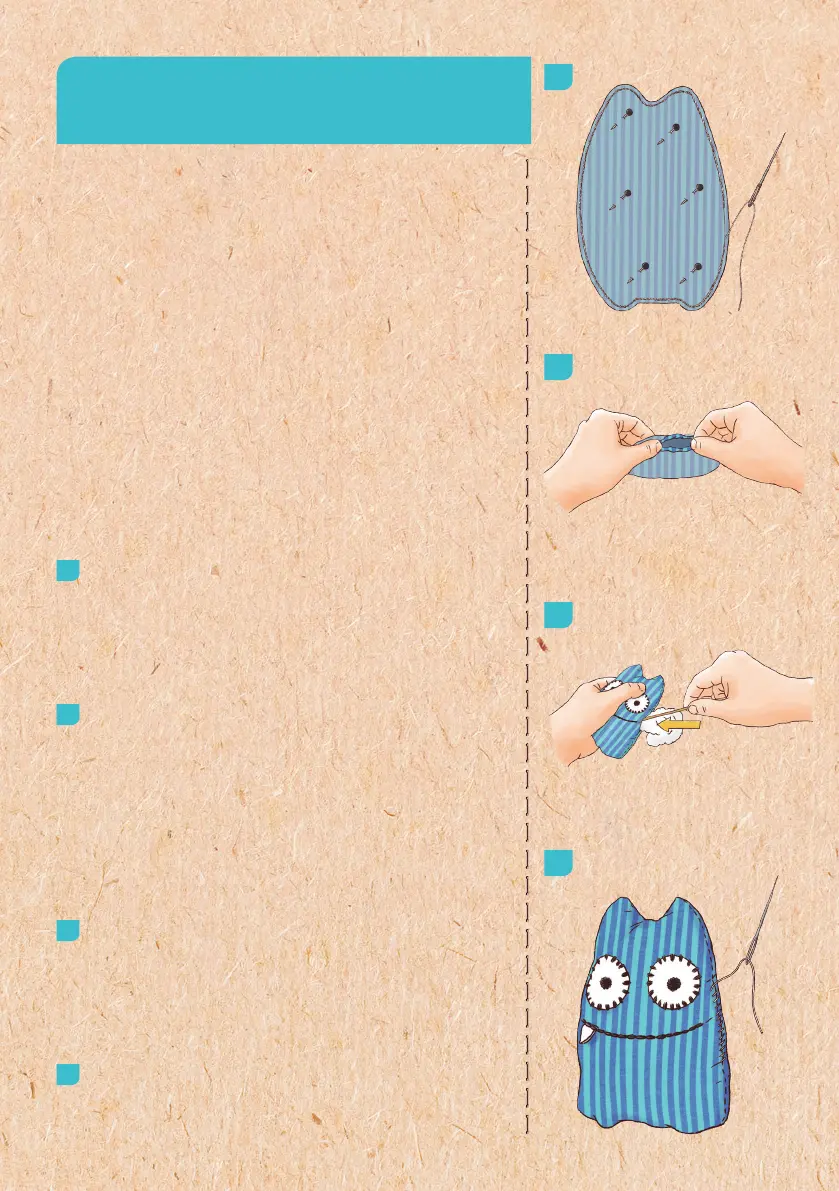
1
Sew the two fabric pieces together along the
inner pencil line with very small
backstitches (see page 7). At the end, leave a
small opening in the seam (about 2 to 3 cm)
and bury the thread (see page 8).
2
To be able to see the pretty side of the fabric,
your monster will have to be turned inside
out. To do that, you will have to push the
fabric through the little opening. Be very
careful as you do this, so you don’t rip the
fabric. Then push the arms, legs, or ears of
your monster into their proper shape. It’s
easiest with the wooden stick.
3
Next, gradually fill the monster with small
portions of cotton batting. You can use the
wooden stick for that too. Start by filling the
legs, arms, and ears. Finally, fill the body and
the head.
4
Close the opening through which you turned
the fabric with a few small whipstitches (see
page 8) and bury the thread.
Sewing the fabric monster
together and stuffing it
1
2
3
4
Bekijk gratis de handleiding van Thames & Kosmos Monster Sewing Workshop, stel vragen en lees de antwoorden op veelvoorkomende problemen, of gebruik onze assistent om sneller informatie in de handleiding te vinden of uitleg te krijgen over specifieke functies.
Productinformatie
| Merk | Thames & Kosmos |
| Model | Monster Sewing Workshop |
| Categorie | Niet gecategoriseerd |
| Taal | Nederlands |
| Grootte | 39958 MB |