Supermicro X14SBH-AP handleiding
Handleiding
Je bekijkt pagina 33 van 140
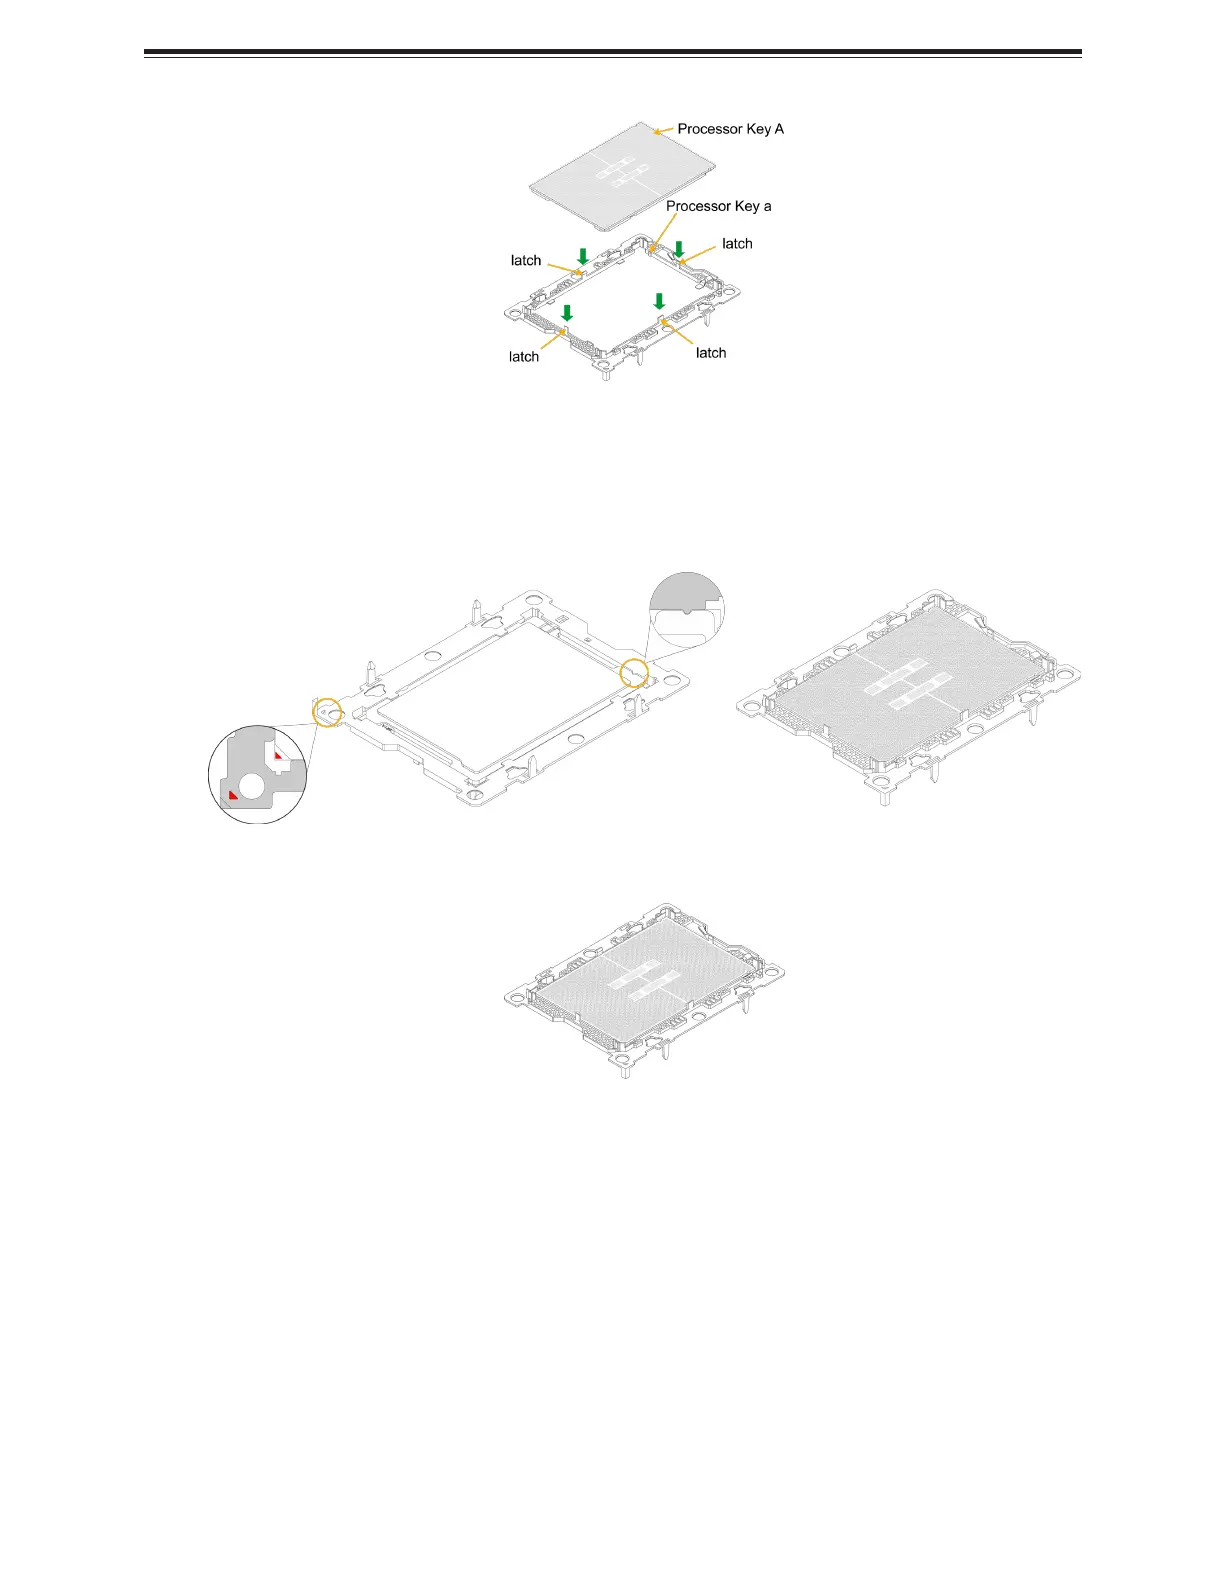
Figure 2-14. Keys and Latches Locations
4. Examine all corners to verify that the processor is secured to the carrier. Two triangles
indicating pin 1 on the processor and processor carrier should point towards the same
direction.
Figure 2-15. Processor and BR1A Keys and Latches
Figure 2-16. Completed Processor Carrier Installation
Assembling the Processor Heatsink Module
After installing the processor into the carrier, mount it onto the heatsink to create the processor
heatsink module (PHM):
1. Note the label on top of the heatsink, which marks the airflow direction. Turn the heatsink
over and orient the heatsink so the airflow arrow is pointing towards the triangle on the
processor.
33
X14SBH-AP: Component Installation
Bekijk gratis de handleiding van Supermicro X14SBH-AP, stel vragen en lees de antwoorden op veelvoorkomende problemen, of gebruik onze assistent om sneller informatie in de handleiding te vinden of uitleg te krijgen over specifieke functies.
Productinformatie
| Merk | Supermicro |
| Model | X14SBH-AP |
| Categorie | Niet gecategoriseerd |
| Taal | Nederlands |
| Grootte | 17647 MB |


