Supermicro X11SSM handleiding
Handleiding
Je bekijkt pagina 31 van 124
31
Chapter 2: Installation
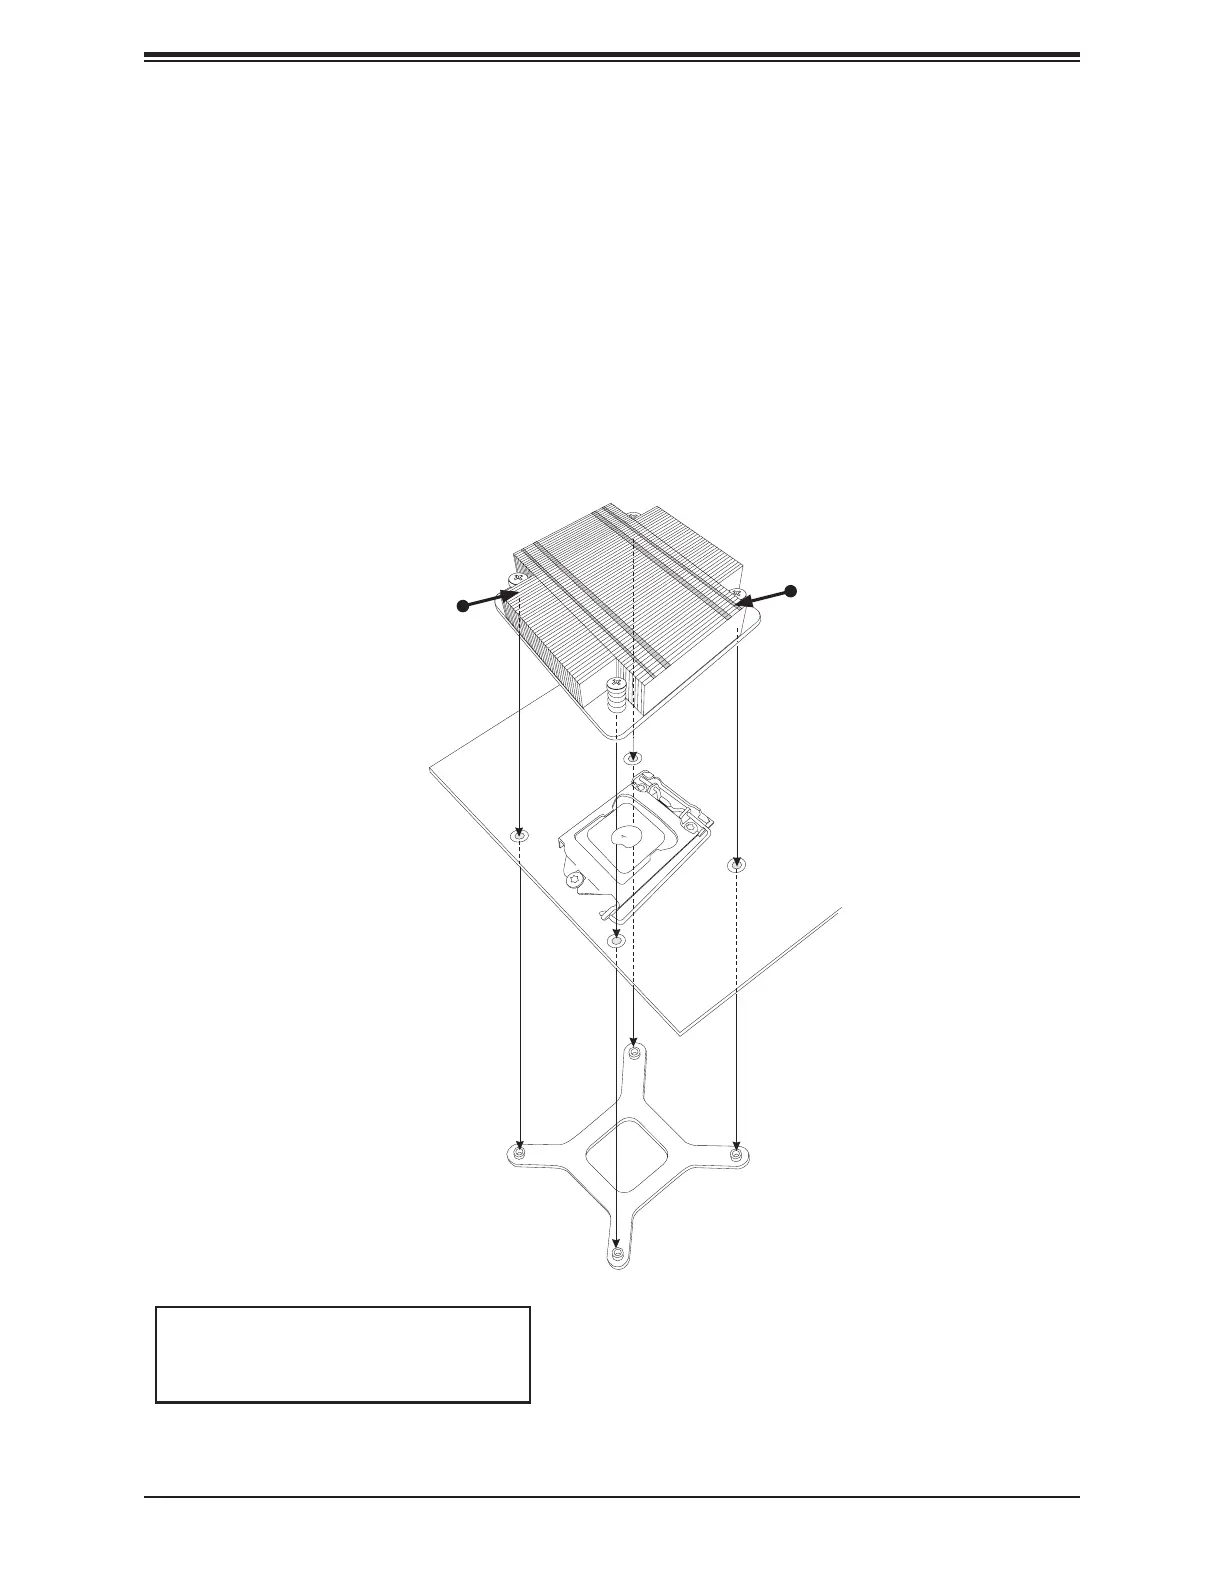
Installing a Passive CPU Heatsink
1. Do not apply thermal grease to the heatsink or the CPU die; the required amount has
already been applied.
2. Place the heatsink on top of the CPU so that the four mounting holes are aligned with
those on the motherboard and the underlying heatsink bracket.
3. Screw in two diagonal screws (the #1 and #2 screws in the gure below) until just snug.
To avoid possible damage to the CPU, do not over tighten the screws.
4. Finish the installation by fully tightening all four screws.
Mounting Holes
Screw#1
Heatsink Bracket
Screw#2
Motherboard
Recommended Supermicro heatsink:
SNK-P0046P passive heatsink
(1U chassis)
Bekijk gratis de handleiding van Supermicro X11SSM, stel vragen en lees de antwoorden op veelvoorkomende problemen, of gebruik onze assistent om sneller informatie in de handleiding te vinden of uitleg te krijgen over specifieke functies.
Productinformatie
| Merk | Supermicro |
| Model | X11SSM |
| Categorie | Niet gecategoriseerd |
| Taal | Nederlands |
| Grootte | 19665 MB |
Caratteristiche Prodotto
| Breedte | 244 mm |
| Diepte | 244 mm |
| Ethernet LAN | Ja |
| Aantal USB 2.0-poorten | 2 |
| VGA (D-Sub)poort(en) | 1 |


