Supermicro SuperBlade SBI-420P-1T3N handleiding
Handleiding
Je bekijkt pagina 23 van 94
23
Chapter 2 Installation and Setup
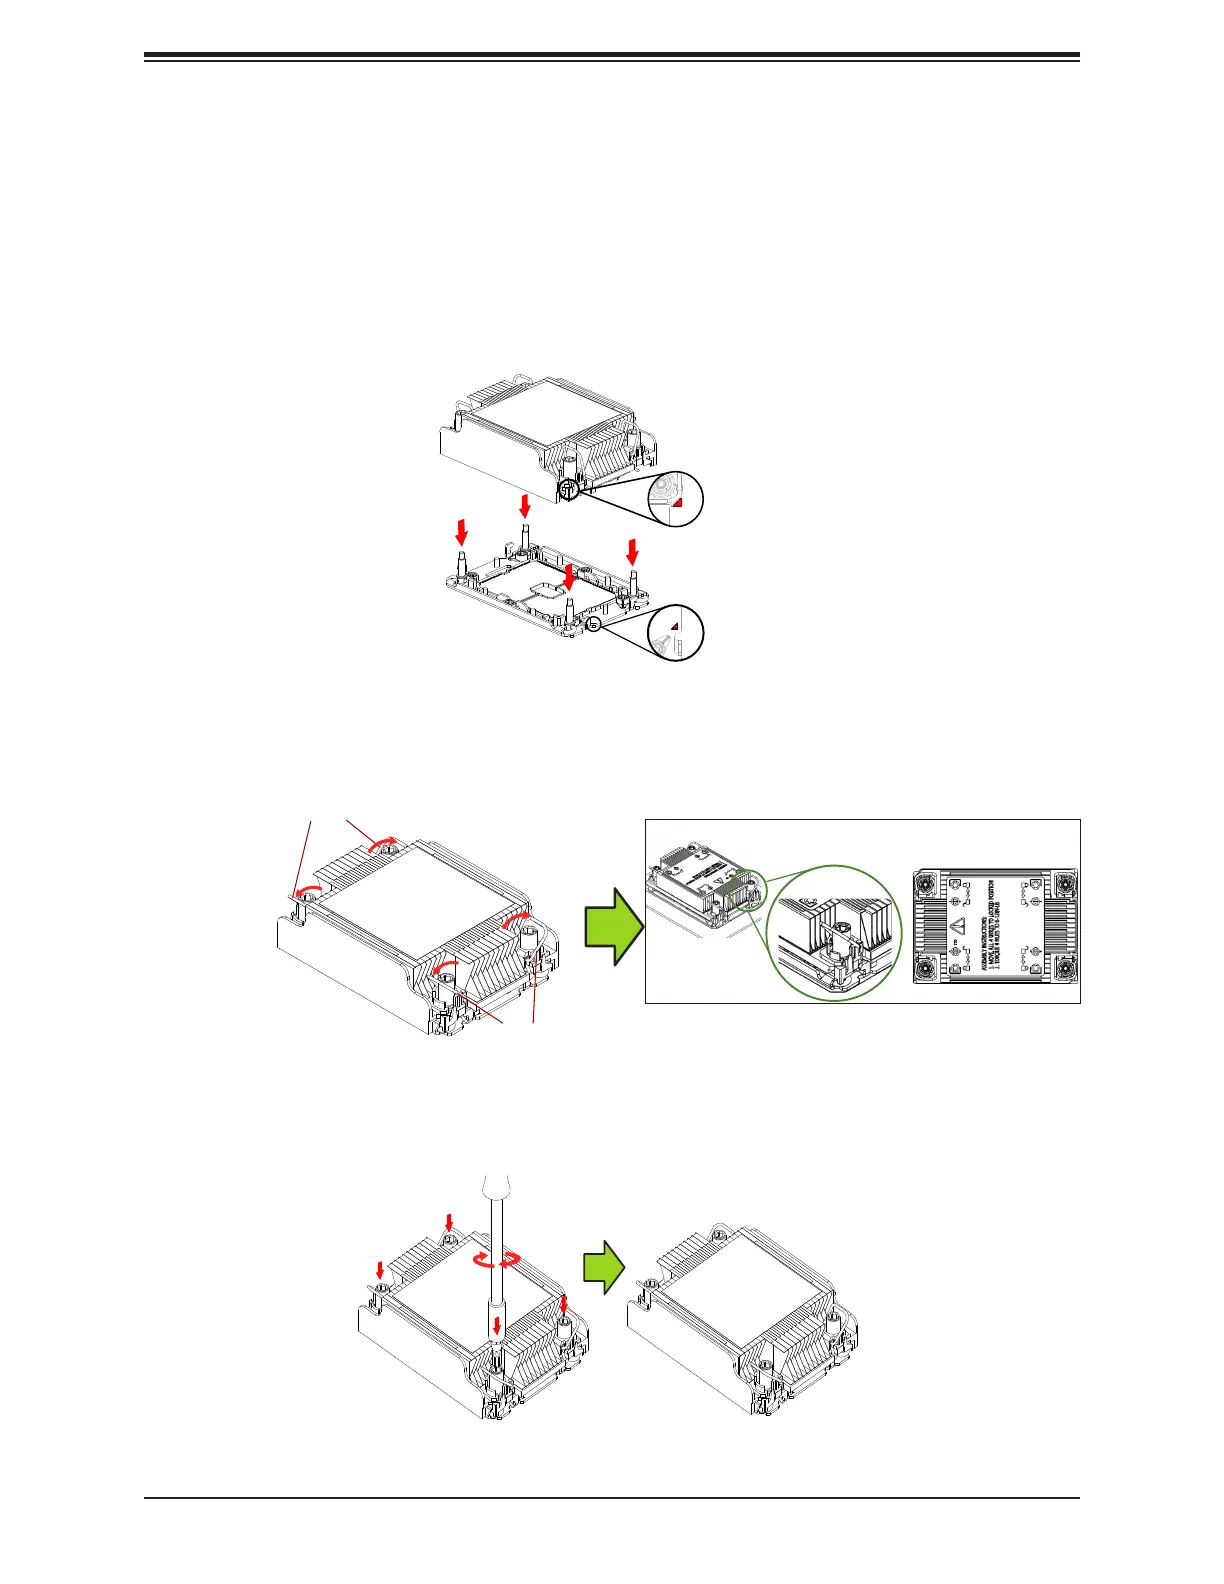
5. Align nut A (next to the triangles and pin 1) on the heatsink with threaded fastener "a"
on the CPU socket. Also align nuts B, C, D on the heatsink with threaded fasteners b, c,
d on the CPU socket.
6. Gently place the heatsink on the CPU socket, making sure that each nut is properly
aligned with its corresponding threaded fastener.
Latched State
Top View
7. Press all four rotating wires outward to latch the PHM onto the CPU socket.
8. With a t30-bit screwdriver, tighten all PEEK nuts in the sequence of A, B, C, and D with
even pressure not greater than 12 lbf-in.
a, b, c, d:
Threaded Fastener on the CPU socket
A
B
C
D
a
b
c
d
A, B, C, D:
Peek Nut on the Heatsink
Rotating Wire
Rotating Wire
A
B
C
D
Bekijk gratis de handleiding van Supermicro SuperBlade SBI-420P-1T3N, stel vragen en lees de antwoorden op veelvoorkomende problemen, of gebruik onze assistent om sneller informatie in de handleiding te vinden of uitleg te krijgen over specifieke functies.
Productinformatie
| Merk | Supermicro |
| Model | SuperBlade SBI-420P-1T3N |
| Categorie | Niet gecategoriseerd |
| Taal | Nederlands |
| Grootte | 15430 MB |


