Stihl BRA 500.0 B handleiding
Handleiding
Je bekijkt pagina 15 van 64
2
3
4
1
0000083481_002
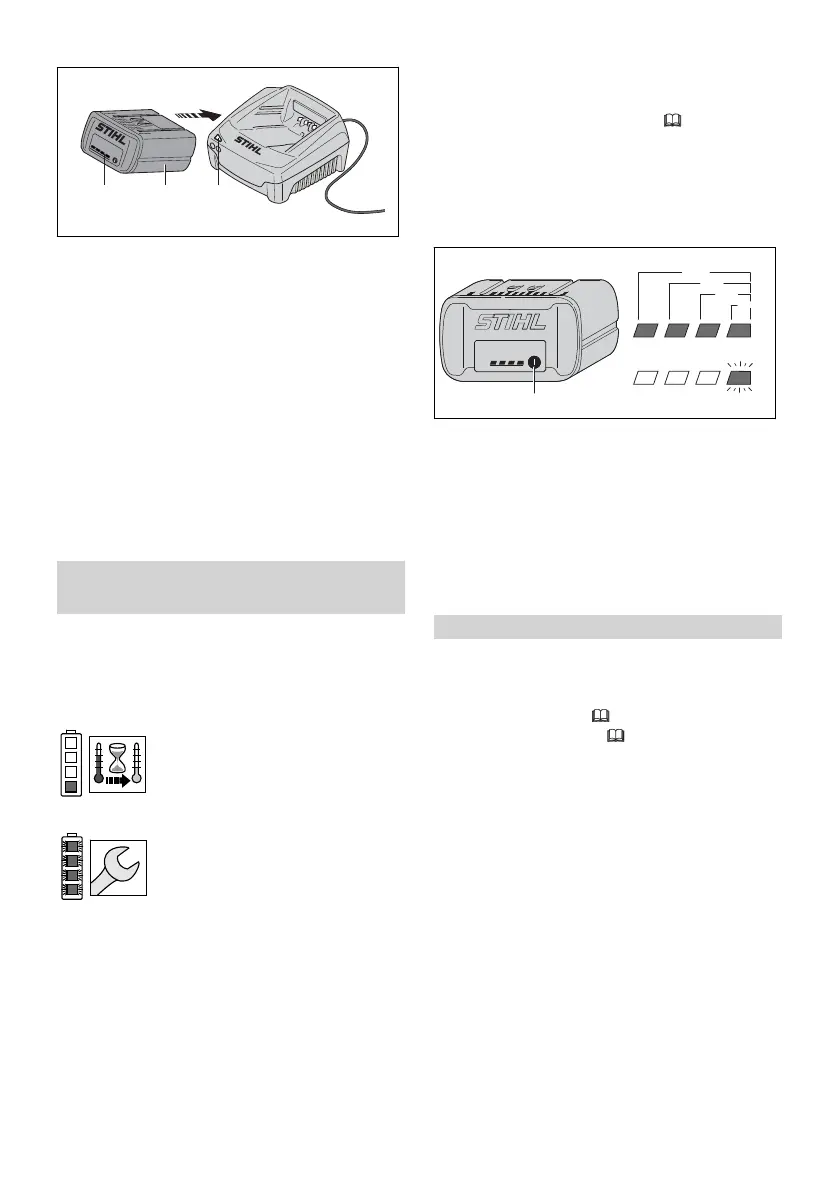
► Push the battery (2) into the charger (3) until it
stops.
The LED on the charger glows green when the
battery is charging.
The LEDs (1) on the battery glow green and
show the state of charge.
When the LEDs on the battery go out, the
charging process is complete and the charger
will shut itself off. The battery can be removed
from the charger.
► Disconnect the power supply cord from the
electrical outlet when the charger is not in use
for extended periods of time.
► Charge STIHL AP series batteries only with
genuine STIHL AL 101, AL 301, AL 301-4,
AL 500 or AL 501 series chargers.
11 LED Diagnostics and
Acoustic Signals
11.1 STIHL AP Battery
11.1.1 Battery Status
Four LEDs show the status of the battery. These
LEDs can glow or flash green or red.
If one LED glows red continu‐
ously: the battery is either too hot
or too cold. Allow the battery to
warm up or cool down gradually at
an ambient temperature of about
50 °F to 68 °F (10 °C to 20 °C).
If all 4 LEDs flash red: the battery
has a malfunction and must be
replaced. Do not attempt to
charge, use or store the battery.
11.1.2 Power Tool Status
The same LEDs on the battery will indicate the
status of the power tool.
If three LEDs glow red continuously: the power
tool motor is too hot. Allow the motor to cool
down.
If three LEDs flash red when you activate the
trigger switch: the power tool has an electrical
malfunction. Do not operate the power tool. Have
it checked by an authorized STIHL servicing
dealer before use or storage.
For troubleshooting information,
24.
11.1.3 Charge Status
The LEDs on the battery also show the battery's
state of charge.
To determine the battery's state of charge:
0000079877_002
20-40%
40-60%
60-80%
80-100%
0-20%
1
► Press the button (1) on the battery.
The LEDs on the battery will glow or flash
green for about 5 seconds and indicate the
state of charge (see illustration).
For example:
If four green LEDs glow continuously: full charge.
If one green LED is flashing: less than 20 %
charge.
12 Bluetooth® Radio Interface
12.1 Blower
12.1.1
Turning the Bluetooth
®
Interface On
►
Insert the batteries,
15.1.
►
Switch the blower on, 16.1.
► Press and hold the push button on the operat‐
ing unit for about 3 seconds.
If the Bluetooth
®
LED next to the connected
symbol glows blue for about 5 seconds, the
blower's Bluetooth
®
interface is on.
12.1.2
Turning the Bluetooth
®
Interface Off
► Delete the blower from the STIHL connected
App.
► Press and hold the push button on the operat‐
ing unit for about 10 seconds.
If the Bluetooth
®
LED flashes blue six times,
the Bluetooth
®
interface is off.
11 LED Diagnostics and Acoustic Signals English
0458-060-8601-A 15
Bekijk gratis de handleiding van Stihl BRA 500.0 B, stel vragen en lees de antwoorden op veelvoorkomende problemen, of gebruik onze assistent om sneller informatie in de handleiding te vinden of uitleg te krijgen over specifieke functies.
Productinformatie
| Merk | Stihl |
| Model | BRA 500.0 B |
| Categorie | Niet gecategoriseerd |
| Taal | Nederlands |
| Grootte | 7276 MB |


