Steinbach Silent 7 handleiding
Handleiding
Je bekijkt pagina 21 van 30
40 41
049311_049312_049313_049314_049315_V2404 049311_049312_049313_049314_049315_V2404
en en
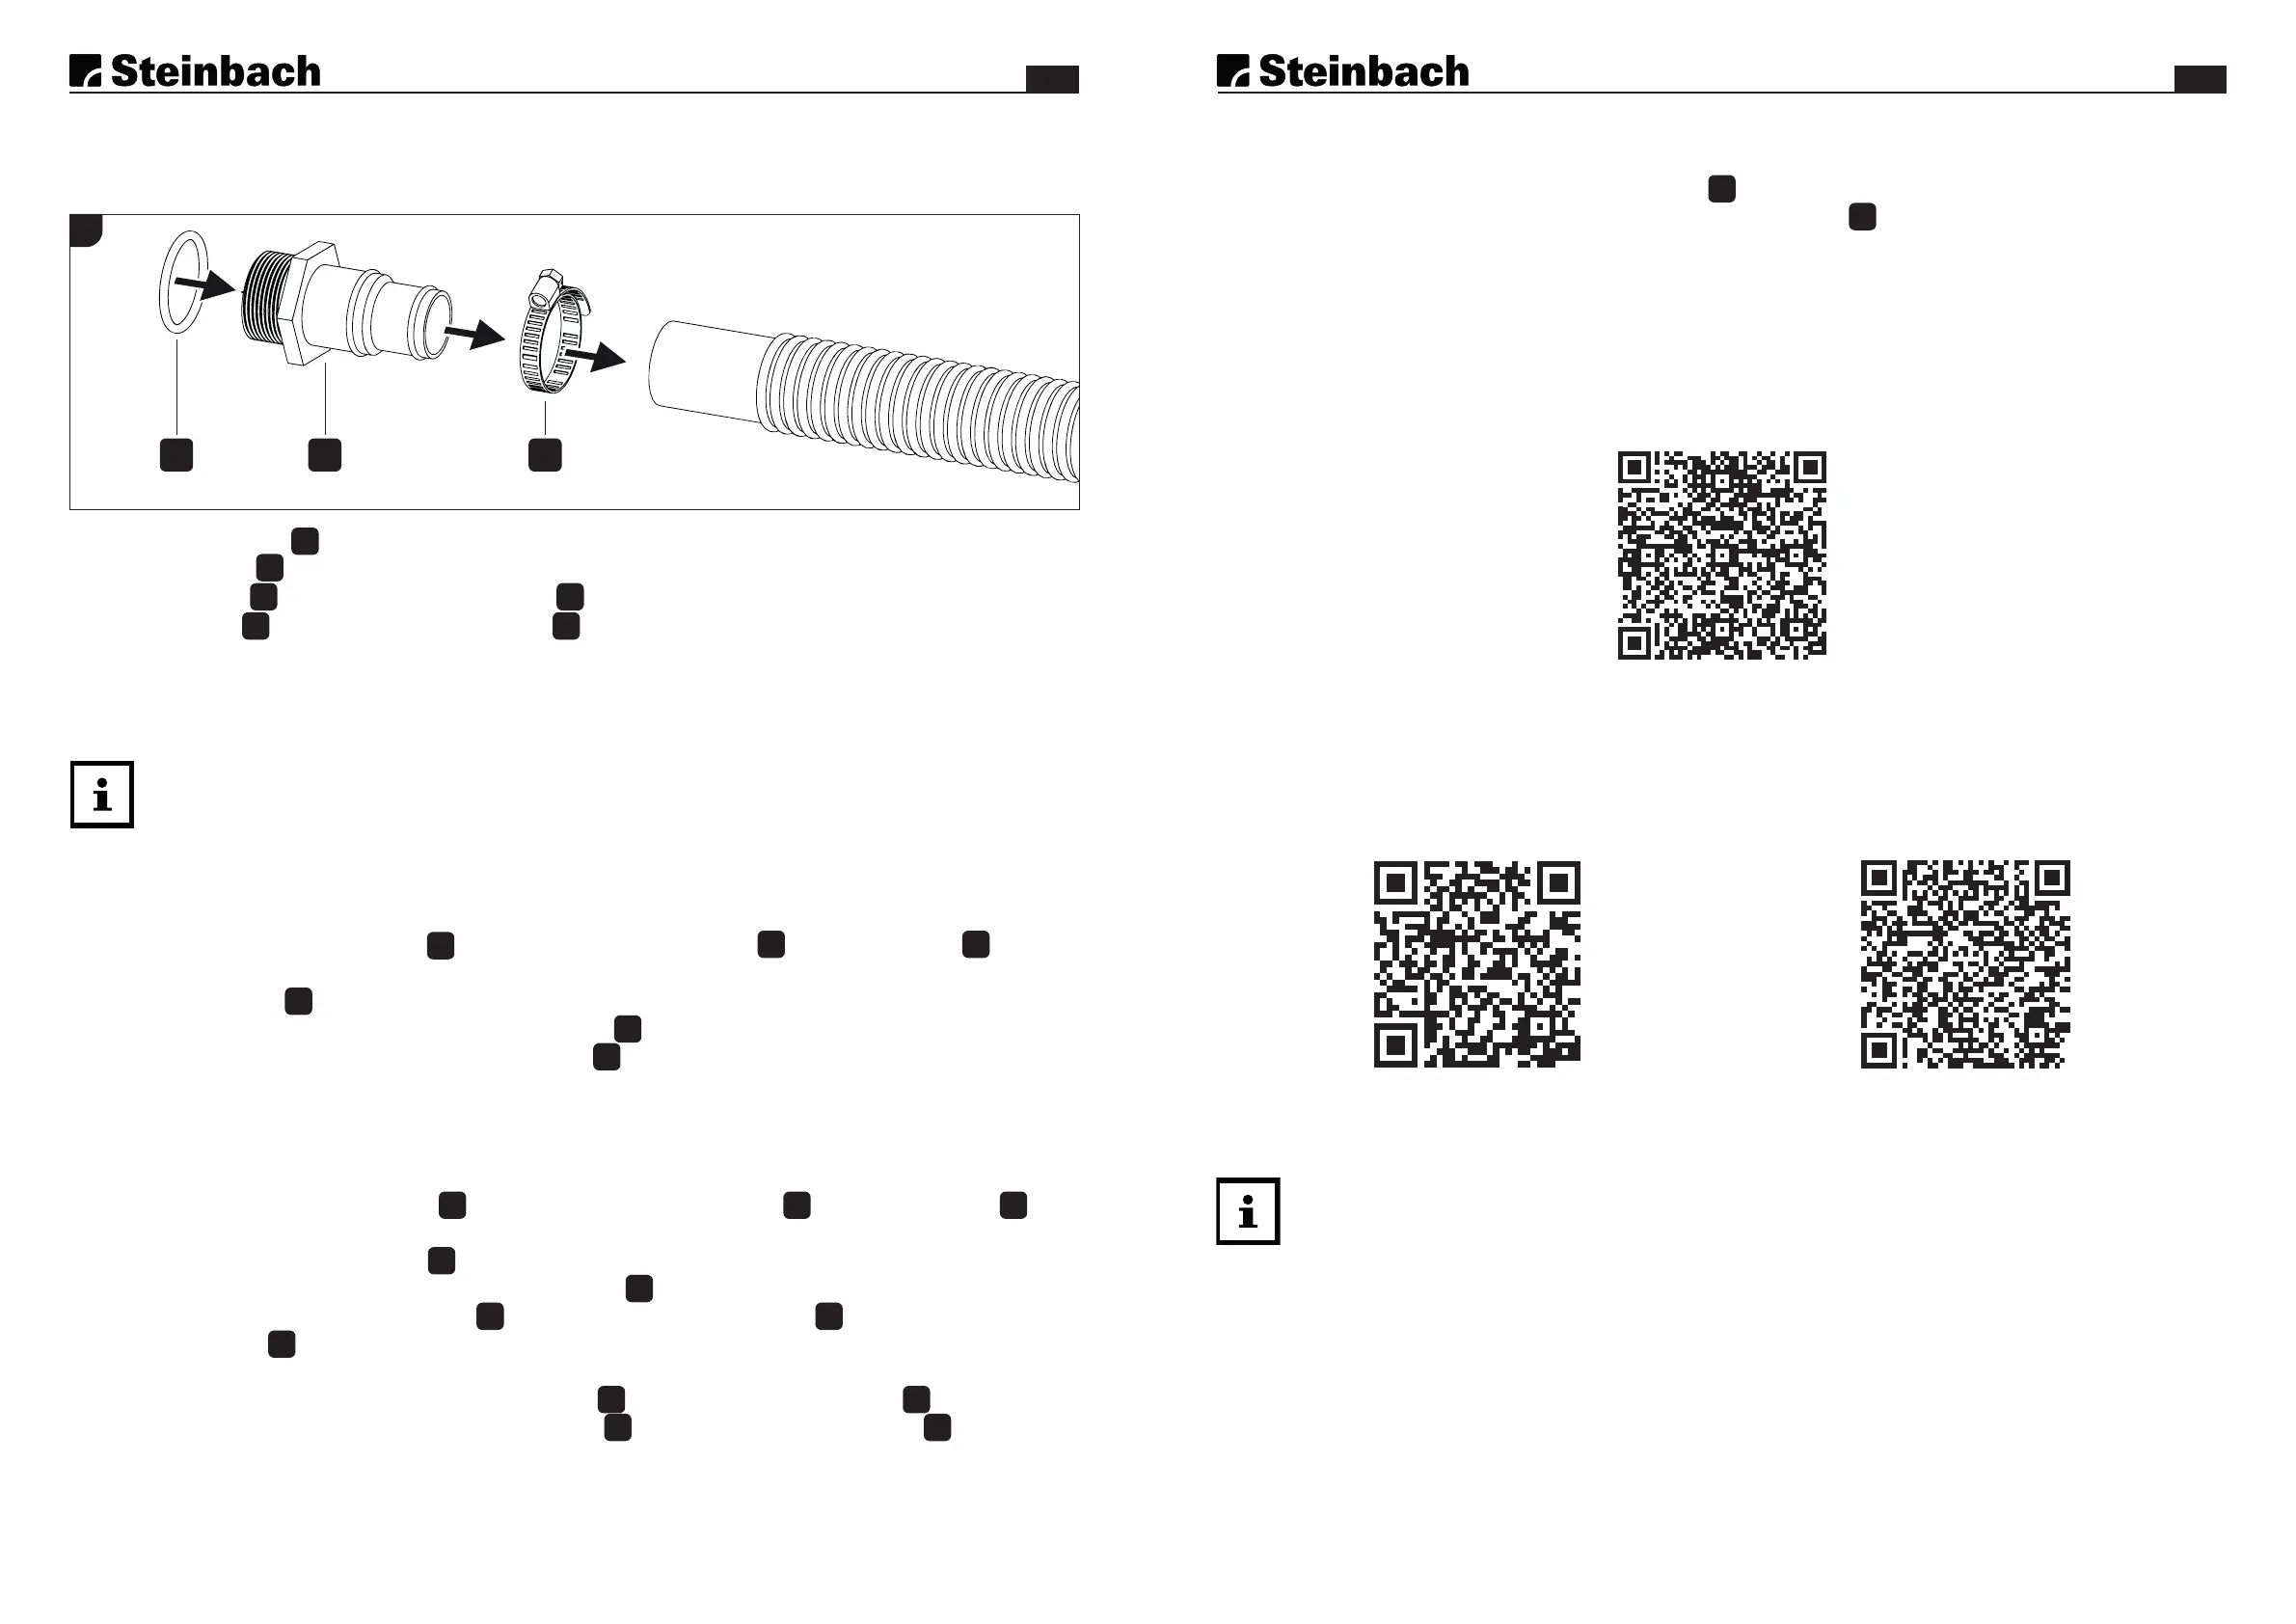
1. Insert a hose clamp
4
to the end of the supply line.
2. Plug an adapter
2
into the end of the supply line.
3. Fix the adapter
2
by ghtening the hose clamp
4
at the hose end of the supply line.
4. Insert the seal
3
via the thread on the adapter
2
.
5. Fit the second adapter to the hose end of the drain in the same way.
The adapters are ed to the hose ends.
Connecng the cables
You have the opon of installing the water pipes as exible swimming pool hoses (Ø 32/38 mm) or as
xed pipes (D 50 mm). The addional transion sleeve nipples included with the Silent 9, Silent 11 or
Silent 13 heat pumps allow the heat pump to be installed in both variants.
Connecng water pipes (Hose connecon)
1. Place the heat pump at the prepared locaon.
2. Clean the water connecon outlet
6
and the water connecon input
7
on the heat pump
1
from
coarse impuries.
3. Clean the adapters
2
at the hose ends of the water pipes from coarse impuries.
4. Screw the drain pipe onto the water connecon outlet
6
.
5. Screw the inlet pipe onto the water connecon inlet
7
.
The swimming pool hoses are connected.
Connecng water pipes (xed piping)
1. Place the heat pump at the prepared locaon.
2. Clean the water connecon outlet
6
and the water connecon input
7
on the heat pump
1
from
coarse impuries.
3. Clean the transion sleeve nipples
5
from coarse impuries.
4. Wrap the external thread of the transion sleeve nipple
5
with sealing tape (e. g. Teon tape).
5. Screw one transion sleeve nipple each
5
into the water connecon outlet
6
and into the water
connecon input
7
.
The water connecons are prepared for burst piping.
6. Connect the inlet pipe to the transion sleeve nipple
5
in the water connecon inlet
7
.
7. Connect the drain pipe to the transion sleeve nipple
5
in the water connecon outlet
6
.
The xed piping is installed.
Installaon
Fing the adapter to the hose ends
Install app
Install the app and register to be able to use the full funconality of the device.
Product registraon
or open the following URL in your browser:
hps://productregistraon.steinbach-group.com/
App-Installaon
Keep the app up to date by regularly installing updates.
This is the only way to guarantee trouble-free operaon of the control system via Bluetooth in the long
term.
iOS
or search in the Apple App Store for
„Steinbach Silent Series“
Android
or search in the Google Play Store for
„Steinbach Silent Series“
Establishing the power supply
Connect the mains plug to the end of the mains cable
8
with the power supply prepared at the stand. As soon
as the power supply is established, all display elements on the display
C
light up.
1
3 2 4
Bekijk gratis de handleiding van Steinbach Silent 7, stel vragen en lees de antwoorden op veelvoorkomende problemen, of gebruik onze assistent om sneller informatie in de handleiding te vinden of uitleg te krijgen over specifieke functies.
Productinformatie
| Merk | Steinbach |
| Model | Silent 7 |
| Categorie | Niet gecategoriseerd |
| Taal | Nederlands |
| Grootte | 6137 MB |


