Standard Horizon Quest GX1500S handleiding
Handleiding
Je bekijkt pagina 15 van 92
Page 15GX1500S
8.9 OPTIONAL MMB-84 FLUSH MOUNT INSTALLATION
1. To assist in flush mounting, a template has been included. Use this template
to find the mounting location.
2. Use the template to mark the location where the rectangular hole is to be
cut. Confirm the space behind the dash or panel is deep enough to accom-
modate the transceiver (at least 6 inches or 15 cm deep).
There should be at least 1/2 inch (1.3 cm) between the transceiver’s heatsink
and any wiring, cables or structures.
3. Cut out the rectangular hole and insert the transceiver.
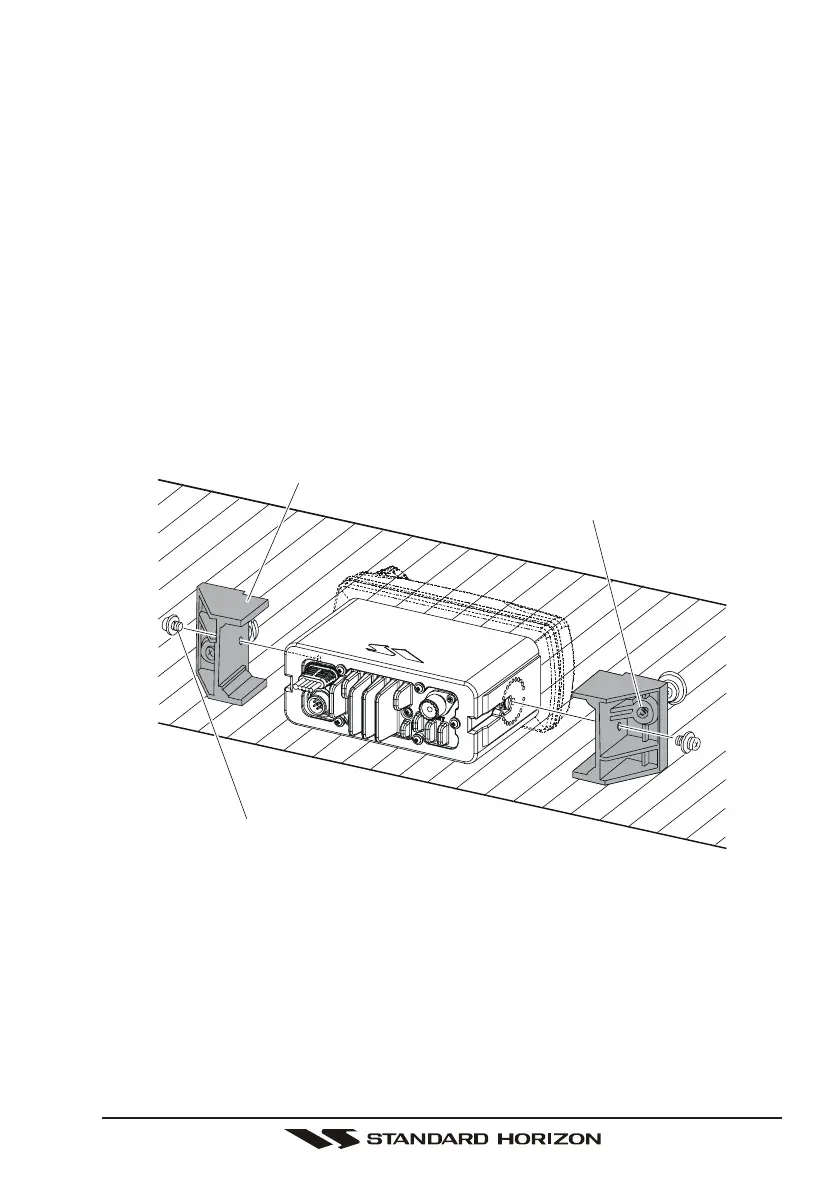
4. Fasten the brackets to the sides of the transceiver with the lock washer nut
combination; so that the mounting screw base faces the mounting surface
(see Figure 2).
5. Turn the adjusting screw to adjust the tension so that the transceiver is tight
against the mounting surface.
Figure 2. MMB-84 Flush Mount Installation
Bracket
Adjusting Screw
Lock-washer nut combination
Bekijk gratis de handleiding van Standard Horizon Quest GX1500S, stel vragen en lees de antwoorden op veelvoorkomende problemen, of gebruik onze assistent om sneller informatie in de handleiding te vinden of uitleg te krijgen over specifieke functies.
Productinformatie
| Merk | Standard Horizon |
| Model | Quest GX1500S |
| Categorie | Niet gecategoriseerd |
| Taal | Nederlands |
| Grootte | 9601 MB |


