Standard Horizon Matrix GX2200 handleiding
Handleiding
Je bekijkt pagina 27 van 152
Page27GX2200
6.11 OPTIONAL CMP30
(
RAM3
)
INSTALLATION
The GX2200iscapableofusingaCMP30
(
RAM3
)
RemoteStationMicro-
phonetoremotelycontroltheRadio,AIS,DSCandPA/Fogfunctions.In
addition the GX2200canoperateasafullfunctionintercomsystembetween
the CMP30
(
RAM3
)
and the GX2200.
WARNING
Do not connect or remove the CMP30 (RAM3) microphone while
the radio is powered on. This may result in equipment failure.
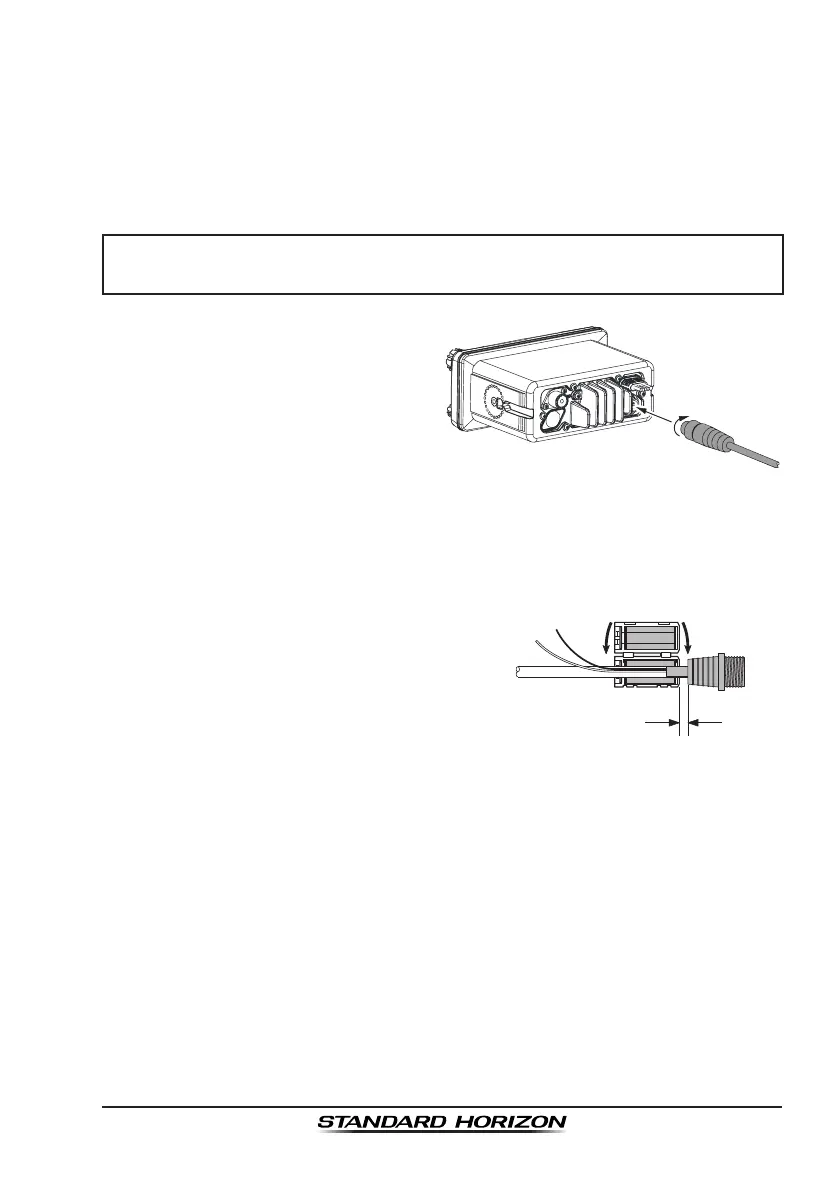
1. Connecttheextensioncable to
theremotemicrophoneeight
pinconnectorontherearpanel,
thentighten thecablenut(see
illustrationattheright).
2. Installtheferritecore(suppliedwiththeCMP30
(
RAM3
)
Remote Station
Microphone)totheextensioncable, thensnapitstwohalvestogether,
pertheillustrationonthenextpage.
3. AttachtheferritecoreascloseaspossibletotheMIC plug,asshown
below.
4. Finally,windsomeplastictape
aroundeachferritecore,to
preventvibrationfromcausing
thetwohalvestosplitapart.
Ascloseaspossible
RoutingCableor
CT-100ExtensionCable
FerriteCore
Snaptogether
ExternalSpeaker
Connections
5. Referringtoillustrationbelow,makea1.2”(30mm)holeinthewall,then
inserttheextensioncableintothishole.Connectthegasketandmount
basetotheextensioncableconnectorusingthenut.
6. Drillthe four screw holes (approx. 2 mm) on the wall, then installthe
mountingbasetothewallusingfourscrews.
7. Puttherubbercapontothenut.Theinstallationisnowcomplete.
Bekijk gratis de handleiding van Standard Horizon Matrix GX2200, stel vragen en lees de antwoorden op veelvoorkomende problemen, of gebruik onze assistent om sneller informatie in de handleiding te vinden of uitleg te krijgen over specifieke functies.
Productinformatie
| Merk | Standard Horizon |
| Model | Matrix GX2200 |
| Categorie | Niet gecategoriseerd |
| Taal | Nederlands |
| Grootte | 20843 MB |


