Sony Sonic Surf VR handleiding
Handleiding
Je bekijkt pagina 9 van 24
9
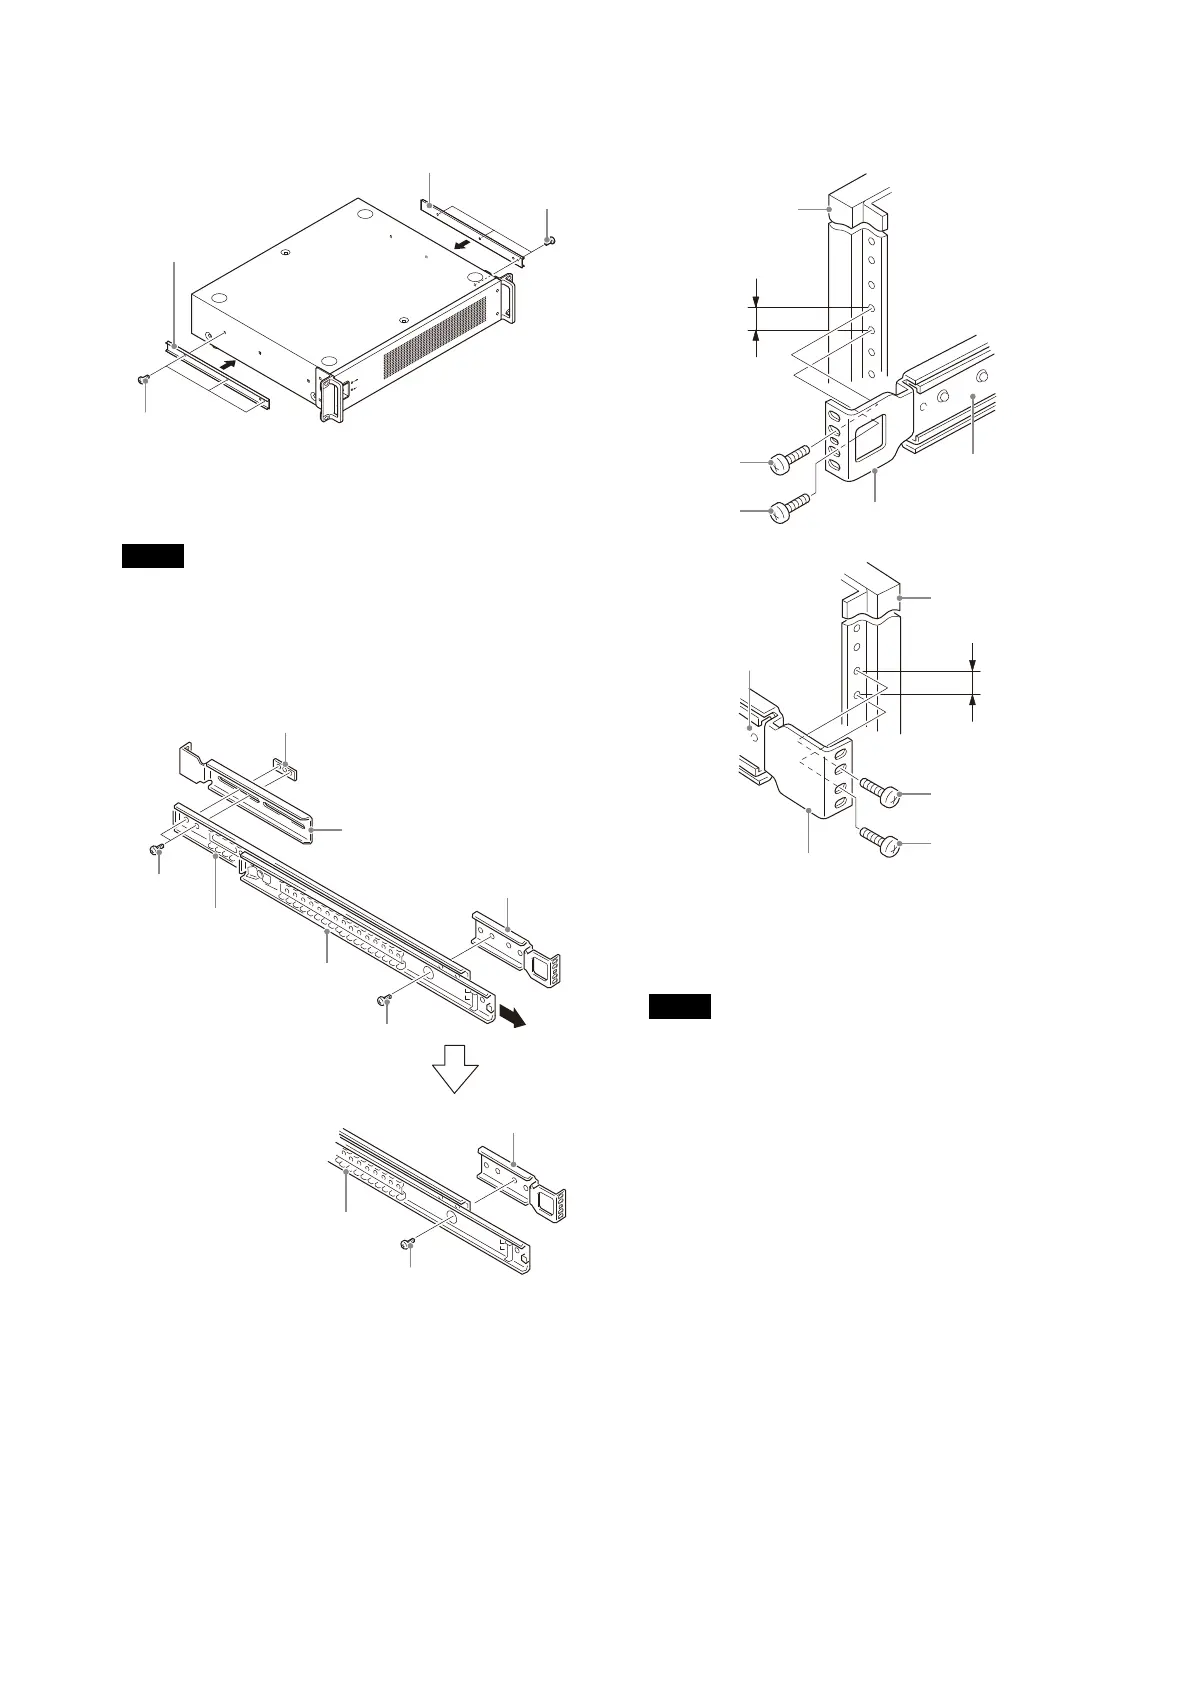
2
Attach the inner rail to the control unit using six
screws (B4×8).
3
Attach the front and rear brackets to the outer rail
using eight screws (B4×8).
• When attaching the front bracket, slide the middle member to the
position where the screw hole in the cabinet member is visible from
the hole in the middle member, as shown in the figure.
• When attaching the rear bracket, adjust the bracket position
according to the depth of the rack.
4
Temporarily attach the front and rear brackets to the
outer side of the rack mount position using eight
screws (B5×8).
5
Insert the control unit in the rack into the outer rail as
far as it will go while pressing the inner rail stopper.
• Mounting the control unit in a rack must be done by two or more
workers so as not to hurt the worker’s lower back.
• Failure to tighten the rack angle screws may cause the control unit
to slide and fall from the rack, resulting in injury. After the control
unit has been mounted, be sure to tighten all the screws.
• When inserting and withdrawing the mounted control unit, be
careful not to catch your fingers in the rails.
• If balance is lost when mounting and removing the control unit, it
may fall, resulting in injury. Mount or remove the control unit
carefully maintaining a stable posture.
Notes
Inner rail
Inner rail
B4×8
B4×8
Plate nut
Rear bracket
Front bracket
B4×8
B4×8
B4×8
Cabinet member
Middle member
Middle member
Front bracket
Notes
B5×8
B5×8
Rack (front)
12.7 mm
Front bracket
Outer rail
B5×8
Rear bracket
12.7 mm
Outer rail
Rack (rear)
B5×8
Bekijk gratis de handleiding van Sony Sonic Surf VR, stel vragen en lees de antwoorden op veelvoorkomende problemen, of gebruik onze assistent om sneller informatie in de handleiding te vinden of uitleg te krijgen over specifieke functies.
Productinformatie
| Merk | Sony |
| Model | Sonic Surf VR |
| Categorie | Niet gecategoriseerd |
| Taal | Nederlands |
| Grootte | 2676 MB |


