Singer Ditto handleiding
Handleiding
Je bekijkt pagina 14 van 26
14
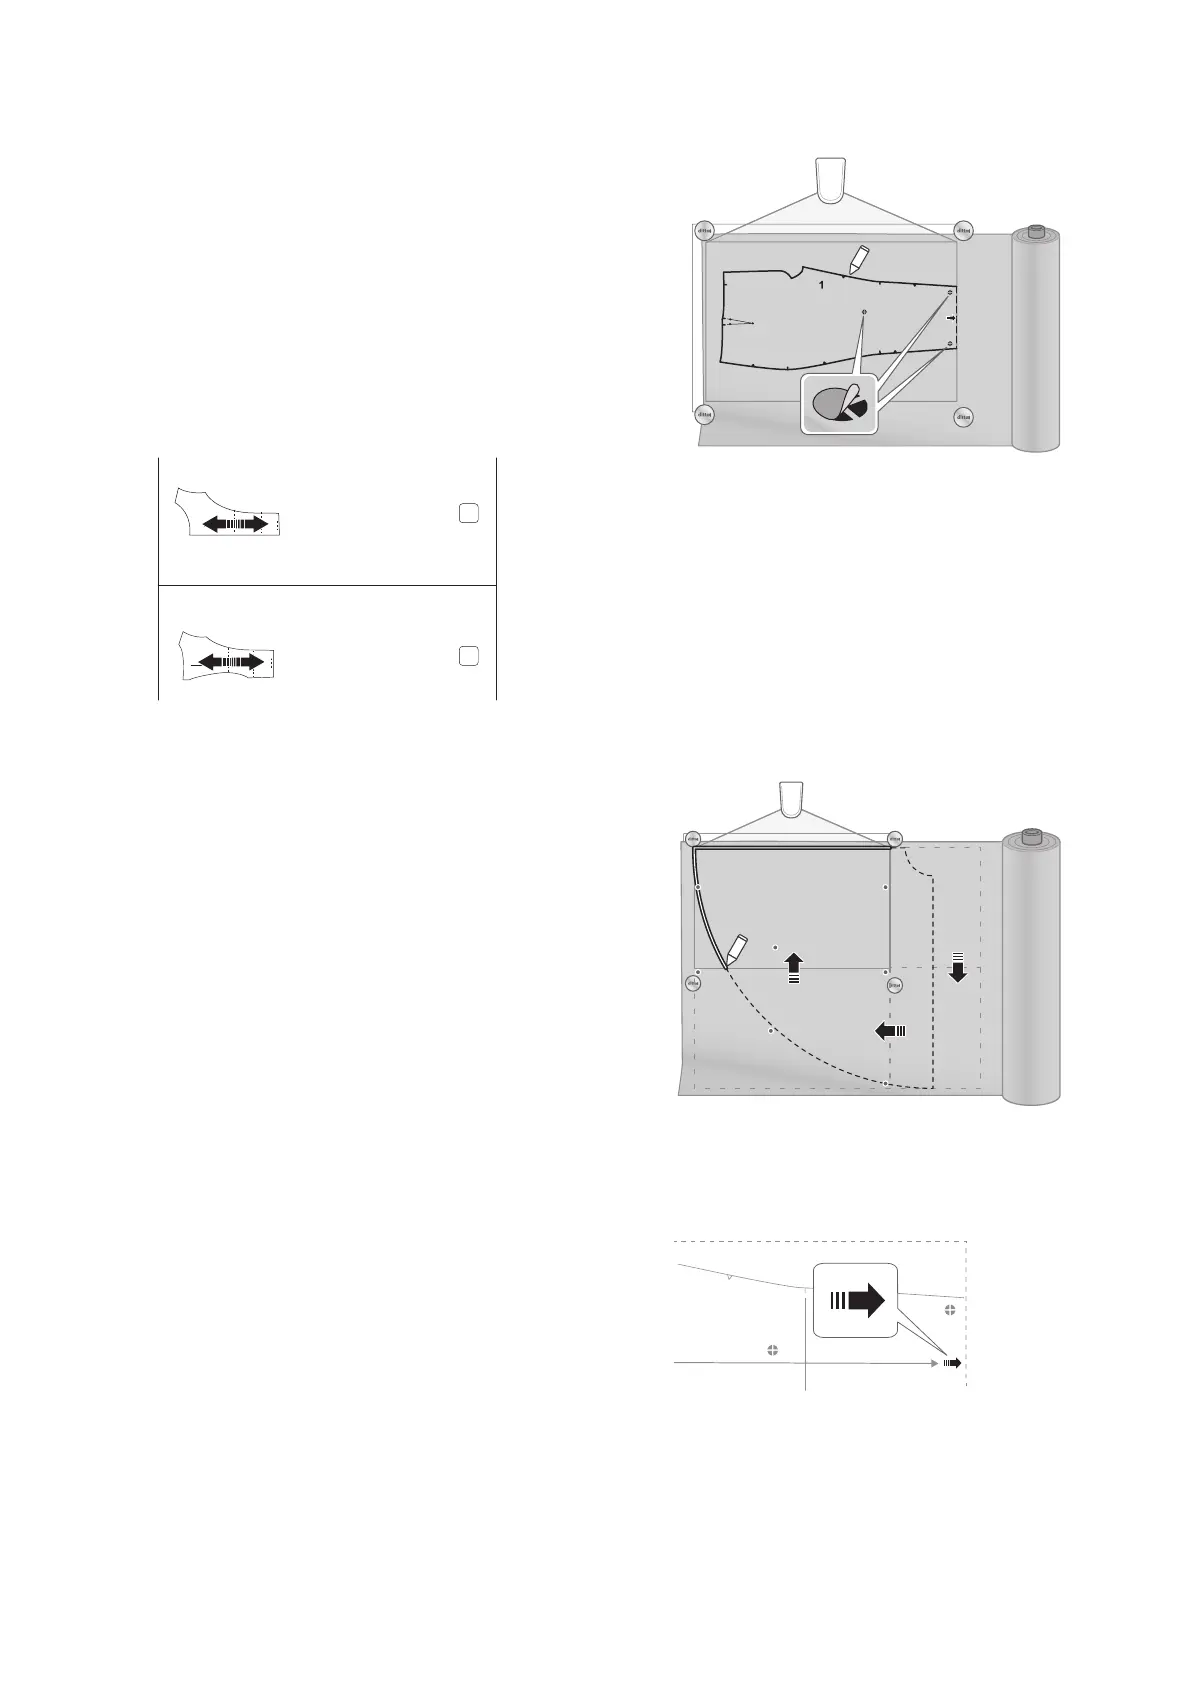
To Splice a Pattern Piece
If you have a pattern piece that is too large for the
cutting mat, the pattern piece will need to be projected
as multiple frames. This is called “Splicing”.
Note! A spliced piece cannot be mirrored.
Note! No other pattern pieces can be in the
workspace at the same time as a spliced pattern
piece.
The spliced pattern pieces in the Ditto app are
marked with a red arrow that indicates the direction
of the splicing. The direction of the splicing can
be vertically, horizontally or in multiple directions
Cut 2
Cut 1 on fold
#1 Upper
Center Front
#3 Upper
Center Back
Note! When a large amount of fabric is needed,
make sure to fold the excess fabric on the table or
drape it onto a chair. If the fabric is draping down
over the edge of the table the weight of the excess
fabric can pull the complete fabric piece down.
Note! Always use fabric weights when splicing a
pattern piece to hold the fabric in place.
1. Add a pattern piece. Refer to steps 1-5 “To Select a
Pattern Piece” on page 13.
2. Press “Send to projector” to project the pattern
pieces. Refer to steps 1-4 in “To Project the Pattern”
on page 13.
Note! Red arrows will appear on the spliced pattern
piece in the workspace to indicate direction of
the splicing. Make sure that there is enough fabric
beyond the arrows to account for the entire pattern
piece.
3. Mark the projected red splice targets with the
provided target stickers. Do not remove the target
stickers until the entire pattern piece has been traced.
Note! The reference layout shows the splicing map
and which frame is being projected.
4. Use a temporary fabric marker to transfer any
markings from the pattern to the fabric.
5. Use the rotary cutter or a pair of scissors to cut the
fabric.
Note! If you are doing a multi-directional spliced
piece, we recommend that you trace the entire
projected piece before cutting your fabric.
6. When the first part of the pattern piece is cut
or traced, tap the red arrows in the workspace
to move the pattern piece to the next frame.
7. Send the pattern to the projector.
8. Follow the arrow directions to reposition the fabric.
Bekijk gratis de handleiding van Singer Ditto, stel vragen en lees de antwoorden op veelvoorkomende problemen, of gebruik onze assistent om sneller informatie in de handleiding te vinden of uitleg te krijgen over specifieke functies.
Productinformatie
| Merk | Singer |
| Model | Ditto |
| Categorie | Naaimachine |
| Taal | Nederlands |
| Grootte | 2624 MB |


