Singer Ditto handleiding
Handleiding
Je bekijkt pagina 12 van 26
12
Workspace
1. Click on the “Connect” button in the
workspace.
2. Allow Ditto Patterns to find, connect and determine
the location of nearby devices.
3. Select Bluetooth device, “Ditto”.
4. Select your network and enter the Wi-Fi password.
Note! Select the same network as connected to your
mobile device with the Ditto app installed.
5. Click “Ok”.
When the Ditto system is properly connected
the Connect button in the workspace will
be replaced with a Calibrate button. The
projection will change from “Waiting to
Connect” to “Connected” under the Ditto logo.
Connected
Reconnect Wi-Fi Connection
If the Ditto system loses Wi-Fi connection, a message
will appear on the screen and the projection will change
to “Waiting to Connect”. Reconnect the Ditto system
according to the instructions. Refer to “To Connect the
Ditto System” on page 11.
To Calibrate the Ditto System
Calibration is the process to remove distortion or skew
for an accurate projection. You need to calibrate the
Ditto system every time the product has been moved or
taken down, if the beam is accidentally knocked out of
place, or a different mobile device is used for the Ditto
app.
Note! Make sure that the cutting mat is clean and
free from markings, target stickers and loose items.
1. Have your room dimly lit.
2. Confirm that the Ditto system is connected to Wi-Fi.
3. Click on the “Calibrate” button in the workspace.
4. Select “Continue”.
Note! Make sure to allow camera access within the
app.
5. Follow the instructions in the app to confirm accurate
setup and projector height by aligning the red
rectangle on top of the white outline.
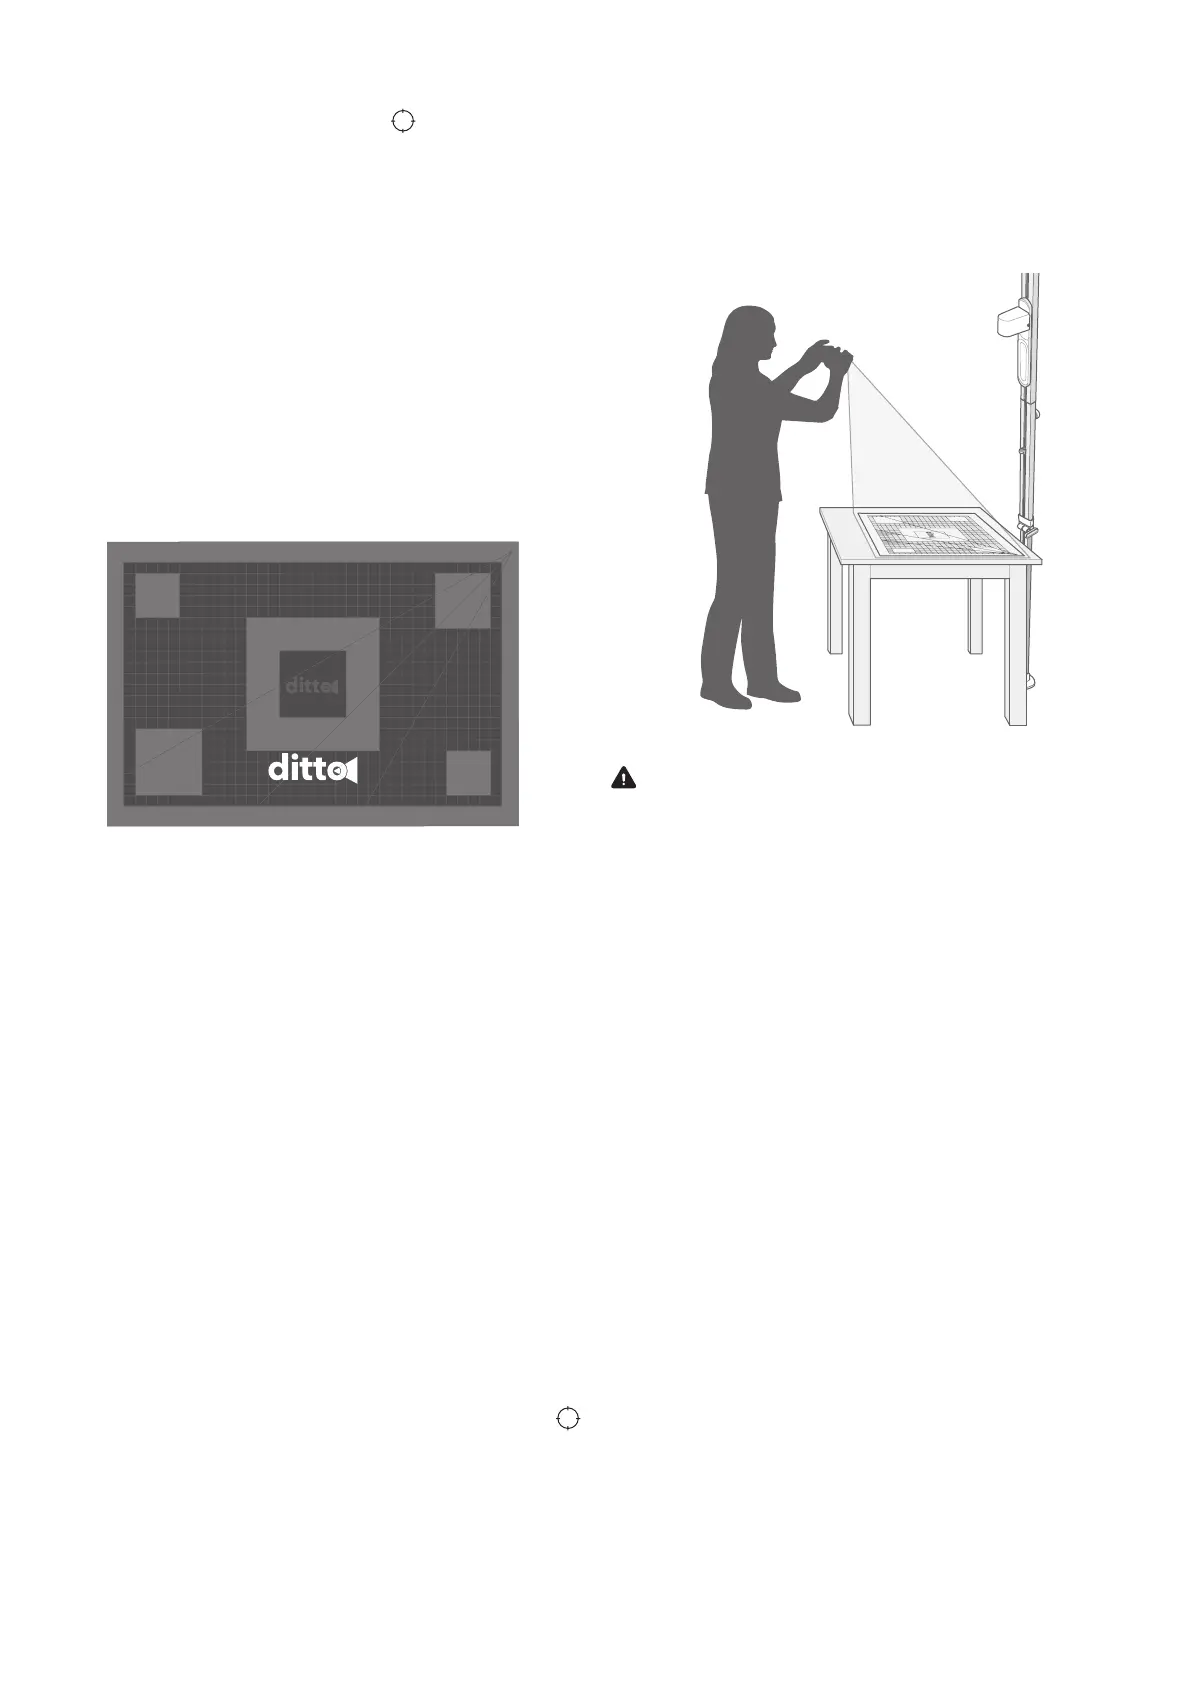
6. Stand on the opposite side of the projector
and follow the instructions in the app to
capture a photo when prompted. Make sure
to include all 4 corners of the cutting mat.
Warning! Always stand on the floor when you
take a picture of the cutting mat. There is a risk of
falling if you stand on a chair, a table or similar.
Allow enough room to stand back away from table
or take the photo from a high angle.
7. Select “Yes” when asked if the photograph is ready
to submit. The image usually takes a few seconds to
process.
8. The Ditto app will indicate if calibration is successful
or not.
Note! If the calibration fails, select one of the
following options:
• Tutorial – To view a video tutorial of the
calibration.
• Retry – Refer to steps 5-7 in “To Calibrate the
Ditto System”
• Skip calibration – If you have already calibrated
the system and have not moved the beam.
Bekijk gratis de handleiding van Singer Ditto, stel vragen en lees de antwoorden op veelvoorkomende problemen, of gebruik onze assistent om sneller informatie in de handleiding te vinden of uitleg te krijgen over specifieke functies.
Productinformatie
| Merk | Singer |
| Model | Ditto |
| Categorie | Naaimachine |
| Taal | Nederlands |
| Grootte | 2624 MB |


