Showtec AirDrive 2.4 IP handleiding
Handleiding
Je bekijkt pagina 14 van 28
4.4. Mounting Options
The device can be mounted to a truss or other rigging structure in any orientation. It can be mounted using a
clamp or the included hook-and-loop straps. Make sure that all loads are within the pre-determined limits of
the supporting structure.
CAUTION
Restrict the access under the work area during rigging/derigging.
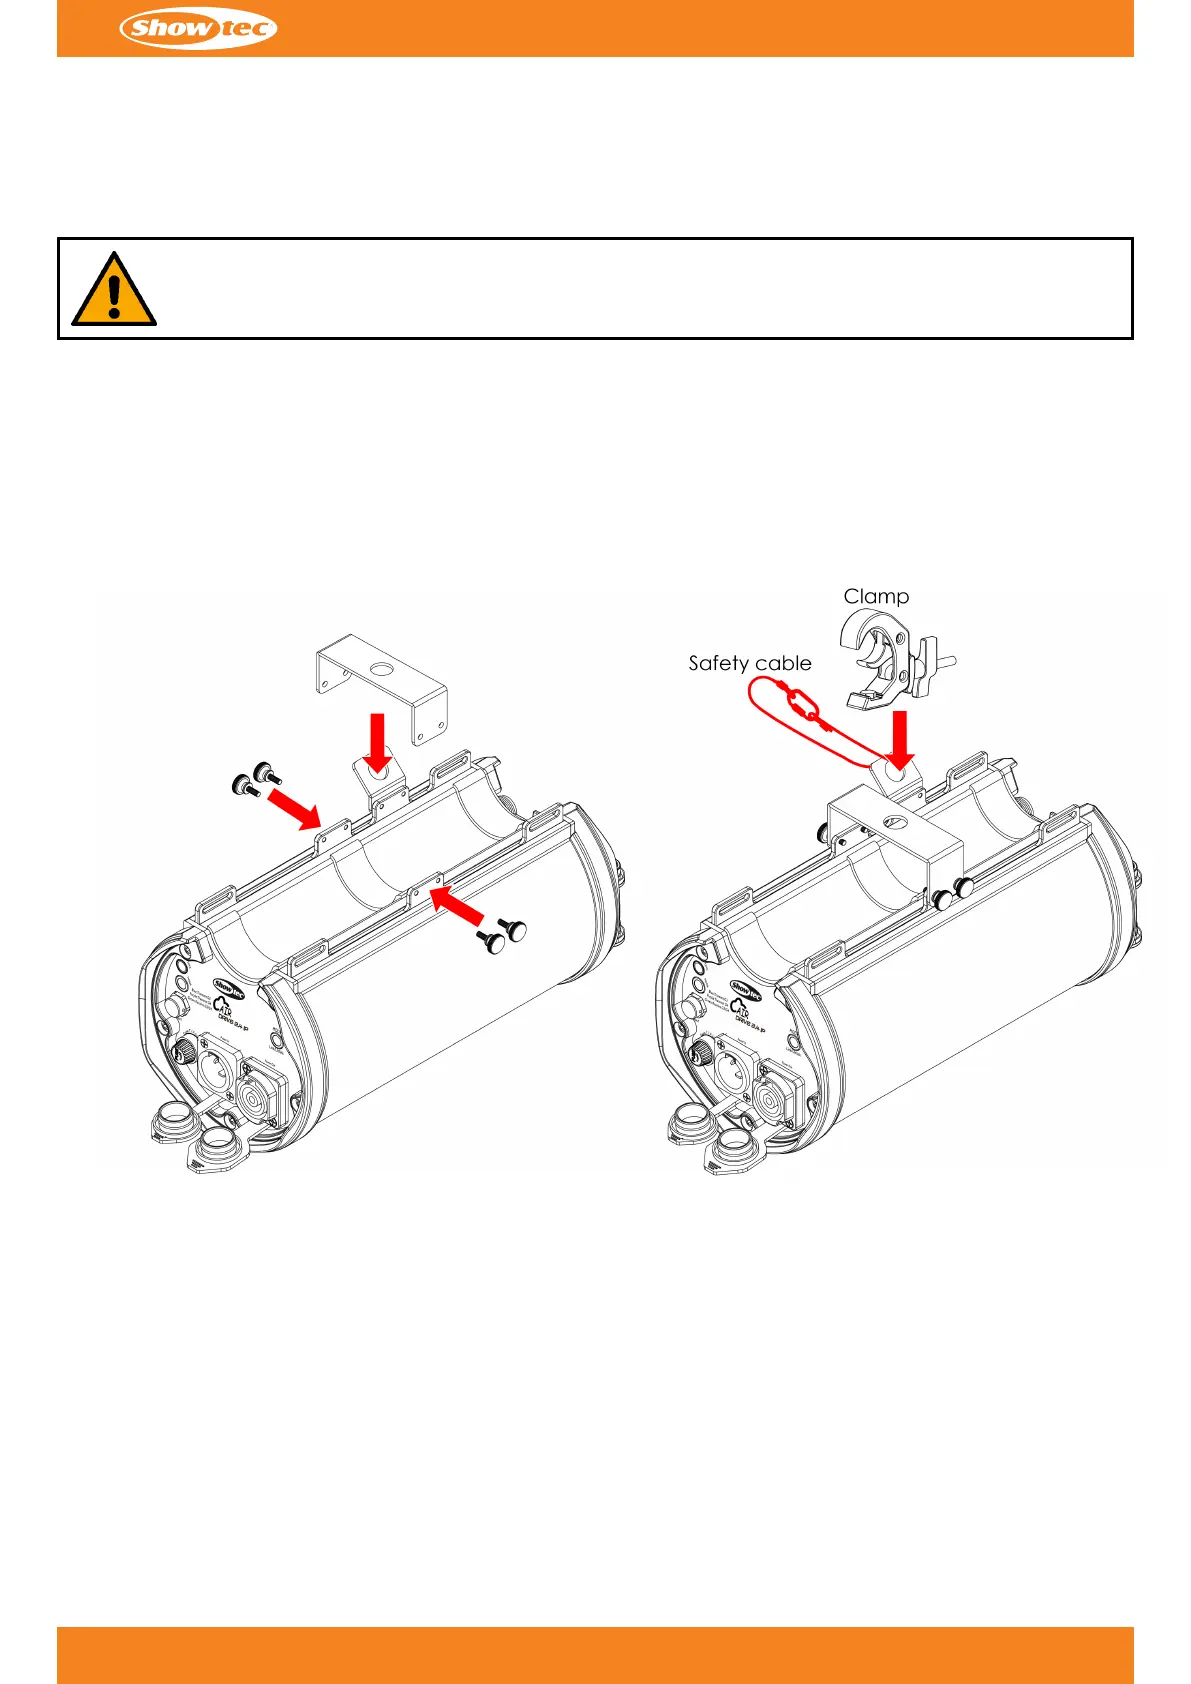
4.4.1. Mounting with a Bracket
You can mount the device to a rigging structure with the supplied mounting bracket and 4 thumbscrews.
To mount the device, follow the steps below:
01) Use the 4 thumbscrews to attach the mounting bracket to the 4 openings for mounting bracket (13).01)
02) Install the clamp. Make sure that you use a clamp suitable for attaching the device to a truss.02)
Figure 6
03) Attach the device to the supporting structure. Make sure that the device cannot move freely.03)
04) Secure the device with a secondary suspension, for example a safety cable. Make sure that the secondary04)
suspension can hold 10 times the weight of the device. If possible, the secondary suspension should be
attached to a supporting structure independent of the primary suspension. Put the safety cable through
the safety eye (12).
13
c
Product code: 50266
AirDrive 2.4 IP, 3-pin XLR
Bekijk gratis de handleiding van Showtec AirDrive 2.4 IP, stel vragen en lees de antwoorden op veelvoorkomende problemen, of gebruik onze assistent om sneller informatie in de handleiding te vinden of uitleg te krijgen over specifieke functies.
Productinformatie
| Merk | Showtec |
| Model | AirDrive 2.4 IP |
| Categorie | Verlichting |
| Taal | Nederlands |
| Grootte | 4009 MB |


