RIDGID RP 251 handleiding
Handleiding
Je bekijkt pagina 13 van 52
RP 251 Press Tool
999-995-443.10_REV. A
11
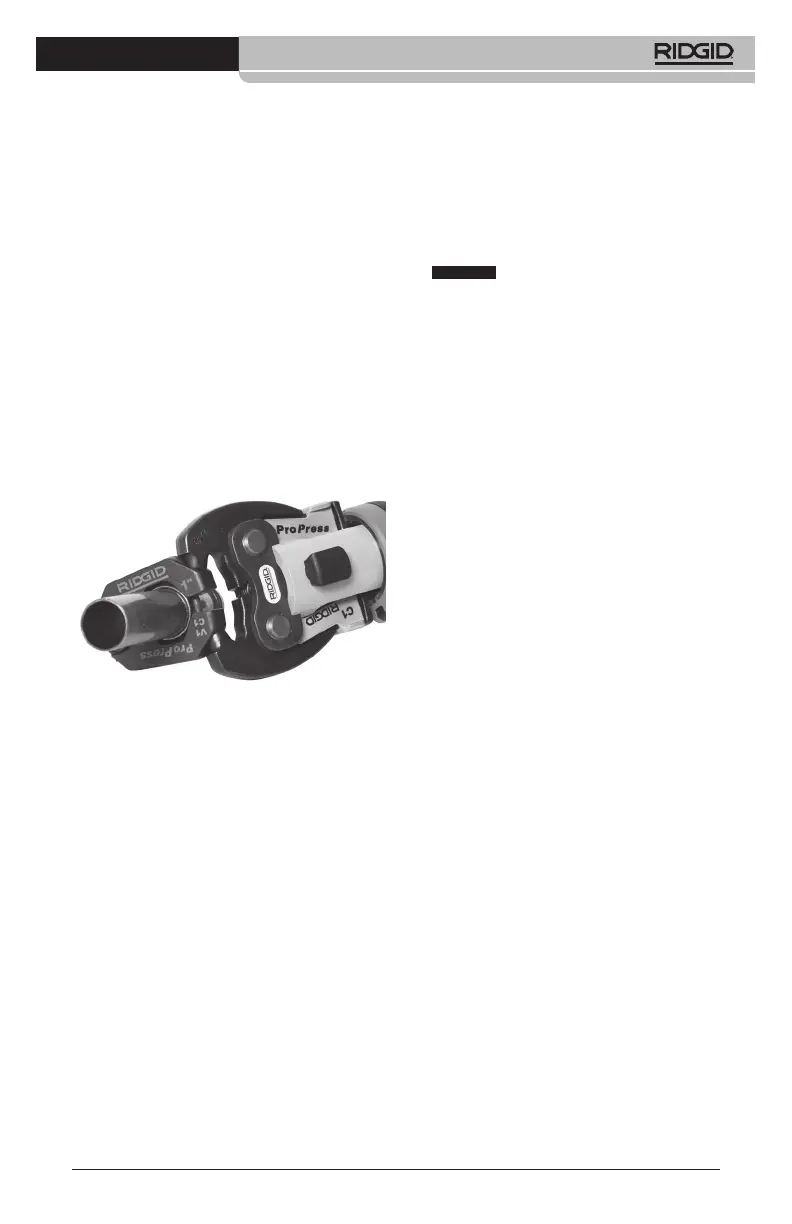
Pressing A Fitting With
Typical Actuator And Press
Ring Set
1. Open ring and place around fitting. Pro-
perly align ring press profile with con-
tour of the fitting as specified in Fitting
Manufacturer’s Installation Instructions.
Release ring to close around fitting (Fi-
gure 10).
2. Confirm appropriate actuator is properly
installed in tool. Squeeze actuator arms
to open the actuator tips. Align actuator
tips with ring pockets. Release actua-
tor arms and fully engage actuator tips
into ring pockets (Figure 10). Misaligning
actuator tip to ring pocket can damage
the ring or actuator during pressing. Do
not hang tool and actuator from press
ring. Tool could unexpectedly drop and
cause serious injury or death.
Figure 10 – Attaching Actuator to Press Ring
3. Confirm ring is appropriately placed
and square to fitting. Keep fingers and
hands away from the actuator and ring to
avoid crushing injuries in attachment or
between attachment and surroundings.
If the tool work light is OFF, wake up the
tool by depressing and releasing the tool
switch one time. The tool is now ready to
make a press.
Normal Mode: Depress the trigger/run
switch (Figure 1). Once the tool cycle
begins and the rollers contact the jaw
arms, the tool will lock-on and auto-
matically complete the cycle. Releasing
the switch will not stop the tool once it
has locked on. This assures consistent,
repeatable press connection integrity.
Control Mode: Depress the trigger/run
switch (Figure 1). The jaws will engage
the fitting but the press connection is
not made. Make adjustments as neces-
sary. Press the run switch again, the tool
will lock-on and automatically complete
the cycle. Releasing the switch will not
stop the tool once it has locked on. This
assures consistent, repeatable press con-
nection integrity.
If tool must be removed before a connec-
tion is completed, release the trigger/run
switch, depress the retract button (Figure
1).
Any time retract button is de-
pressed, press is NOT complete and the
connection must be pressed again to
ensure completion. If the tool malfunctions
during operation, use this procedure.
4. Release the trigger/run switch.
5. Squeeze actuator arms to open actuator.
Remove actuator from ring.
6. Remove ring from fitting. Avoid sharp
edges that may have formed on fitting
during pressing operation.
7. When operation is complete. Remove
battery from tool.
Inspecting The Pressed
Connection
1. Inspect the pressed fitting for:
• Full insertion of tube into fitting.
• Excessive misalignment of the tubes.
A slight amount of misalignment at a
press connection is considered normal.
• Incorrect attachment alignment with the
fitting contour. Distorted or deformed
fitting.
• Any other issues per the fitting manu-
facturer. This could include the removal
of a control ring or decal (used to indi-
cate the connection has not yet been
pressed).
If any issues are found, remove fitting
and install a new press connection.
2. Test the press connection in accordance
with connector manufacturer instructions,
normal practice and applicable codes.
Cold Weather Operation
As temperature drops, hydraulic fluid thick-
ens and battery performance degrades. To
reduce the risk of improper operation, the RP
251 Press Tool will not operate outside of the
specification temperature range as indicated
by the tool status lights (Figure 5).
When ambient conditions are outside the
specification temperature range, keep the
NOTICE
Bekijk gratis de handleiding van RIDGID RP 251, stel vragen en lees de antwoorden op veelvoorkomende problemen, of gebruik onze assistent om sneller informatie in de handleiding te vinden of uitleg te krijgen over specifieke functies.
Productinformatie
| Merk | RIDGID |
| Model | RP 251 |
| Categorie | Niet gecategoriseerd |
| Taal | Nederlands |
| Grootte | 9266 MB |


