Handleiding
Je bekijkt pagina 144 van 428
6. Scan
142
6
5. Select the [Share this folder] check box, and then click [Permissions].
After completing the procedure, remove Everyone (unspecified user), and then add a
user allowed access the folder. The user whose information is written down on the
check sheet is used in the example shown below.
6. Select [Everyone] under [Group or user names], and then click [Remove].
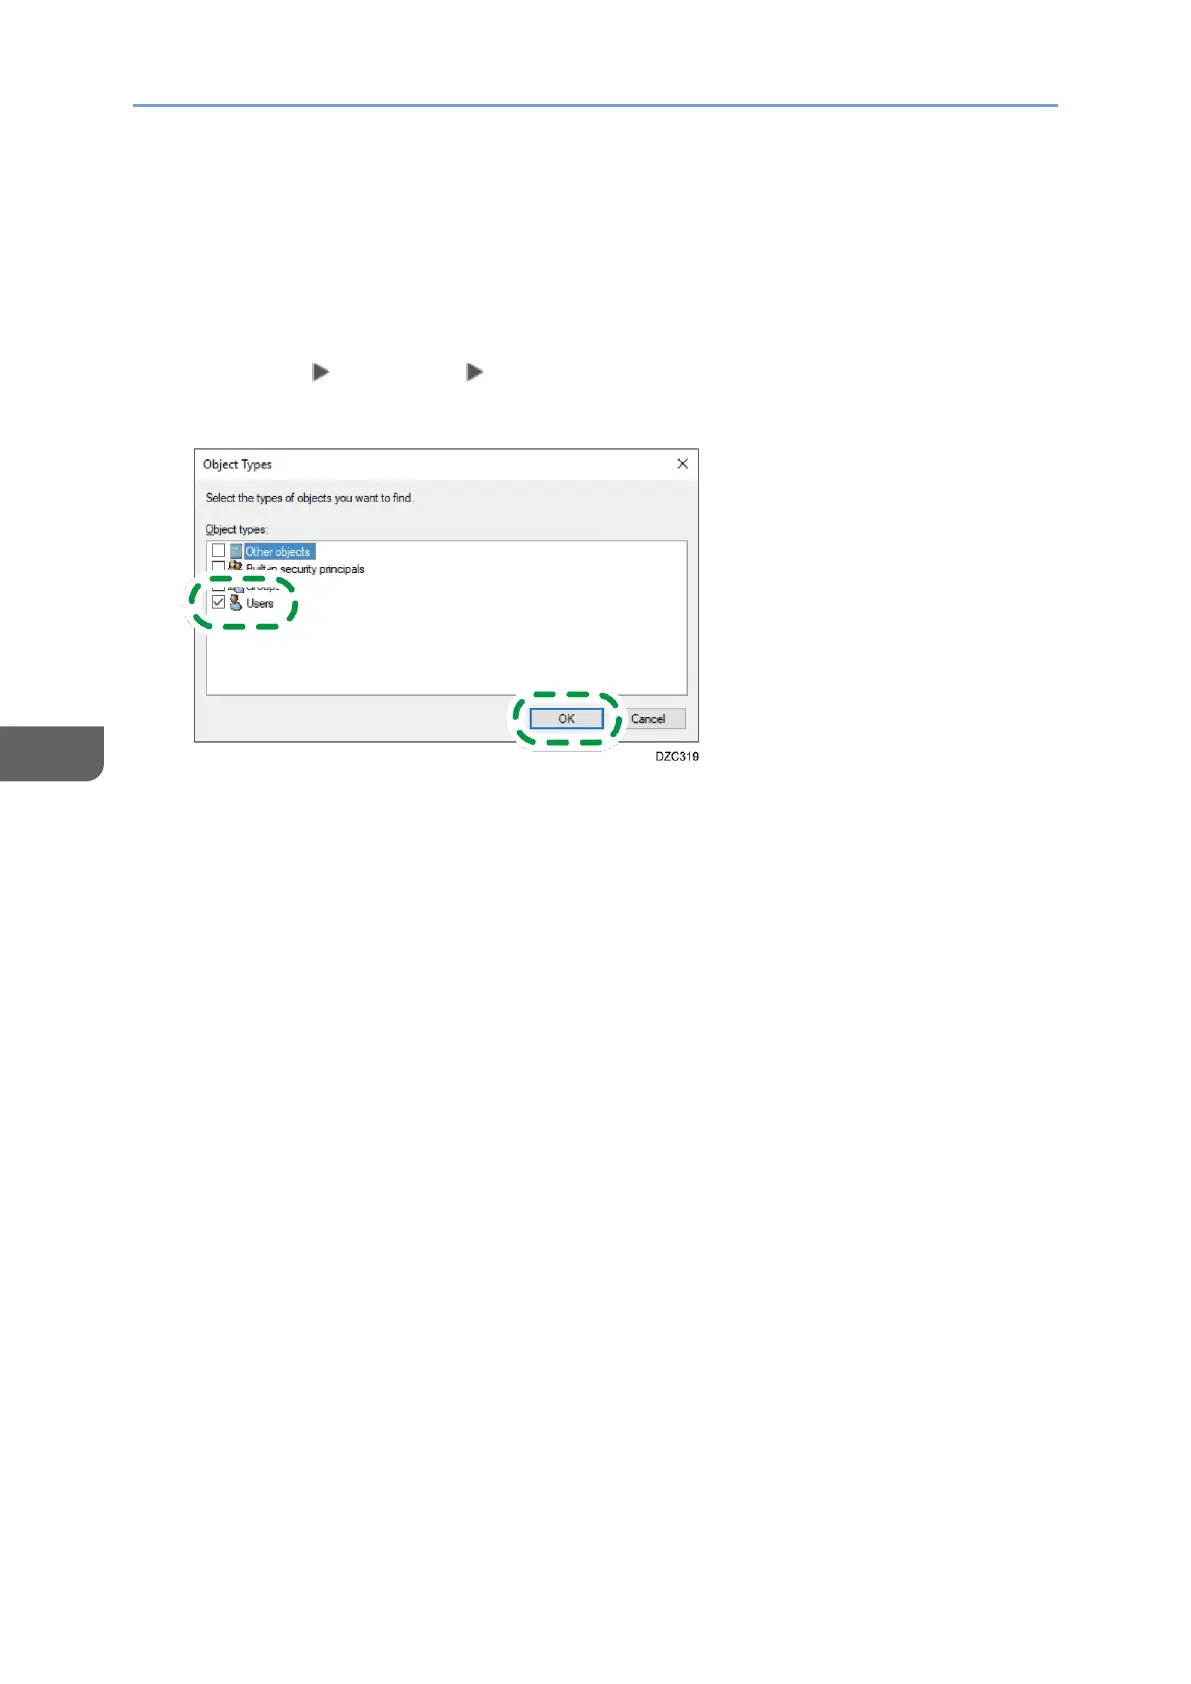
7. Click [Add] [Advanced] [Object Types].
8. Select [Users], and then click [OK].
9. Click [Locations], select the name of the domain or work group the user belongs
to ([2] on the check sheet) and then click [OK].
10. Click [Find Now].
11. From the Search results, select the login user name of the computer to be added
([2] on the check sheet) and then click [OK].
When you cannot find a specific user, click [Columns], or right-click the [Search
results] field, select [Choose columns], and then add [Logon Name] or [Logon Name
(pre-Windows 2000)] from the [Columns available] list.
Bekijk gratis de handleiding van Ricoh IM 370, stel vragen en lees de antwoorden op veelvoorkomende problemen, of gebruik onze assistent om sneller informatie in de handleiding te vinden of uitleg te krijgen over specifieke functies.
Productinformatie
| Merk | Ricoh |
| Model | IM 370 |
| Categorie | Printer |
| Taal | Nederlands |
| Grootte | 47753 MB |
Caratteristiche Prodotto
| Soort bediening | Touch |
| Kleur van het product | Wit |
| Ingebouwd display | Ja |
| Gewicht | 41000 g |
| Breedte | 374 mm |


