RaySafe Pro-Slit handleiding
Handleiding
Je bekijkt pagina 3 van 6
3
RaySafe Pro-Slit Camera User Manual – Test Procedure and Evaluation
TEST PROCEDURE AND EVALUATION
Note! Make sure to comply with local regulations! For complete guidance on positioning the RaySafe Pro-Stand, see its manual.
1. Remove objects between the focal spot and the table, e.g. compression device, diaphragms, cones, etc.
2. Make sure the X-ray machine film or digital detector is in place.
3. Place the stand on the X-ray machine imaging table or other surface enabling it to be positioned
perpendicular to the beam axis (maximum angle 1° according to EN 60336).
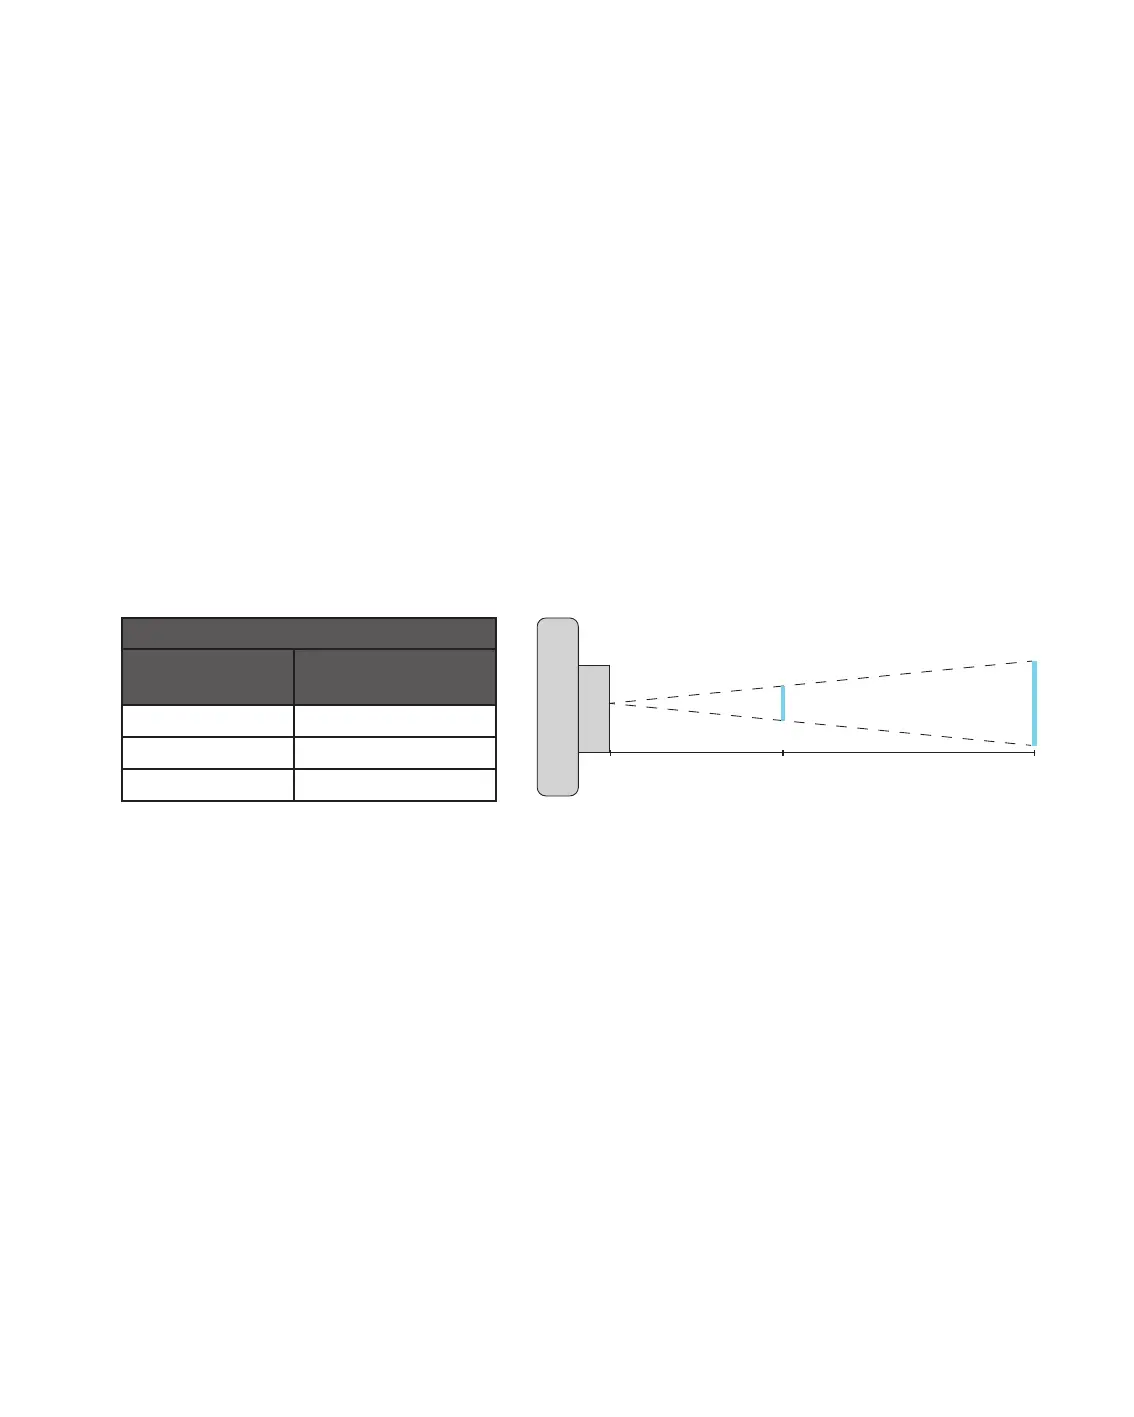
4. Adjust the stand height (y) so the minimum enlargement in the table below is achieved (use Equation 1):
From geometry rules we get (x+y)/x= L
2
/L
1
, which means 1+y/x= (L
2
/L
1
) y/x= L
2
/L
1
-1. This is the same as the
enlargement factor E which consequently can be calculated in two ways:
Equation 1: E=y/x, and
Equation 2: E=(L
2
/L
1
)-1=(L
2
/10)-1
y=Slit to detector distance, x=Slit to focal spot distance ≥ 100 mm (according to EN 60336).
L1=Slit length=10 mm, L2=Measured slit length in image.
Minimum Enlargement
Nominal Focal
Spot Size (F, mm)
Enlargement
F<0.4 >3
0.4<F<2.5 >2
F>2.5 >1
Table 1. Enlargement requirements depending on the X-ray machine and its nominal focal spot size
which ultimately determines slit camera positioning.
5. Place the Pro-Slit on the stand’s table so the slit is aligned with the anode-cathode axis. This corresponds
to the focal spot width in the anode-cathode axis.
6. Make an exposure choosing the appropriate X-ray machine parameters to achieve the best contrast.
7. Rotate the Pro-Slit 90° so the slit is perpendicular to the anode-cathode axis, and make another separate
exposure (avoid double exposure of the previously acquired image). This corresponds to the spread of the
focal spot perpendicular to the anode-cathode axis (focal spot length).
8. Develop the film/save images on a computer.
9. Measure the lengths of the acquired slit images and calculate the enlargement:
Example: If L=32 mm (1st exposure), E=(32/10)-1=2.2.
10. Measure the slit thickness for the two images using software or a magnifying glass.
L
1
L
2
x y
b
f
Bekijk gratis de handleiding van RaySafe Pro-Slit, stel vragen en lees de antwoorden op veelvoorkomende problemen, of gebruik onze assistent om sneller informatie in de handleiding te vinden of uitleg te krijgen over specifieke functies.
Productinformatie
| Merk | RaySafe |
| Model | Pro-Slit |
| Categorie | Niet gecategoriseerd |
| Taal | Nederlands |
| Grootte | 574 MB |


