Pro1 R250S handleiding
Handleiding
Je bekijkt pagina 1 van 2
R250S
Installation Manual
Pro1 Technologies
P.O. Box 3377
Springeld, MO 65804
Toll Free : 888-776-1427
Web: www.pro1iaq.com
Hours of Operation: M-F 9AM - 6PM Eastern
Table of Contents
New Installations
Resistance Chart
Specications & Warranty
Page
Una version en espanol de este
manual se puede descargar en la
pagina web de la compania.
Rev. 1807
New Installations
6
7
2-5
New Installations New Installations
Connecting to a Wired Sensor Capable Thermostat
Before wiring, the R250S needs to be installed. The stainless steel
housing allows this sensor to be placed into concrete, thin-set, and
grout. The following ve examples demonstrate the proper way to
install a R250S as a oor sensor in conventional oor construction.
Installing the R250S as a Floor Sensor
Do not operate the cooling
system if the outdoor
temperature is below 50˚F
(10˚ C) to prevent possible
compressor damage.
Caution: Equipment
Damage Hazard
U.S. Registered Trademark. Patents pending
Copyright 2018 All Rights Reserved.
This manual covers the following models:
• R250S (Requires a Wired Sensor Capable Thermostat)
Congratulations on purchasing a PRO1 Wired Sensor.
This remote sensor was designed to the highest reliability
and ease of use standards. Thank you for choosing our
quality products
Thick Covering - Greater Than 3/8” (10mm)
If the thick oor covering is installed directly to the suboor, a 1/8” (4mm)
wide by 1/16” (2mm) deep groove should be cut into the back of the oor
cover to allow for the R250S wire. Position the sensor in such a place that
the wire can reach the location of its junction box. The groove for where
the sensor will be placed should be 1/4” (8mm) wide by 1/4” (8mm) deep
by 1 3/4” (45mm) long. For accurate temperature reading, the sensor
should be located exactly between heating elements.
Subfloor
Hardwood
Thin Covering - Less Than 3/8” (10mm)
If the thin oor covering is installed directly to the suboor, a 1/8” (4mm) wide
by 1/16” (2mm) deep groove should be cut into the surface of the suboor to
allow for the R250S wire. Position the sensor in such a place that the wire can
reach the location of its junction box. The groove for where the sensor will
be placed should be 1/4” (8mm) deep by 1 3/4” (45mm) long. For accurate
temperature reading the sensor should be located exactly between the
heating elements.
Subfloor
Hardwood
Thin-Set or Thin-Pour
If the oor covering is installed over the thin-set or thin-pour material of
sucient depth, the R250S sensor can be placed into either material and
then covered by the oor covering. Position the sensor in such a place that
the wire can reach the location of its junction box. For accurate temperature
reading, the sensor should be located exactly between the heating elements.
Tile
Thin-Se t
Electric Heat
Installing the R250S as an Outdoor Sensor
The R250S can also be used as an Outdoor Temperature Sensor. Included in the package
is a metal wall mount and 2 screws. Securely screw the mount with the R250S into a
shaded area.
Wiring the R250S
The R250S is packaged with 6’ of 1.8mm cable. If you need more length, 24 AWG or larger
wire can be joined onto the two wires from the sensor. The splices need to be properly joined
and protected in an accessible junction box.
Do NOT run the wires parallel to telephone or power cables. If there is a strong source of
electromagnetic interference near the location of the sensor wires, a twisted pair or a
protected cable should be used. The wires can also be run in a grounded metal conduit.
Warning:
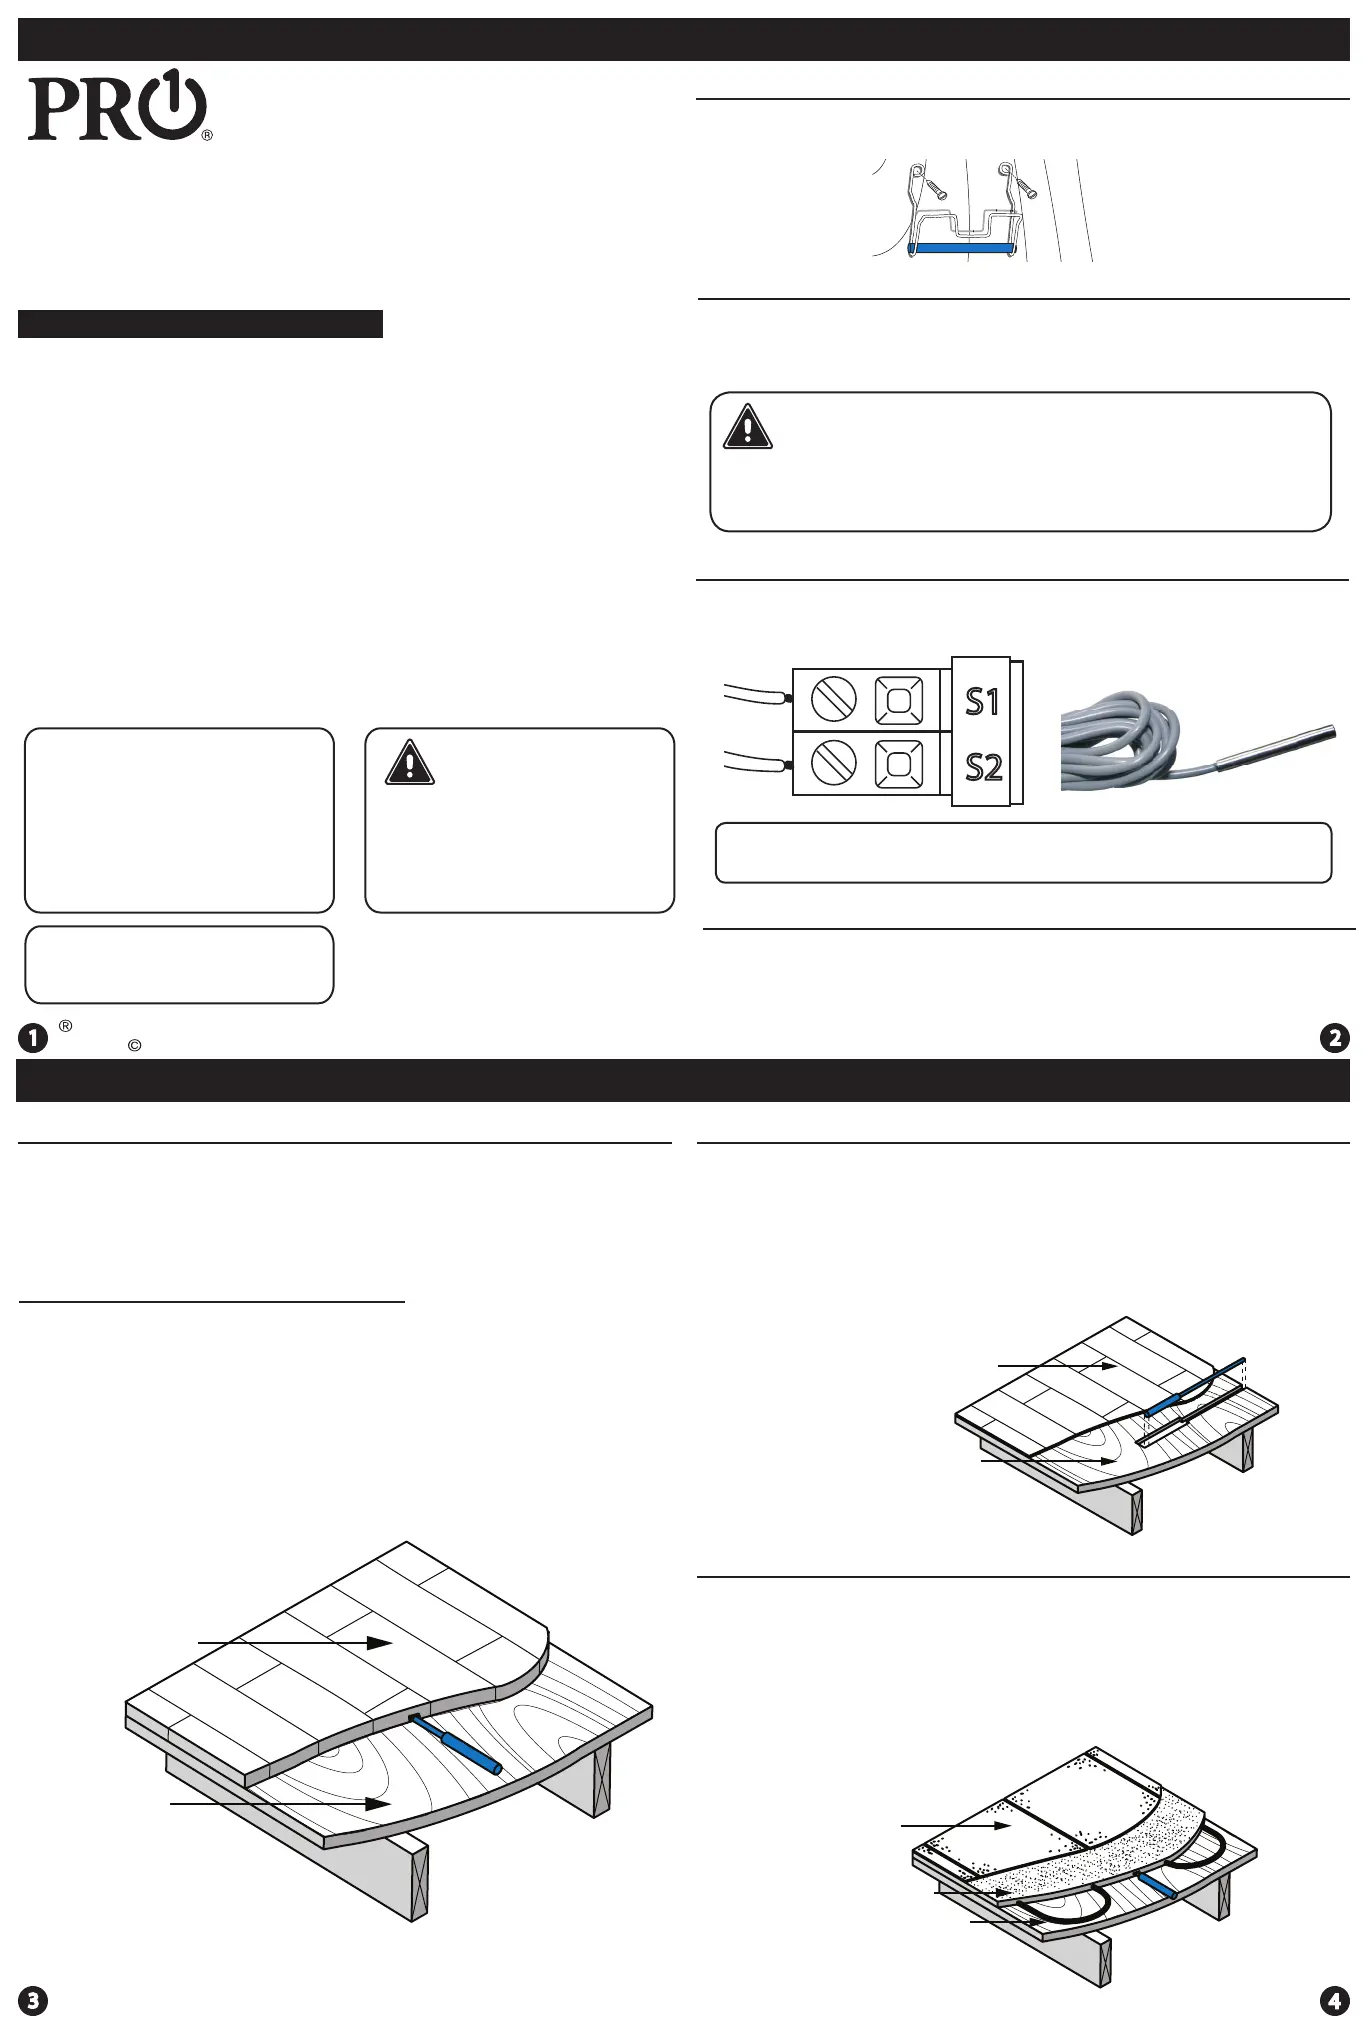
After installation connect the R250S to the S terminal blocks on the Wired Sensor Capable
Thermostat. Loosen the terminal block screws. Insert wires, then retighten terminal
block screws.
R250S Remote Sensor
NOTE: Refer to your wred sensor capable thermostat manual for setup
Connecting to a Wired Sensor Capable Thermostat
R250S Wired Sensor
Temperature range................... -4ºF to 140ºF (-20ºC to 60ºC)
Temperature accuracy............................................................± 1ºF
Transmission................................................Constant Resistance
A trained, experienced technician
must install this product.
Carefully read these
instructions. You could damage
this product or cause a
hazardous condition if you fail to
follow these instructions.
S1
S2
Bekijk gratis de handleiding van Pro1 R250S, stel vragen en lees de antwoorden op veelvoorkomende problemen, of gebruik onze assistent om sneller informatie in de handleiding te vinden of uitleg te krijgen over specifieke functies.
Productinformatie
| Merk | Pro1 |
| Model | R250S |
| Categorie | Niet gecategoriseerd |
| Taal | Nederlands |
| Grootte | 527 MB |
