Prixton P125 handleiding
Handleiding
Je bekijkt pagina 25 van 108
Removing or attaching the presser foot
The presser foot is used to hold down the fabric while sewing. Always place the upper and
bobbin threads under the presser foot befare sewing.
NOTICE
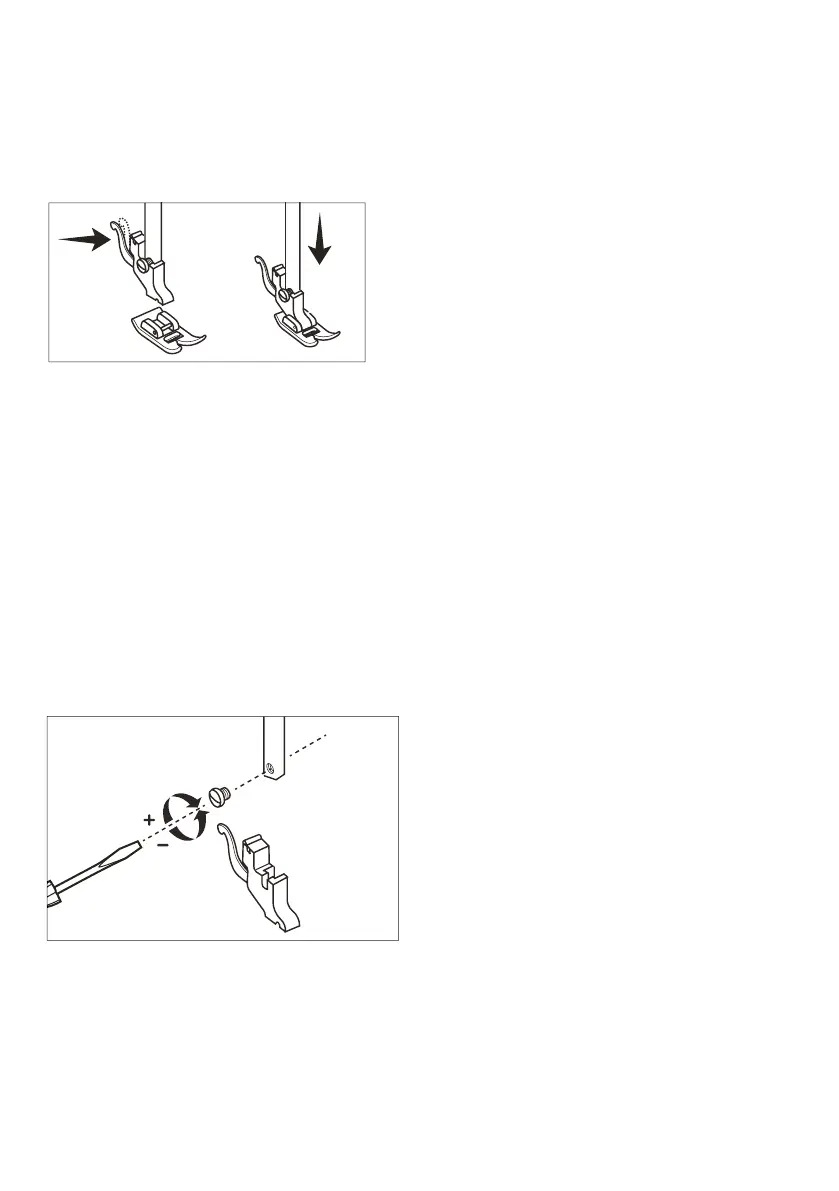
Use this method to install the presser foot , the button hole presser foot and the zipper
presser foot.
1. Turn the hand wheel anti-clockwise to raise the needle to the highest point. Raise the
presser foot lever.
2. Press the presser foot locking lever. The presser foot drops off.
3. Place the presser foot under the presser support, lower the pressure foot lever and press
the presser foot locking lever. The presser foot locks into place.
Removing or attaching the presser support
NOTICE
Remove the presser foot before you remove the presser support. See section "Replacing
the presser foot" for details.
1. Turn the hand wheel anti-clockwise to raise the needle to the highest point. Raise the
presser foot lever.
2. Loosen the presser set screw by turning the screwdriveranti-clockwise. Remove the
presser support.
3. To attach the presser support, refit and secure it by turning clockwise, tightening the
presser set screw.
Change and installation of sewing needle
NOTICE
Only use 14#(90) needles far home use, Other needles may bend ar break and cause
injury. Never sew with a bent needle . A bent needle will be easily break and cause injury.
Bekijk gratis de handleiding van Prixton P125, stel vragen en lees de antwoorden op veelvoorkomende problemen, of gebruik onze assistent om sneller informatie in de handleiding te vinden of uitleg te krijgen over specifieke functies.
Productinformatie
| Merk | Prixton |
| Model | P125 |
| Categorie | Niet gecategoriseerd |
| Taal | Nederlands |
| Grootte | 16294 MB |


